22 Levels of Cardistry: Easy to Complex
Released on 07/30/2021
Hi, I'm Dan.
I'm Dave, and we do cardistry.
Dan and I are considered the pioneers of cardistry.
Since we started, it's grown to encompass a variety
of styles and new innovations.
Today, we've been challenged to show you guys,
22 levels of cardistry in increasing complexity.
[upbeat music]
Cardistry is the art of manipulating playing cards.
It has roots in the sleight of hand card magic world,
and it was a small flourish use to accentuate an effect.
We've decided to define complexity based on number
of packets, speed, and technical skill.
There are so many cardists
who would have approached this differently,
and this is just our interpretation of the challenge.
It's important to exercise the fingers.
We have this finger exercise we'd like to do.
This is great to loosen up the joints and get right into it.
So before we get into the levels,
we'd like to go over a few basic card handling moves.
[Dan And Dave] Dealers' grip, end grip,
straddle grip, all around square up,
reverse all around square up, swing cut,
swivel cut, one hand fan.
[Dan] You got that?
Let's begin.
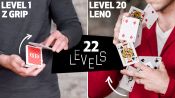
Level one, Z grip.
The Z grip is an extremely basic grip in Cardistry
used for many different flourishes.
To execute the Z grip,
hold the cards in dealers grip in your left hand.
Come over with your right hand,
and place your thumb at the back end of the deck.
Place your middle finger at the top side of the deck,
lift up one third of the cards with your middle finger,
pivoting it off your thumb.
Now lift up another third with your thumb,
pivoting it off your index finger, and that's Z grip.
So the most important thing to keep in mind
is an even distribution of packets.
If you don't peel off an even amount of cards,
and you get one card in the middle,
or a few cards in the middle,
performing cardistry trick might be a little more difficult.
Variations of the Z grip are reverse Z grip,
and the alt Z grip.
Going into the next level,
we're gonna try to increase the complexity
by only using one hand.
Level two, Charlier cut.
The Charlier cut is a one handed cut.
To begin, you want to hold the cards in dealers grip.
You'll notice this becomes almost a straddle grip.
From here though, you want to curl your index finger
underneath the deck,
and you're gonna use your thumb to lift up half the cards.
As you lift up half the cards,
your thumb slides down the top packet.
Once it's around center,
your index finger pushes up on the bottom packet
until it clears the edge of the top packet,
and everything comes back together again.
The most important thing I would say
is having that little finger at the back edge of the deck.
You need that little finger support
to keep the cards together.
Going into the next level,
we're going to be exploring aerials.
This is where a card flies through the air
from one hand to the other.
[Dan And Dave] Level three, Card Shot.
A card shot is a mechanical way
to shoot a playing card through the air.
Unlike card throwing, which uses inertia,
card shot uses tension to cause the card to shoot
from one hand to the other.
To execute this card shot,
hold a single playing card in your right hand,
between your thumb and your middle finger.
Push down with your middle finger,
causing the card to bow like a bowl.
Now you're gonna apply tension by pushing the thumb
towards the palm of your hand.
You're going to keep doing this
until the card flicks off the thumb,
and this is what causes the card to spin.
It's actually pivoting off your middle finger.
This is a knacky move, it's gonna take trial and error.
I would say it's also important to take this slow.
It's a gradual buildup of that pressure that causes
that corner to flick off the thumb.
Next, we're gonna get a little more complex
by learning to control the entire deck of cards.
[Dan And Dave] Level four, Thumb Fan.
A thumb fan is an introduction to card fans.
This is a very basic fan.
It's a foundational fan.
It's also, I would say,
one of the more beautiful fans as you can actually display
every single card in the deck with enough practice.
For a thumb fan, begin with the cards in dealer's grip.
You then want to come over with your right hand in end grip,
and reposition the cards in the left-hand
so that the fingers are altogether extended,
and the thumb is resting on top of the cards also extended.
You now want to use your right thumb in one single
continuous motion, a semicircular rotation of the card,
and as you do this wiping action,
you'll notice that the cards fan,
and now you have the thumb fan.
Going into the next level increases complexity
by combining gravity, inertia,
and the nuances of finer finger mechanics.
[Dan] Level five, pirouette.
This is a way to spend a single card
on the tip of your finger, kind of like a basketball.
To do this, take a single playing card,
and pinch it directly in the middle
between your thumb and your middle finger.
Extend your index finger horizontally, across,
parallel to your middle finger.
Apply a small amount of pressure to your index finger,
and bend in the knuckle.
In that rocking inward action,
you're gonna lift up the thumb,
and if you do that fast enough,
at the same time as lifting up the thumb,
the card is gonna want to spin.
Continuing on, we're gonna move into a one handed cut
that applies a rotation of a single packet.
Level six, revolution cut.
The revolution cut is a one-handed two packet cut.
It's very similar to the Charlier cut,
although it applies a 180 degree rotation to the top packet,
as it moves to the bottom.
You want to start the same way
as you did with the Charlier cut.
The only difference is before you use your index finger
to push up that lower packet,
you want to insert your ring finger
underneath the top packet.
You're gonna want to use your thumb
to push that top packet over a little more,
rotating it counter-clockwise just enough
so that your ring finger can contact
and grip that left edge of the top packet.
And you'll notice by curling in the index finger,
it almost rotates automatically.
Once it's been rotated 180 degrees,
it's just the Charlier cut,
bringing that lower packet up to the top,
and back down again, squaring the cards.
The most important thing to remember
is that grip between the index finger and ring finger.
This is the most challenging aspect of this flourish.
We're now going to increase complexity
by exploring a two handed multipacket cut.
[Dan And Dave] Level seven, Kalush's cut.
Kalush's cut is a three packet cut
where the cards literally turned themselves inside out.
The top packet goes to the bottom,
and the bottom packet goes to the top.
The middle stays in the middle.
To execute Kalush's cut,
hold the cards in dealers grip,
and come over with your right hand, and break into Z.
Move your middle finger down,
and you're gonna clip that center packet
between the thumb and that middle finger.
Next you're gonna rotate your right hand 360 degrees
around the front side of the deck,
using that left index finger as a pivot
to help rotate that middle packet around
to the bottom of the deck.
And you're going to go into it all around square up,
and we're good to go.
At this point, it's worth noting that we've learned
a handful of moves and we can start combining them together.
We've learned Z grip,
we've learned Charlier, and we've learned Kalush's cut.
And if you combine all those three together, you get Sybil.
Next, we're gonna demonstrate an incredibly old move.
It's the ability to perfectly shuffle
a deck of playing cards.
[Dave] Level eight, Faro.
Faro shuffle is a perfect shuffle.
You're actually weaving the cards one by one
all the way through the deck.
Begin with the cards in dealers grip.
Come on over with your right hand in end grip,
and break off half the cards with your right thumb.
As you come away with that half,
the packets are gonna come together, end to end.
You're now going to slide the bottom packet up,
and the top packet down.
And as you do this, there's this weaving option.
You'll notice that the cards begin to weave together.
You're going to apply pressure down on the cards,
bowing them like a bridge,
and as you release the pressure,
all the cards spring together
into a nice square packet of cards,
which you can hold in dealer grip,
and give an all around square up
so that you can begin your next cardistry move.
So now that you've quite literally learned
to control every single card,
we're going to increase complexity
by controlling every single card again,
but this time in midair.
[Dan] Level nine, card spring.
The card spring is one of
the most classic moves in cardistry.
It is the move that every layman recognizes,
and it's featured in countless films and TV shows,
and even cartoons such as The Simpsons.
Come over with your right hand,
and pinch the packet of cards
between your at this inner left corner,
and your fingers kind of wrapped
around the outer right corner.
You're gonna apply pressure with your thumb
by squeezing the full deck inward,
and the cards are going to begin to shoot off the thumb
one at a time.
And you can kind of hear it.
[cards shuffling]
At that point, your hands are gonna want
to come back together in this action.
So they start together, they separate and they end together.
Another important thing to note
is that when you spring in the cards in this position,
you're gonna spring them into straddle grip.
And that little pinky in the back,
is gonna prevent the cards from falling to the floor.
Begin with a semi broken-in deck of cards.
If you try this with a brand new deck of cards,
they're going to be very slippery,
and they're just going to spray all over where the floor.
[Dan] There are two ways to execute the card spring,
straight up and down or side to side.
As we transition into the next level,
we're combining rhythm with a choreographed movement
of multiple packets between the hands.
[Dan And Dave] Level 10, Genesis.
Genesis is one of the very first cardistry tricks
we ever created.
Begin with Z grip, grip that center packet
between the left thumb and fingers.
You'll notice this is in a very similar position
to the opening of the Charlier cut.
You can now separate the two hands
so that you can begin a swing cut with the right hand.
So you're just lifting up half the cards
with the index finger, holding the lower half
with the middle finger of the right hand.
From here, you're going to perform a Charlier cut
with the left hand.
However, before you close the Charlier cut,
you're going to insert the lower packet of the right hand
between the two packets coming together in the left-hand.
Lower the fingers of the left hand down,
tilting the left edge out and away from the palm.
This opens up the palm,
and allows the bottom packet of the right hand
to be dropped or placed down into the left hand palm.
Lift up the packet gripped between the base of the thumb,
and the right middle finger,
so that you've now squared the bottom two packets.
From here, you're now going
to pinch this center packet between the right middle finger,
and the right ring finger.
Continue rotating this packet all the way over end for end
until it's face down on top of the deck.
As we move forward,
we're now combining packet cuts with aerials and fans.
Level 11, Mary Jane.
This is a multi packet cut,
where a packet literally flips 360 degrees in the air.
So let's break into alt Z grip,
rotate these top two packets to the right,
grab that center packet
between your thumb and middle finger.
Once that packet is grabbed,
you're gonna rotate the bottom and top packet forward
around that center packet, and back on top.
Come over with your left index finger
and perform a swivel cut with that top and bottom packet.
Perform a Charlier cut, but don't square the cards.
With this right packet, perform a one handed fan.
Stick the outer edge of that fan
into those two packets of the left-hand.
Continue tilting the fan to the right.
You don't want to flip it, just use gravity.
So that packet falls, pivots off the thumb,
rotates 360 degrees, and lands in the left-hand.
Square the fan on top of the deck,
give the deck and all around square,
and you've just completed Mary Jane.
So don't toss the packet, just let gravity do the work.
If you toss the packet, cards are going to the floor.
Going into the next level, we're getting into a new concept,
running cuts, but with one hand.
[Dave] Level twelve, one hand running scissor cut.
This is an introduction to scissor cuts.
It's a two packet cut where you're dropping one packet
on top of the other,
consistently until you have no more cards.
So you're gonna start in a modified straddle grip
with the cards held in the left hand,
and your thumb is gonna come over and pick up as many cards,
I would say about four fifths of the deck.
You're now going to lever these cards all the way up
until it clears the top packet of the deck.
Once it clears, you're gonna bring it back down
the same way you lifted it up.
You're going to use your thumb to drop a small packet off,
and then you're gonna repeat the actions
again and again and again, I would say four or five times
until you have no more cards,
and then you complete the scissor cut.
The most important thing to remember
is keeping the packets consistent.
So when you initially lift up that packet
from the bottom of the deck,
I would say around four-fifths of the deck,
if not the cards are going to flex too easily,
they'll start to bow one way or the other,
and that's when you get into problems with cards
flying out and falling onto the floor.
[Dan And Dave] Level 13, Worm.
[Dan] The worm is a really unique trick
in that it uses a kinetic type motion
combined with a really cool five-packet display.
So let's start with Z grip,
rotate the packets in opposite directions as you tilt
your hand into a perpendicular plane to the floor.
Your index finger of the right hand is going
to push the top card forward,
and this is gonna give you this beautiful square display.
You can rock these cards back and forth
by moving your hands in opposite directions.
In this inward position, your left thumb
is gonna position itself on the back of this packet.
Drag that single card up and clip it between those packets.
Your left thumb can come over and clip this packet,
and extend everything in this beautiful five packet display.
Believe it or not,
pushing off that single card is pretty knacky.
It's gonna take some practice.
Level 14, Carnahan fan.
The Carnahan fan is a one-handed fan
where the cards begin face down,
and then magically open up into a face up fan.
Begin in dealer's grip,
and curl your index finger underneath the deck.
And you want to curl it so far that the knuckle of the index
finger is butted right up against the base of the thumb.
Curl the index finger out and then immediately curl it back
around the top of the thumb.
And to close it,
you can either reverse the actions for a one-handed close,
or for a simpler method,
just come over with the opposite hand,
square all the cards together,
and give it an all around square up.
For the next level, we're going to combine tricks
we've already learned as well as advanced mechanics,
and an aerial from one hand to the other.
[Dan And Dave] Level 15, Molecule 2.
[Dan] Molecule 2 is the opening and closing
of packets revolving and spinning around each other
with an aerial in between.
Molecule two starts with a modified version
of the Z grip with the finger on the corner,
instead of the front edge.
From here, you're gonna revolve that lower packet
to the middle.
At the same time, we turn the top packet face up,
but flip it back face down on top.
This leaves us with that center packet sticking out
between the top and bottom packet.
Revolve this packet 180 degrees around,
and then flip it, imprint over,
so it's back on top in this sort of Charlier type position.
From here, you're gonna grip the top packet,
and revolve half of that packet 360 degrees over
into your right hand end grip.
Now you're gonna execute a revolution cut
with your left hand,
at the same time flip this right-hand packet
360 degrees in the air from one hand to the other,
between those two packets and everything gets closed.
[Dave] Level 16, Kryptonite.
Kryptonite is a one-handed multipacket cut.
It utilizes the Charlier and Revolution cut,
which we've already gone over.
Begin as you would for revolution cut.
You're gonna use your index finger instead
to split the top packet in half.
You're now gonna extend the middle finger,
ring finger, and little finger out,
allowing that top packet to glide or slide down
until it falls into the base of the finger.
Just ignore that you now have a packet
clipped between the middle finger and ring finger,
and perform a revolution cut.
As that packet revolves around,
instead of landing on the bottom,
it's gonna land on top of that lower packet.
You're gonna push down on that lower packet
with the fingers, the tips of the fingers,
and lever that packet up and around the index finger,
allowing it to fall on top flush with the deck.
So as we move forward,
we're advancing along to a more advanced
multipacket two handed cut.
This also ends in a very nice display,
which is somewhat iconic amongst cardists.
[Dan And Dave] Level 17, 5 Faces of Sybil.
[Dan] Things are getting a little complex.
To do this,
we're gonna break into Z,
and then kick off that top packet
to break into both the Z and alt Z at the same time.
From here, we're gonna rotate both hands
in opposite directions, similar to Mary Jane.
Also similar to Mary Jane,
we're gonna clip that center packet
with our left thumb and index finger.
We're gonna extend our right hand forward,
clearing that center packet, coming back around.
We're going to straddle this packet,
clip off half of it and extend,
and that's what's gonna give us
this beautiful five packet display.
So you're gonna want to try
to get an even distribution of packets.
So one fifth of the deck in each grip, so to speak.
For the next level we're going to be combining three things
we've already learned.
The Scissor cut, the Faro, and the Bridge.
[Dan And Dave] Level 18, One Hand Shuffle.
To begin, you want to hold the cards
in a raised straddle grip.
You're gonna break the cards with the index finger,
inserting your index finger
between the two halves of the deck.
This is similar to Kryptonite.
You're now going to slide that upper half of the deck along
the index finger until your index finger reaches
the left edge of that upper packet.
At this point, you want to make sure the cards
are as square as possible.
So at that point, you apply a little bit
of pressure with the thumb and fingers.
We'll notice that the cards sort of want to flex upward,
and as they flex upward,
you'll notice that they're bowing against each other.
Relax the grip and just sort of rock the tension back
and forth until you feel the cards begin to weave together.
Once the cards are weaved together,
you're going to squeeze the two packets together
so that they bode downward creating a bowl.
Relax the index finger,
and the cards will sort of spring back into place,
just like in a riffle shuffle with a bridge.
[Dan And Dave] Level 19, Madonna 2.
Madonna 2 is a speed cut that uses simultaneous swivel cuts,
swing cuts, and the revolution cut.
This one starts with alt Z.
From here, you're basically gonna perform
a series of swivel cuts and swing cuts,
moving packets on top of each other, below each other,
and under packets.
At this point, you perform a revolution cut,
drop that packet on top,
and you're left with a single packet
held between your left thumb, and your right thumb.
You're gonna sort of kick that packet
so it spins 180 degrees and lands on top.
For these types of speed cuts,
it's important to get the mechanics down to perfection
before going into speed.
With that said, you do want to practice at a fast pace.
It's gonna be difficult, but that's ultimately what's
gonna make the flourish look really nice.
[Dan And Dave] Level 20, Leno.
The Leno cut is a complex seven packet display cut,
where packets are spinning back and forth
one on top of the other, and back again.
It's this long, beautiful, magnificent display,
and then it all comes back together again.
Begin with Z grip.
However, here we're going to do it backwards.
Instead of pivoting that packet off the index finger,
we're pivoting it off the little finger.
We're then going to lift up with the index finger
of the right hand into like an alt Z grip.
Here, you're gonna pick up
an additional packet from the bottom packet of the deck.
So you're lifting up or breaking off half of that bottom
packet with the little finger of the right hand.
From here, you start to rotate and pivot packets
one on top of the other.
That bottom packet held between the index finger
and little finger is swiveled around counterclockwise.
You're gonna grip a packet between the left thumb
and middle finger.
What's unique about this,
you're opening and closing packets,
ultimately getting you to a much grander display.
So there's this nice kinetic opening and closing of packets
until you finally reached this grand display,
and then I'm just closing everything
almost in reverse action to opening it.
And at the very end, I like to end with Genesis.
So we're at a very advanced place right now,
and we're gonna get into combos.
[Dan And Dave] Level 21, Pandora.
[Dan] So this is the introduction
of multiple packet display cuts,
using seamless transitions from multiple versions.
This one's nuts.
It starts with the opening of four packets simultaneously,
which transitions into an old cut called Tornado.
From here, we're spinning packets around
in beautiful choreographed ways,
which transitions into a cut we call Crabshack.
Again with packets spinning around each other
in the chaotic fashion,
followed by molecule three sequence to close it off.
What makes Pandora so beautiful is that state of flow.
You really want to dance with the cards
and get that rhythm down.
[Dan And Dave] Level 22, improvisational cardistry.
[Dave] So improvisational cardistry
is the idea of exploring all of these techniques
we've learned and coming up with new ways of executing them.
It's basically combining everything
into your personal expression.
[upbeat techno music]
[Dan] Since we started,
cardistry has grown into this international art form,
and you have guys all over the world doing stuff
that as kids we could not even dream up.
The fact is there's infinite possibilities
with a deck of cards.
It's really a personal artistic expression.
It's an art form.
And so with new people getting into it,
there comes new ideas, new innovations, new styles.
Yeah, in terms of creativity, the sky's the limit.
We'd love to see cardistry get to a point where
cardists could make a living doing this,
and we are seeing that happen today.
It's still a somewhat new art form,
but I think in the next 10 years, it will get to that point.

16 Levels of Piano Composition: Easy to Complex
21 Levels of Skateboarding: Easy to Complex
6 Levels of Knife Making: Easy to Complex

11 Levels of Origami: Easy to Complex

10 Levels of Ice Sculpture: Easy to Complex

13 Levels of Beatboxing: Easy to Complex

11 Levels of Self-Portraiture: Easy to Complex
26 Levels of Yo-Yo Tricks: Easy to Complex
22 Levels of Cardistry: Easy to Complex
24 Levels of Balisong Flipping: Easy to Complex

13 Levels of Pumpkin Carving: Easy to Complex

21 Levels of Dunking: Easy to Complex

15 Levels of Pool: Easy to Complex

12 Levels of Graffiti: Easy to Complex

15 Levels of Turntablism: Easy to Complex
11 Levels of Prosthetic Makeup: Easy to Complex
Levels of Knot Tying: Easy to Complex

13 Levels of Drumming: Easy to Complex

21 Levels of Pen Spinning: Easy to Complex
21 Levels of Ballet: Easy to Complex

25 Levels of Freestyle Soccer: Easy to Complex

9 Levels of Pickpocketing: Easy to Complex
11 Levels of Holiday Gift Wrapping: Easy to Complex


