Recommended System Requirements
- Windows XP / Vista / 7 / 8 / 8.1 / 10 (32, 64-bit); Linux(Wine); Mac OS X.
- 1 GHz Pentium III processor or equivalent;
- 1 Gb RAM
- 2,0 Gb hard disk space;
- 1024x768 screen resolution or higher;
- OpenGL / DirectX 9.0 or higher.
How to Install (Windows)
1.
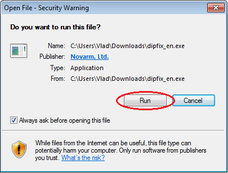
Launch downloaded <filename>.exe file (for example "diptrace_en.exe", "diptrace_en64.exe" or other) and press Run.
5.
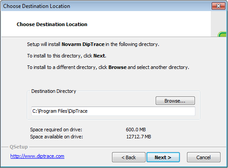
Select the destination folder. DipTrace is installed to "C:\Program files\DipTrace" folder by default, but you can select another directory. Press Next> to continue.
2.
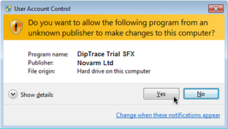
Press Allow if "Do you want to allow the following program to make changes..." message appears.
6.
Set the program shortcuts. Type in the name of the folder in the "Start \ Program" menu. "DipTrace" is a default name. Press Next>.

3.
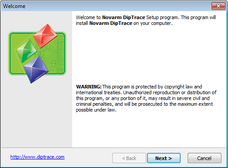
The welcome dialog box appears. Click the Next> button.
7.
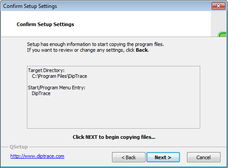
Confirm the setup settings. Review entered information, and press Next> to start copying the files.
4.
Read the License Agreement, select Yes - I accept the terms of the License Agreement!, and press the Next> button. License agreements are different for freeware and 30-day trial versions.

8.
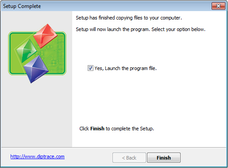
Setup complete. Press Finish. You can select to launch DipTrace automatically after the installation.
How to Install (MacOS)
1.
Download and open
DipTrace DMG file.
2.
Move DipTrace to your Applications.
3.
Open Terminal (Applications → Utilities → Terminal) and run command:
xattr -rd com.apple.quarantine /Applications/DipTrace.app
4.
Launch DipTrace from your Applications.
First start – up to 5 minutes.
DipTrace Launcher

DipTrace consists of four software modules: Schematic Capture, PCB Layout, Pattern Editor, and Component Editor. You can launch each module separately form the Start menu in the Windows OS or with DipTrace Launcher on Mac OS.
How to order DipTrace
Visit DipTrace Online Store, select Order via FastSpring. Fill out required details: your name, phone, email, select the payment method, and proceed to checkout. We will send the registration data (user name and license key) to your email within 24 hours. Make sure you entered a valid email address and check your spam filter if you do not recieve the letter.
Volume pricing is available for any DipTrace edition, the total price is automatically recalculated depending on the quantity of copies (valid only when purchasing several copies within a single order).
DipTrace on a CD is available for additional charge. You can use it as a backup installation source. Compact disk in a slim DVD-box features Win32, Win64, Mac OS X installers with all libraries and 3D models, shipping cost included. Usually the delivery takes 7–14 days, sometimes up to 3 weeks, depending on your location. If you didn't receive the disk on time – contact us.
Activation
30-Day Trial
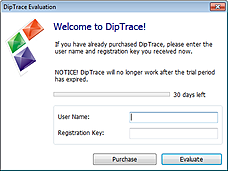
When the evaluation period is over, press Purchase or visit DipTrace Online Store to buy the software. Once you receive the registration data (user name and license key) copy/paste them into the corresponding fields of the dialog box, which pops up automatically on the DipTrace Trial startup. Press Apply / Evaluate button.
Freeware
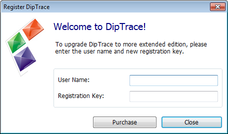
To purchase DipTrace, select "Help \ Register" from the main menu in the PCB Layout or Schematic Capture, then press the Purchase button in the pop-up dialog box to buy DipTrace on our website. When you receive the registration data, copy paste the User Name and Registration Key, and press the Apply button to activate the software.
DipTrace Files and Locations (Windows)
DipTrace has four native binary file formats (listed below by file extensions):
*.dip – the printed circuit board file saved in the PCB Layout.
*.dch – schematic file saved in the Schematic module.
*.lib – pattern library file.
*.eli – component library file.
DipTrace system files, together with standard libraries and examples, are installed to "C:\Program files\DipTrace" folder. Another DipTrace folder is "C:\Users\<User>\Documents\DipTrace", this folder has three sub folders inside: Examples (copy of the same folder from the Program files), My Libraries (default location for all user libraries), and Projects (default location for all user projects).
DipTrace does not allow the user to save custom libraries together with standard libraries in the same folder. When you upgrade DipTrace to a newer version, all library files in "C:\Program files\DipTrace\Lib" folder will be rewritten with new files.
The last place where you can find the DipTrace files is "C:\ProgramData\DipTrace\" ("??:\Documents and Settings\All Users\Application Data\DipTrace\" for Win XP users). This folder contains the settings (files with *.dat extension) and interface language files (*.lng extension) in Data and Data-Unicode sub folders.
Restore Default Settings
Sometimes users can change the settings, so DipTrace doesn't launch at all. Usually it happens when the graphics mode is incompatible with the video adapter. In order to restore default settings, you need to launch "Default.reg" file and allow it to make necessary changes in the Windows registry. You can find this file in the DipTrace folder.

