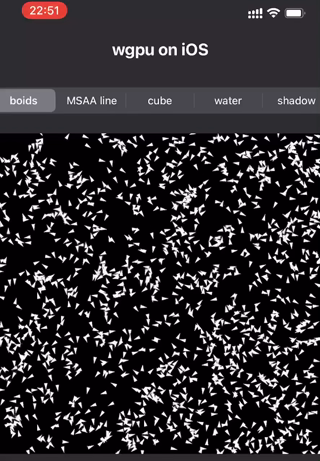
Integrate wgpu into your existing iOS | Android apps.
wgpu does not depend on any window program, so it does not provide window creation and management functions. Only when creating a window-based Surface, an argument that implements the raw-window-handle abstract interface may be needed (may be needed because on iOS/macOS, instance of Surface can be created directly by CAMetalLayer). The winit used by the wgpu examples is a cross-platform window creation and management crate that implements the raw-window-handle abstract interface. It will take over the window management and events loop of the entire app, there is no doubt that for game apps, the combination of wgpu + winit is very suitable.
However, a large number of non-game apps also need to use graphics APIs (such as charts, image filters, etc.). These apps may require a large number of system components, as well as the ability to freely control various input devices (e.g., stylus, motion sensors). So, it would be very useful to integrate wgpu into these apps without using third-party window management libraries.
 |
 |
|---|
on_visionOS.mp4
# Add Apple device (iOS | iPadOS | visionOS) target
# Since iPhone 5 and later are all 64-bit devices, `armv7s-apple-ios` and `armv7-apple-ios` are not required.
rustup target add aarch64-apple-ios

# Add Apple Simulator target
# M1+ Mac
rustup target add aarch64-apple-ios-sim# Build for iOS | iPadOS
sh ./apple_lib_build.sh --releaseThen, Open Apple/wgpu_in_App.xcodeproj with Xcode and run on iPhone、iPad.
sh ./apple_lib_build.sh aarch64-apple-ios-sim --releaseThen, Open Apple/wgpu_in_App.xcodeproj with Xcode 15 Beta 2+ and run on visionOS Simulator.
Passing Primitive Data Between Rust and iOS
Passing Owned Objects between Rust and iOS
Sending a boxed trait over FFI
Assuming your computer already has Android Studio installed, go to Android Studio > Tools > SDK Manager > Android SDK > SDK Tools. Check the following options for installation and click OK.
- Android SDK Build-Tools
- Android SDK Command-line Tools
- NDK(Side by side)
Then, set two following environment variables:
export ANDROID_SDK_ROOT=$HOME/Library/Android/sdk
# Replace the NDK version number with the version you installed
export NDK_HOME=$ANDROID_SDK_ROOT/ndk/23.1.7779620# from crates.io
cargo install cargo-so
# frome source code
cargo install --path cargo-so# Add build targets
# Since simulator and virtual devices only support GLES, `x86_64-linux-android` and `i686-linux-android` targets are not necessary
rustup target add aarch64-linux-android armv7-linux-androideabi
# Build
sh ./android_lib_build.sh --release# Use primary backend (metal vulkan or dx12, depend on your computer OS).
cargo run
# Use OpenGL backend (platforms other than Linux, need to add the `angle` feature).
# https://github.com/gfx-rs/wgpu/pull/2461
WGPU_BACKEND=gl cargo run --features=angle
# Use Vulkan backend (on macOS, need to add the `vulkan-portability` feature)
# https://github.com/gfx-rs/wgpu/pull/2488
WGPU_BACKEND=vk cargo run --features=vulkan-portability
# Then, press 0, 1, 2, 3, 4 keys change running example.