This proyect is barely tested.
2020-8-27 - Link to the first test video:

Sorry for my english, i'm learning.
The idea is a simple wifi plane, controlled whit a Phone using a Touch Screen or a Bluetooth Joystick and a ESP8266

Controller Part List:
- Wemos D1 Mini
- Wemos Motor Shield
- Wemos Battery Shield
- 100k resitor
- 500 mAh 1c 3.7v lipo battery
- Phone or PC
- Bluetooth Joystick (im using a Swich Pro Controller)
- USB to USB Micro Cable (charging and upload the program)
- Cable and conectors.


Plane Part List:
- 2mm Foamboard
- 1mm Balsa wood
- 2 Small servos
- 2 Small plane motors
- 2 Rubber Bands (for the wing)
- 2 bamboo sticks or 2 brochete sticks or 4 toothpicks
- Steel Wire

Tools list:
- Soldering Iron and lead
- Hot Glue Gun and Sticks
- Cutter
- Superglue


Wemos Motor Shield
Wemos Motor Shield V2 dont need changes.
Wemos Motor Shield V1 needs soldering.

Also, you need improve stability flashing new firmware, for dat you need a USB TTL Programer, and connect the motor shield to a PC

Then you need execute the flash commands for linux
    cd /tmp
    sudo apt install stm32flash
    wget https://cdn.hackaday.io/files/18439788894176/motor_shield.bin
    stm32flash /dev/ttyUSB0
    stm32flash -k /dev/ttyUSB0
    stm32flash -f -v -w motor_shield.bin /dev/ttyUSB0
For mac or windows see link
- Install CH340G Serial Driver - Windows - Mac - Included in linux
- Install Visual Studio Code - Download
- Install Plataform IO - Instructions
- Download Repository
- Copy configuration.example to src/configuration.h and set the wifi configuration (see firmware configuration)
- Connect Wemos D1 Mini USB
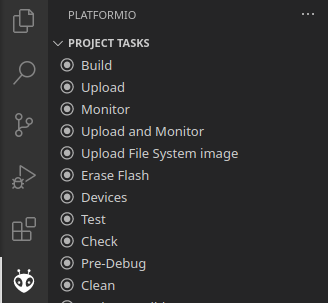
- Build and Upload the code


Edit src/configuration.h
WIFI_MODE:
- JOIN: Join a existing Access Point
- AP: Create a password protected Access Point
- OPENAP: Create a open Access Point
WIFI_NAME: Name of the Wifi Network
WIFI_PASS: Password of the Wifi Network (not used in OPENAP)
Example:
    #define WIFI_MODE           "AP"
    #define WIFI_NAME           "PLANE"
    #define WIFI_PASS           "12345678"
MAP Servo to ESP8266 OUTPUT
    #define SERVO1_PIN          14  // Wemos D5
    #define SERVO2_PIN          12  // Wemos D6
    #define SERVO3_PIN          13  // Wemos D7
    #define SERVO4_PIN          15  // Wemos D8

The control is a Webpage, can go full screen and is resposibe.
Horizontal Control

Vertical Control

Websocker URL
config.websocketUrl = 'ws://' + location.hostname + ':81/';
If you use and external web or a proxt, you can specify the IP and port manually.
config.websocketUrl = 'ws://192.168.0.191:81/'
GamePad Axis Feedback configuration
    config.gamepadAxis12FeedbackStyle = 'PowerStick';
    config.gamepadAxis34FeedbackStyle = 'Square';
Options: Circular - Square - PowerStick


Gamepad Trim buttoms Mapping:
    config.gamepadPanel1TopTrimPlus = 'button_15';
    config.gamepadPanel1TopTrimMinus = 'button_14';
    config.gamepadPanel1BottomTrimPlus = 'button_12';
    config.gamepadPanel1BottomTrimMinus = 'button_13';
    config.gamepadPanel3TopTrimPlus = 'button_1';
    config.gamepadPanel3TopTrimMinus = 'button_2';
    config.gamepadPanel3BottomTrimPlus = 'button_3';
    config.gamepadPanel3BottomTrimMinus = 'button_0';
To test you gamepad buttons you can use this link

Wifi Signal Telemetry Style:
config.telemetryWifiSignalStyle = 'Percentual';
Options: Percentual - dBm


Links : Wifi Singal Streng Explained
Plane control type
    config.panel1type = 'DifferentialThrust';
    config.panel3type = 'PitchYaw';
Options: PitchYaw - Thrust - ThrustRoll - DifferentialThrust
- PitchYaw: Horizontal Sevo Pitch - Vertical Servo Yaw
- Thrust: Vertical motor intensity
- ThrustRoll: Horizontal Sevo Roll - Vertical motor intensity
- DifferentialThrust: Vertical motor intensity - Horizontal Motor proportion (Only 2 motors)


Plane Motor Quantity
1 or 2 motors supported
config.motorQuantity = 1;
Motor plane location
You can invert the motor location in software.
    config.motorRigth = 1;
    config.motorLeft = 2;
Options: 1 or 2
Motor rotation
    config.motor1orientation = "CounterClockwise";
    config.motor2orientation = "CounterClockwise";
Options: Clockwise - CounterClockwise
Servo max angle value
    config.servo1maxValue = 180;
    config.servo2maxValue = 180;
    config.servo3maxValue = 180;
    config.servo4maxValue = 180;
Servo function
    config.pitchServoNumber = 1;
    config.rollServoNumber = 2;
    config.yawServoNumber = 3;
For joypad interaction joypad.js (MIT Licensed)
For touchscreen controls nipplejs (MIT Licensed)
For WebSockets (GNU LGPL)
For Json (MIT Licensed)
All libraries have his own license, my code and documentation is MIT Licensed.