Category:American football formation diagrams
Jump to navigation
Jump to search
Media in category "American football formation diagrams"
The following 200 files are in this category, out of 205 total.
(previous page) (next page)-
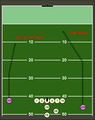
 3-3-5 green.svg 871 × 297; 11 KB
-
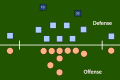
 3-4 base defense.svg 750 × 500; 15 KB
-
 3-4 green.svg 871 × 297; 11 KB
-
 3-5-3 green.svg 871 × 297; 11 KB
-
 33 stack green.svg 871 × 297; 11 KB
-
 4-2-5 green.PNG 871 × 297; 10 KB
-
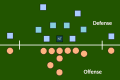
 4-3 green.svg 871 × 297; 11 KB
-
 4-3 over green.svg 871 × 297; 11 KB
-
 4-3 under green.svg 871 × 297; 11 KB
-
 4-4 green.svg 871 × 297; 11 KB
-
 43BaseDefense.svg 750 × 500; 15 KB
-
 46 Defense - Formation Offense vs Defense - 4-3-names.png 533 × 300; 14 KB
-
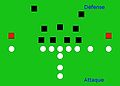
 46 Defense - Formation Offense vs Defense.png 533 × 300; 14 KB
-
 46 Defense.svg 407 × 197; 241 KB
-
 46 green.svg 871 × 297; 11 KB
-
 5-2 green.svg 871 × 297; 11 KB
-
 5-wide green.svg 871 × 280; 11 KB
-
 A-11.gif 748 × 234; 4 KB
-
 A-11.png 748 × 234; 8 KB
-
 A-Formation.svg 533 × 101; 32 KB
-
 Ace green.PNG 871 × 280; 9 KB
-
 Ace spread green.PNG 871 × 280; 10 KB
-
 American football field Diagram Template.svg 713 × 1,230; 221 KB
-
 American football Gaps and holes.svg 304 × 200; 39 KB
-
 American football officials positions eight man.svg 300 × 300; 52 KB
-
 American football officials positions.svg 300 × 300; 52 KB
-
 American Football Position DB.svg 800 × 400; 12 KB
-
 American Football Position DL.svg 800 × 400; 12 KB
-
 American Football Position LB.svg 800 × 400; 12 KB
-
 American Football Positions.png 604 × 335; 26 KB
-
 American football positions.svg 300 × 300; 42 KB
-
 American Football Positions.svg 604 × 335; 23 KB
-
 American Football Positions2.png 625 × 465; 578 KB
-
 American Football Positions2.svg 640 × 480; 68 KB
-
 American Football Positions3.svg 2,592 × 1,914; 1.53 MB
-
 AmFBSafeties.svg 750 × 500; 15 KB
-
 Big I Formation.PNG 576 × 227; 7 KB
-
 Big I formation.svg 576 × 227; 28 KB
-
 Blue Formation.png 722 × 373; 2 KB
-
 Center position.png 576 × 266; 7 KB
-
 Centre.jpg 420 × 300; 22 KB
-
 Corner route.png 738 × 930; 18 KB
-
 Cornerback 2.svg 750 × 500; 16 KB
-
 Cornerback.jpg 420 × 300; 22 KB
-
 Cornerback.svg 420 × 300; 1.96 MB
-
 Curl Hook route.png 738 × 930; 16 KB
-
 Curl route.svg 750 × 500; 8 KB
-
 Defensiveend.jpg 420 × 300; 22 KB
-
 DefensiveEnd43.svg 750 × 500; 16 KB
-
 Defensivetackle.jpg 420 × 300; 22 KB
-
 DefTackle34.svg 750 × 500; 15 KB
-
 DefTackle43.svg 750 × 500; 16 KB
-
 Der Center in einer I-Formation.PNG 516 × 367; 7 KB
-
 Die Guards in der I-Formation.PNG 516 × 367; 7 KB
-
 Die O-Line in der I-Formation.PNG 516 × 367; 7 KB
-
 Die Tackles in der I-formation.PNG 516 × 367; 7 KB
-
 Double Wing Formation.png 722 × 373; 2 KB
-
 Double Wing Power.png 642 × 332; 12 KB
-
 Drag In.png 475 × 224; 30 KB
-
 Flat route.png 738 × 930; 15 KB
-
 FleaFlicker.png 456 × 350; 10 KB
-
 Flexbone Formation.PNG 521 × 171; 6 KB
-
 Flexbone Formation.svg 521 × 171; 34 KB
-
 Fly route.png 738 × 930; 19 KB
-
 Football Diagram 1904.jpg 1,068 × 680; 73 KB
-
 Football-Formation-C.svg 1,200 × 600; 28 KB
-
 Football-Formation-FB.svg 1,200 × 600; 28 KB
-
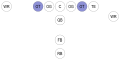
 Football-Formation-LB.svg 1,200 × 600; 7 KB
-
 Football-Formation-OG.svg 1,200 × 600; 28 KB
-
 Football-Formation-OT.svg 1,200 × 600; 28 KB
-
 Football-Formation-QB.svg 1,200 × 600; 28 KB
-
 Football-Formation-RB.svg 1,200 × 600; 28 KB
-
 Football-Formation-TE.png 1,200 × 600; 30 KB
-
 Football-Formation-TE.svg 1,200 × 600; 25 KB
-
 Football-Formation-WR.svg 1,200 × 600; 28 KB
-
 Footballguard.png 385 × 159; 2 KB
-
 Fullback position.png 576 × 266; 7 KB
-
 Guard position.png 576 × 266; 7 KB
-
 Hitch route.png 738 × 930; 17 KB
-
 I formation.svg 576 × 227; 29 KB
-
 I-Form Power Example.png 960 × 720; 53 KB
-
 Linebacker.jpg 420 × 300; 22 KB
-
 Linebacker.svg 750 × 500; 17 KB
-
 Linebacker34.svg 750 × 500; 17 KB
-
 Linemen.jpg 582 × 446; 84 KB
-
 Linemen.svg 765 × 531; 43 KB
-
 Loose Red Formation.png 722 × 373; 2 KB
-
 Miami Wildcat Formation.png 960 × 720; 22 KB
-
 New flexbone green.PNG 871 × 280; 6 KB
-
 Notre Dame Box.svg 521 × 228; 18 KB
-
 Offense i-form qb.PNG 516 × 367; 7 KB
-
 Offense i-form te.PNG 516 × 367; 7 KB
-
 Offense i-form wr.PNG 516 × 367; 7 KB
-
 Offensiveguard.jpg 420 × 300; 22 KB
-
 Offensivetackle.jpg 420 × 300; 22 KB
-
 Out route.png 738 × 444; 21 KB
-
 Passrouten.png 4,200 × 2,550; 385 KB
-
 Passrouten.svg 1,260 × 765; 52 KB
-
 Pistol green.PNG 871 × 280; 10 KB
-
 PosicoesFutebolAmericano.png 601 × 536; 19 KB
-
 Positions American Football - ja.svg 603 × 404; 200 KB
-
 Positions American Football.svg 603 × 404; 32 KB
-
 Post route.png 738 × 930; 19 KB
-
 Post-Pisarcik QB kneel formation.svg 637 × 500; 3 KB
-
 Pro Formation.PNG 576 × 171; 6 KB
-
 Pro Formation.svg 576 × 171; 29 KB
-
 Punt block formation.svg 300 × 300; 3 KB
-
 Quarterback position.png 576 × 171; 6 KB
-
 Quarterback.jpg 420 × 300; 22 KB
-
 Red Formation.png 722 × 373; 2 KB
-
 Route Tree.svg 570 × 560; 2 KB
-
 Runningback position.png 576 × 266; 7 KB
-
 Runningback.jpg 420 × 300; 24 KB
-
 Shortpuntformation.png 475 × 447; 72 KB
-
 Shotgun formation.JPG 320 × 118; 5 KB
-
 Shotgun Formation.PNG 632 × 171; 6 KB
-
 Shotgun Formation.svg 632 × 171; 29 KB
-
 Signals Yost 1.JPG 679 × 384; 16 KB
-
 Signals Yost 2.JPG 676 × 384; 15 KB
-
 Signals Yost 3.JPG 676 × 384; 17 KB
-
 Single wing formation vs5 diagram.gif 655 × 548; 14 KB
-
 Single-wing punt formation.GIF 675 × 516; 5 KB
-
 Singleback Formation.JPG 322 × 120; 6 KB
-
 Singleback Formation.PNG 632 × 219; 7 KB
-
 Singleback Formation.svg 632 × 219; 29 KB
-
 Singlewing.png 1,123 × 794; 74 KB
-
 Slant route.png 716 × 366; 13 KB
-
 Storm33eagle3.JPG 474 × 304; 8 KB
-
 T Formation.PNG 395 × 227; 5 KB
-
 T Formation.svg 521 × 228; 26 KB
-
 Tackle position.png 576 × 266; 7 KB
-
 Thorstorm333eagle4.JPG 478 × 301; 9 KB
-
 Tightend position.png 576 × 266; 7 KB
-
 Tightend.jpg 420 × 300; 22 KB
-
 Triple Option veer.jpg 1,301 × 458; 33 KB
-
 Trips formation.PNG 677 × 171; 6 KB
-
 Trips Formation.svg 677 × 171; 29 KB
-
 Tstorm33eagle5.JPG 463 × 297; 9 KB
-
 Tstorm33eagle6.JPG 459 × 304; 9 KB
-
 Tstorm33eagle7.JPG 474 × 324; 11 KB
-
 Unbalanced Flexbone Formation.PNG 499 × 171; 6 KB
-
 Unbalanced Flexbone Formation.svg 499 × 171; 32 KB
-
 Veer formation.jpg 1,301 × 458; 25 KB
-
 Veer vs 34.PNG 579 × 188; 6 KB
-
 Wheel route.png 738 × 930; 18 KB
-
 Widereceiver position.png 576 × 266; 7 KB
-
 Widereceiver.jpg 420 × 300; 22 KB
-
 Wing-T Power.png 642 × 336; 17 KB
-
 Wingback Formation.PNG 484 × 171; 6 KB
-
 Wingback Formation.svg 484 × 171; 32 KB
-
 Wishbone Formation.PNG 521 × 228; 7 KB
-
 Wishbone Formation.svg 521 × 228; 32 KB
-
 Yost defense ends in.jpg 647 × 395; 18 KB
-
 Yost defense shift form.jpg 649 × 384; 15 KB
-
 Yost direct pass dp.jpg 669 × 384; 23 KB
-
 Yost direct pass dprhb.jpg 671 × 384; 23 KB
-
 Yost direct pass rhbr.jpg 655 × 384; 20 KB
-
 Yost fake kick fbr.jpg 641 × 384; 18 KB
-
 Yost fake kick lhb.jpg 643 × 384; 17 KB
-
 Yost regular around right.JPG 665 × 384; 21 KB
-
 Yost regular buck right.JPG 660 × 384; 21 KB
-
 Yost regular defense form.jpg 647 × 384; 17 KB
-
 Yost regular fullback plunge.JPG 658 × 384; 18 KB
-
 Yost regular kick.JPG 663 × 384; 21 KB
-
 Yost regular mass right.JPG 662 × 384; 21 KB
-
 Yost regular straight right.jpg 656 × 384; 21 KB
-
 Yost tackle back buck left.JPG 653 × 384; 20 KB
-
 Yost tackle back buck right.JPG 660 × 384; 23 KB
-
 Yost tackle back cross buck.JPG 664 × 384; 22 KB
-
 Yost tackle back fake.JPG 658 × 384; 21 KB
-
 Yost tackle back mass.JPG 669 × 384; 21 KB
-
 Yost tackle back plunge right.JPG 645 × 384; 21 KB
-
 Yost tackle back quarter.JPG 659 × 384; 18 KB
-
 Yost tackle back run left.JPG 667 × 384; 21 KB
-
 Yost tackle back square dp.jpg 669 × 384; 19 KB
-
 Yost tackle back square fbcb.jpg 665 × 384; 18 KB
-
 Yost tackle back square fbp.jpg 665 × 384; 20 KB
-
 Yost tackle back square lea.jpg 659 × 384; 20 KB
-
 Yost tackle back square lhbr.jpg 659 × 384; 18 KB
-
 Yost tackle back square ltp.jpg 669 × 384; 16 KB
-
 Yost tackle back square qbr.jpg 668 × 384; 21 KB
-
 Yost tackle back square tsp.jpg 663 × 384; 18 KB
-
 Yost tackle back straight.JPG 662 × 384; 20 KB
-
 Yost tackle over fbc.jpg 669 × 384; 19 KB
-
 Yost tackle over fbm.jpg 664 × 384; 21 KB
-
 Yost tackle over lea.jpg 673 × 384; 19 KB
-
 Yost tackle over lhb.jpg 668 × 384; 21 KB
-
 Yost tackle over qbr.jpg 669 × 384; 20 KB
-
 Yost tackle over rhb.jpg 673 × 384; 18 KB
-
 Yost tackle over rhbcb.jpg 670 × 384; 19 KB
-
 Yost tackle straight back dp.jpg 676 × 384; 25 KB
-
 Yost tackle straight back fbcb.jpg 651 × 384; 19 KB
-
 Yost tackle straight back ltcb.jpg 654 × 384; 24 KB
-
 Yost tackle straight back ltp.jpg 660 × 384; 18 KB
-
 Yost tackle straight back qbr.jpg 648 × 384; 20 KB
-
 Yost tackle straight back rhbcb.jpg 668 × 384; 19 KB
-
 Yost tandem tackle over fbb.jpg 669 × 384; 19 KB
-
 Yost tandem tackle over fbb2.jpg 670 × 384; 20 KB
-
 Yost tandem tackle over lea.jpg 668 × 384; 20 KB
-
 Yost tandem tackle over lhbcb.jpg 665 × 384; 21 KB


