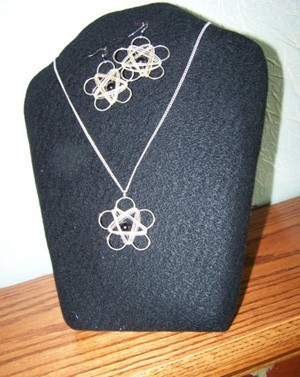
 To show off those special necklaces and sets, this is an inexpensive way to make an expensive looking display stand. If you are making jewelry, it is a big financial commitment. If you are displaying your work, you know how expensive the stands to display on are.
I made my own from corrugated cardboard boxes and am passing my pattern on. If you want a different size display enlarge or reduce it to the size you need. Mine is made to display any length of necklace with bracelet and earrings.
Approximate Time: 30 minutes
Enlarge/reduce the pattern to the size you need, trace onto your cardboard marking the fold lines.
Cut out with heavy scissors to give a smooth edge. Make sure to cut out the holes for the tabs on the bottom edge of the final tab. You may want a sharp knife for this.
Choose one side for the back and fold on all of the solid lines to that side. Once you have them all folded you are ready to fold your stand into shape.
Notice the fold lines are numbered 1 through 4. Starting at (1) fold the triangle shape back and up toward the wing as the arrow shows on both sides; fold the number (2) side wing toward the back. lock them in by folding up the bottom flaps (3) and (4). Slide the tabs into the slots you cut previously.
Smooth batting over the stand, making sure to cover all sides and front but leave the bottom so it will stand. If you plan on disassembling your stand for storage, cover it while assembled so you don't stretch your covering too tight. Glue or tape to the batting to the back.
Repeat the previous step for the fabric but cover the bottom smoothly.
Make neat pleats at the corners matching one with the other and glue or tape to the back. I covered the back of mine with matching fabric. If you choose to do the same, keep this in mind when you gather your fabric.
You have just made your first display stand and saved several dollars. They are a great way to show off some of your special pieces and catch the eye of prospective buyers whether at a show or for picture taking for your Internet selling.
Another hint I would like to share is a display for bracelets.
Wrap a rolled up newspaper with matching fabric, 5 inches longer than the roll of newspaper, you used on your display stand, glue the ends inside. Slip your bracelets on in similar groups, wood beads on one and glass beads on another, etc.
Good luck
.By Latrtatr from Loup City, NE
Very nice. Thanks for pattern and instructions.