Top 13 Best Tile Tools for Your DIY Tile Project
A tiler is only as good as their tools


If you’re going to DIY a tile installation, you need to brush up on (and invest in) the best tile tools you can. Top-notch tools will give you a better result and make the job easier overall. Some of the best tile tools you can’t DIY without include a tile saw or cutter, a grout float, a notched trowel, a level, and tile spacers. Keep reading to learn more about these tools, discover more tile tools you’ll need, and see pricing so that you can start a budget for your project.
1. Wet Tile Saw
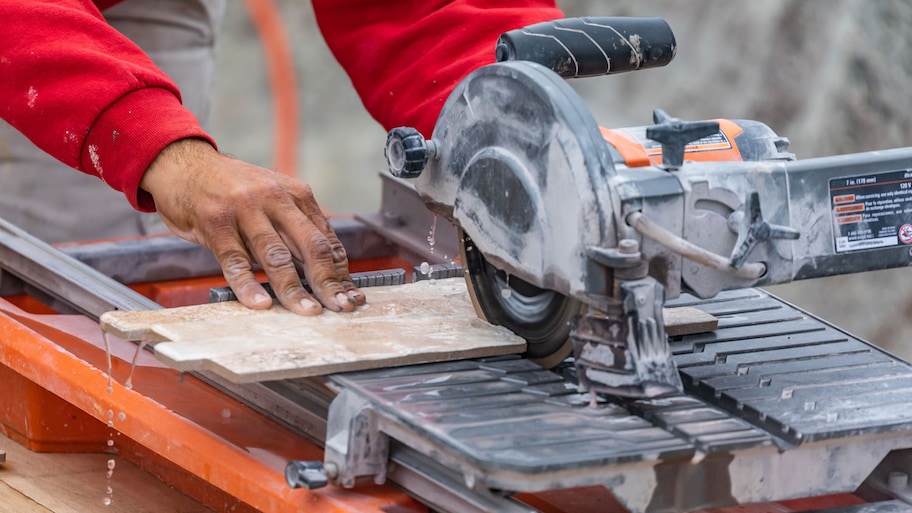
The wet tile saw is arguably the best tool for cutting tile, regardless of the tile’s material. It can work on porcelain, glass, quartz, or even ceramic. A wet saw uses water throughout the cutting process to prevent overheating of the saw or the tile itself. A wet tile saw is an investment, but if you learn how to cut tile, you’ve tackled one of the hardest parts of tile installation.
A wet tile saw will cost you anywhere from $200 to $900, depending on the power draw, size of the blade, and brand you choose. If you decide to tackle a tile installation job yourself, you might want to consider renting versus buying this tool, as rentals will only be around $50 to $100 for a day.
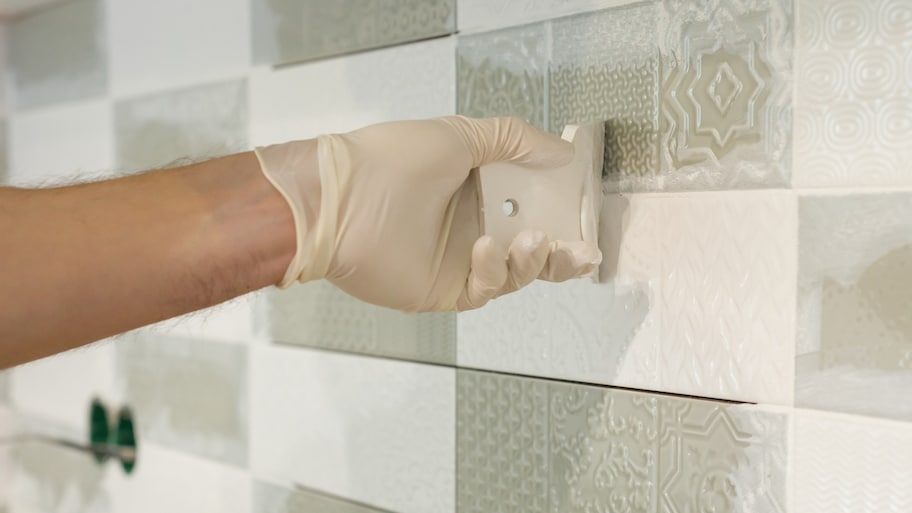
2. Grout Float
The grout float is responsible for giving that lovely finish to the grout so it’s not sticking out like a sore thumb. Rather than using steel on the bottom of the trowel (which is technically what a grout float is), it instead uses rubber. The rubber ensures you can easily push the grout into place without scraping the tile itself.
Grout floats will cost anywhere from $5 to $35, depending on the material of the float itself. If you’re thinking about learning how to install ceramic tile, you’ll want to master the art of installing grout to ensure your tile looks beautiful and lasts for a long time.
3. Notched Trowel

Before you can put the lasting touches on a tile floor, you first need to lay it. Tile adhesives work best when paired with a notched trowel, as the notches help create an even laying surface.
The type of notch you’re looking for will depend on where you’re laying the tile. For instance, a trowel with square notches works best for floor tile adhesives, whereas you’ll use trowels with a V-notch for wall tile adhesives.
Notched trowels will cost around $5 to $15 on average.
4. Rubber Mallets
Smacking tile with a normal hammer is a surefire way to break the tile itself. This situation is where a rubber mallet comes into play. While you still can’t swing it around like a sledgehammer, lightly tapping the tile with a rubber mallet helps knock it into place.
Rubber mallets will cost around $5 to $20. The cost fluctuates based on the material of the mallet itself.
5. Manual Tile Cutter
Sometimes, a small tiling job doesn’t require you to get all the power equipment out. Instead, you might want to use a manual tile cutter. There’s no worrying about equipment overheating because the machine can only work as fast as you do.
Manual tile cutters will cost anywhere from $50 to $100, depending on the size of the unit, and can be a great tool when you’re thinking about different shower tile ideas. You may not need a power tool for the job, especially if it’s a smaller shower.
6. Grout Sponge
When you hire a tile installer near you, you may notice them using this brightly colored object that looks a lot like a sponge. Well, you’re not wrong; it is, in fact, a sponge. But the main purpose of this sponge is to finish off grout work without pulling any grout up or causing it to stain the tile.
Grout sponges use all curved edges rather than flat ones, which ensures it glides easily over the tile while it cleans. You can not use a normal dish sponge, as the edge will likely pull up grout, requiring you to reapply it afterward.
A single grout sponge will run around $3, but a pack will be closer to $5 to $10, depending on how many you want.
7. Rubber or Plastic Bucket
It’s unlikely you’ll ever find a tile installer (or any contractor for that matter) without some type of bucket. You’ll need buckets to mix the mortar and grout before applying.
While it’s common to see a plastic bucket, it will make your life easier to use a rubber bucket for mortar and grout. The rubber material doesn’t allow mortar to stick to the bucket nearly as easily as plastic.
A plastic bucket will cost between $5 and $10, while a rubber bucket will cost around $20 to $30.
8. Paddle Mixer
Pre-mixed thin-set is convenient, but you pay the price. To cut costs, you can purchase a dry thin-set and mix it yourself, but not without a paddle mixer attachment for your drill. Try to mix it by hand, and you’ll tire quickly, not to mention that you'll leave large chunks that are hard to work out, making your tiling job tougher than it should be.
For $10 to $20, you can add a paddle mixer to your drill, make mixing the thin-set much easier, and have a much smoother tile application.
9. Diamond Drill Bits
There will be times when you need to drill through porcelain or other tiles. In these cases, you’re going to want diamond drill bits handy. Diamond drill bits can easily drill through all sorts of materials without causing them to crack or chip.
A single diamond drill bit will run you around $15 to $25, depending on the size and type of the drill bit.
10. Level

You can’t start a tiling project without a level. In fact, a level is essential in every homeowner's toolbox. You’ll want to use this tool to ensure you laid the tile flat and even on the floor or wall. It can also be a handy tool for drawing straight lines.
A level will cost anywhere from $10 to $100, depending on how large of a level you need.
11. Tile Leveling System
A tile leveling system is the key to even tile. Not only does uneven tile look funny, but it can also be hazardous, especially on floors. Plus, if one tile is higher than another, dirt and debris will get caught in the ‘lip,’ making it hard to keep the floor clean.
The tile leveling system uses special types of tile spacers between tiles with braces between the spacers openings to keep tiles level. After the thinset dries, remove the spacers and braces and grout the tile.
A tile leveling system costs anywhere from $25 to $50, depending on the number of pieces in the kit.
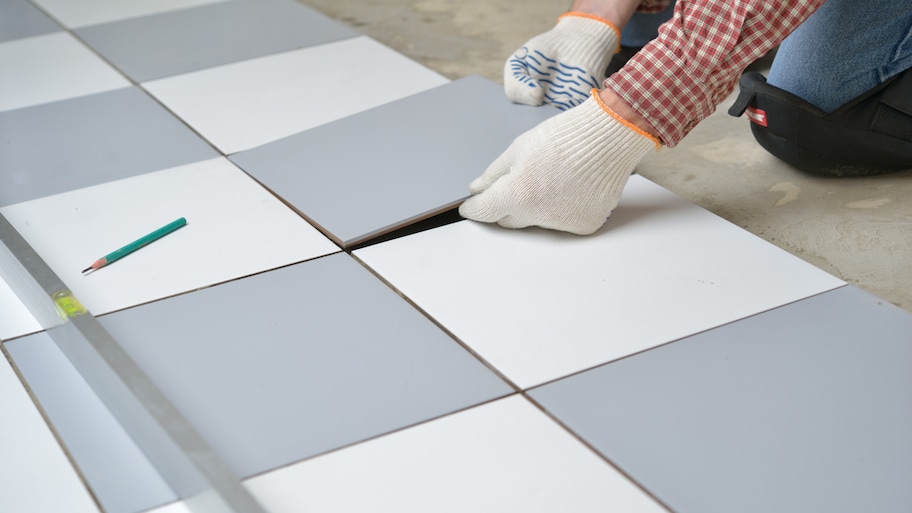
12. Tile Spacers
Tile spacers are simple, yet have made the job of a tile installer a lot simpler. True to their name, this tool ensures you maintain a certain amount of spacing between each tile. If you don’t use some type of spacing tool, then there is a good chance the tiles will shift into each other and leave no room for the grout afterward. This would increase the cost to install tile floor since you’d need to undo the mistakes and start over, or call a professional to install the tile.
Tile spacers will cost anywhere from $10 to $50, depending on how many you purchase and the shape of the spacer, and are a crucial component in the tile installation process.
13. Knee Pads
This one may only apply to floor tile installers, but they’re a life changer. When installing tile on the floor, you’re on your knees quite a bit. This process can take a toll on these necessary joints in the long run, which is where knee pads come in.
Knee pads for floor tile installers have a cushion on the outside of the pad. Allowing for a softer and less intense kneeling position. These work knee pads will cost anywhere from $15 to $50, depending on the type of cushion the brand uses.
You’ll likely continue using the knee pads even after installation. Once you learn how to clean floor tile grout, you’ll find that you’re on your knees a lot and may want to break out those knee pads again.
How Much Does Tile Installation Cost?
Tile installation costs $400 to $4,250, but the total for your project will depend on the size of the project, the type of tile, and where you’ll be installing the tile. It costs more to install tile on floors than it does to tile countertops or backsplash, and materials like porcelain, glass, and natural stone cost more than vinyl and some ceramics.
DIY vs. Hiring a Pro
If you’re DIYing tile installation, you might wonder if you should invest in tiling tools. You’re likely doing it yourself to cut costs, so wouldn’t buying tools increase your expenses? It might feel like an added expense, but having the right tools will make the job easier and more efficient. Plus, you’ll get a better result. Cutting corners may feel like you’re saving money, but in the long run, you’ll need these tools.
If you can’t invest in proper tools or realize you can barely tell some of the tools apart, you’re better off calling a tile contractor near you to finish the job quickly and cleanly.
Frequently Asked Questions
There are several tools that you will use together to install tiles. Four of the most basic tools needed in tile installation include a notched trowel for applying tile adhesive, a tile cutter or saw for cutting tiles to size, tile spacers for creating the appropriate amount of space between tiles, and a grout float for applying grout.
Different types of tile cutters may work best depending on the type of tile you are cutting and the size of your project. There are two main types of tile cutters: manual and electric. Manual tile cutters are quick and easy to use for small projects and softer tile materials, but they can only make straight cuts. Electric tile cutters make light work of big projects and can cut through harder materials.
There are a few different tools you can use to score tiles. Manual tile cutters or tile scribes work well for scoring in straight lines. Tile nippers are one of the best options for scoring because they can make small and irregular cuts that larger tools may not be able to handle.