Including grill price. Consider letting a pro with all the equipment handle this one.
Need professional help with your project?
Get quotes from top-rated pros.
What you'll need:
TOOLS
Flathead or Phillips screwdriver/drill
Adjustable wrench
Safety gloves
Goggles
Broom
Rags
Power washer/hose
Mild soap
Dolly
SUPPLIES
Grill liner (optional)
Gas line tape/thread sealant
Natural gas hose/propane tank
Gas connector kit
Mild detergent
Replacing a built-in gas grill might sound a bit intimidating at first, but the payoff is worth it. Your first steps toward grilling juicy burgers on your shiny new setup are gathering the right tools and having a step-by-step plan. So, whether you’re simply replacing a relic or upgrading to the latest and greatest model, this guide shares how to replace a built-in grill to get an outdoor kitchen you’re gonna love. Let's get cooking.
Prepping to Replace a Built-In Gas Grill
Let’s discuss your new gas grill—it will run on natural gas or propane. You want to ensure your grill uses the best fuel for you and your home. It's essential to remember that propane and natural gas operate at different pressures and need distinct regulators and fittings. You can't use propane to run a grill built for natural gas or vice versa.
Also, consider thoroughly cleaning your old grill before initiating the move. It will make the process way less messy. As you prepare to move your old grill, take a moment to assess the pathway you'll be using. Clear it of any potential obstacles, tripping hazards, or debris, ensuring the path is wide enough to give you and your grill an easy exit.
Double-Check Measurements
Avoid making any guesses regarding measurements. Take the time to carefully measure your existing grill's dimensions and the space it occupies. This crucial step will give you insights into whether you have room for adjustments and the new grill. Pay special attention to measuring the height and rear lid clearance, as even minor deviations can lead to compatibility issues.
Turn Off the Gas Supply
Photo: Ivanna / Adobe Stock
The most crucial step is turning off the grill's gas supply. First, ensure that the burner control knobs are off. Next, locate the gas valve or shut-off knob on the gas line connected to your grill and turn it off completely. You may need a wrench to do so. This step is essential to prevent gas leaks during the transition.
Disconnect the Propane Tank (if Applicable)
If your grill connects to a propane tank, you must disconnect the tank from the grill. Close the valve on the propane tank to stop the flow of gas. Then, disconnect the tank from the grill by unscrewing the coupling nut or valve.
Remove Grates and Accessories
Remove the cooking grates, burner covers, grease tray, and any other removable accessories from the grill. Doing so will make the grill lighter and easier to handle during the move. Wear your work gloves and goggles to protect your hands and eyes from potential spills and splatters.
Remove the Old Grill
Photo: juliedeshaies / Adobe Stock
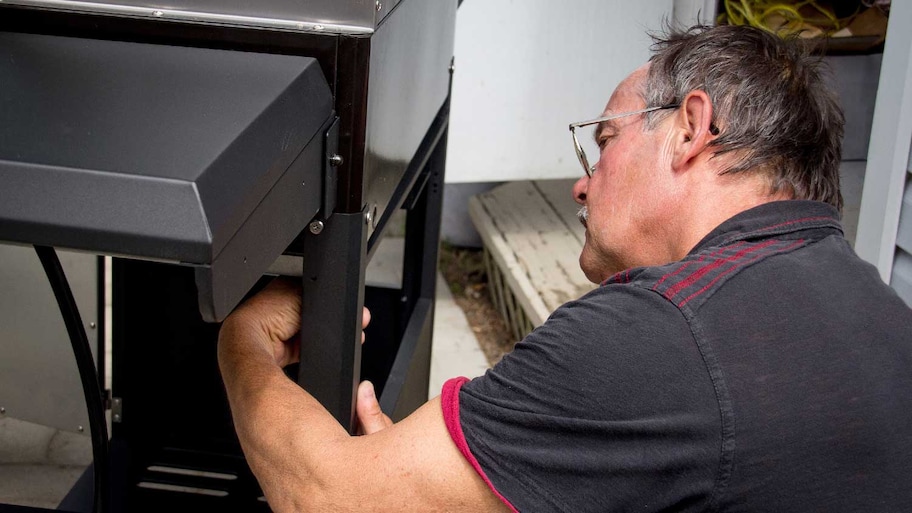
Use a screwdriver to remove any screws or bolts that secure the grill to the outdoor kitchen island or structure. With the help of a friend or family member, if the grill is heavy, carefully slide out the old grill from its housing. Now, you’re ready to store the old grill for future use or dispose of it responsibly.
If you’re getting rid of the grill, follow local regulations for disposal or recycling. Remember to use proper lifting techniques and grab a dolly. Gas grills can be heavy, and you want to avoid injury.
Clean the Area for the New Grill
Cleaning the area for a new grill is essential to ensure a healthy and safe grilling environment. Begin by removing any debris and objects from the area. Use a broom and rags to clear the space thoroughly. It's also an excellent time to check the area for safety hazards, such as overhanging branches. Remove or address any potential safety concerns.
Next, hose down the area using a garden hose or pressure washer, cleaning where the grill will sit. Use a mild soap to scrub out grease spots, and then rinse the soap away. Then, let the area dry before proceeding.
Install the New Built-In Gas Grill
You’re ready to install the new grill in the same location. Unpack the new grill and ensure you have all the parts. If you have a combustible cabinet, ensure you install a liner first if you removed the old one. Remember to follow the manufacturer's instructions for installing the new liner and grill. You will need a screwdriver or a drill plus the hardware that came with your new grill to install after sliding it into place.
Reconnect the Gas Line
First, inspect the gas line and the grill's gas inlet to ensure they are clean and free from debris, old tape, or sealant. To create a proper seal, wrap the threads of the gas line's fitting with gas line tape or apply thread sealant. Make sure to wrap the tape in the direction of the threads (usually clockwise) to prevent the tape from unraveling when you screw on the connection.
Carefully screw the gas line fitting onto the grill's gas inlet or the propane tank by turning it counterclockwise. Use an adjustable wrench to tighten it, but do not over-tighten, as this can damage the threads.
Test for Leaks
Once the connection is secure, checking for gas leaks is crucial. Prepare a mixture of soapy water (water with a few drops of dish soap) in a spray bottle. Spray the soapy water solution onto the gas connection and around the threads. Pay close attention to any potential leak points.
Turn on the gas supply valve slowly and observe the sprayed area for the formation of bubbles. Bubbles indicate a gas leak. If bubbles form, turn off the gas supply immediately and disconnect the line. Reapply gas line tape or thread sealant and reconnect, ensuring a proper seal this time.
After making adjustments, retest for leaks using the soapy water solution. If there are no bubbles, the connection is secure. If you still see bubbles, stop what you’re doing and call in a pro to assist.
Install Grates and Accessories
Following the manufacturer’s instructions, assemble the components that came with your grill. Pieces may include flame tamers or heat plates, cooking grates, drip pans, and grease trays.
Test the Grill
Photo: fedorovacz / Adobe Stock
Once you've confirmed there are no gas leaks and the grill is fully assembled, you can turn it on and check if it ignites and operates correctly. Verify that all burners light up and that the grill functions as expected. Ensure that the flame pattern is uniform and that there are no irregularities. It's a good practice to monitor the grill for a little while to make sure there are no gas odors or signs of leaks during operation.
If all is well, grab a few patties to cook and enjoy your new grill.
DIY vs. Hiring a Pro
You should usually hire a local gas grill professional to replace a built-in gas grill unless you have experience with similar projects. Here are some factors to consider when deciding:
Experience: If you have experience with gas appliances, plumbing, and DIY projects, you may feel confident in replacing a built-in gas grill yourself. If you have little or no experience with gas connections or DIY projects, hiring a professional to ensure a safe installation is best.
Knowledge: A professional will be up to speed on local regulations and building codes, ensuring compliance with safety standards. DIYing means you must understand local building codes and regulations related to gas grill installations and any specific requirements outlined in the manufacturer's instructions.
Tools and resources: Pros have all the necessary tools and resources for the job, including wrenches, pipe tape or sealant, and safety equipment.
Installation difficulty: Some grills are relatively simple to replace, while others may require more technical expertise.
Gas line compatibility: If your existing gas line is incompatible with the new grill, only a licensed professional should make gas line modifications.
Manufacturer's warranty: Check the manufacturer's warranty. Sometimes, the warranty may require professional installation to remain valid.
Peace of mind: Working with natural or propane gas can be dangerous. Hiring a professional can provide peace of mind.
Frequently Asked Questions
Built-in gas grills typically have a life span of 10 to 15 years. However, their longevity can vary based on quality, usage frequency, climate conditions, and maintenance routines. High-quality models made from durable materials tend to last longer. Additionally, regular cleaning, covering the grill when not in use, and conducting routine maintenance tasks such as cleaning burners and replacing worn-out parts can extend its life. A well-maintained built-in gas grill can provide excellent performance and memorable cooking experiences for a decade or more, making it a worthwhile investment for outdoor cooking enthusiasts.
The difference between a built-in and regular grill is installation and design. A built-in grill is integrated into an outdoor kitchen or structure, often within a countertop or island. It is a permanent fixture. A regular grill is standalone, portable, or cart-mounted, allowing mobility and versatility in placement. Built-in grills are typically larger with more cooking space, while regular grills come in various sizes. Built-in grills are favored for creating a custom outdoor cooking area, while regular grills provide convenience and flexibility.
No. Placing a built-in grill against the house is discouraged due to safety concerns. Building codes and regulations often require a minimum distance (typically 10 feet or more) between a gas grill and any combustible structure, including a house. Placing a grill too close poses a fire hazard and risks damage to the siding or structure, potentially leading to carbon monoxide buildup. It's essential to consult local building codes, follow manufacturer guidelines, and prioritize safety by positioning the grill at a safe distance, ideally in a well-ventilated outdoor kitchen or designated grill area.
Deirdre is a seasoned DIYer and home improvement writer. She believes in the transformative powers of deep cleaning and painting to revitalize any space. Her articles have appeared in HomeLight, The Spruce, Realtor, and more.
Deirdre is a seasoned DIYer and home improvement writer. She believes in the transformative powers of deep cleaning and painting to revitalize any space. Her articles have appeared in HomeLight, The Spruce, Realtor, and more.
The homeowners guide to Gas Grills
From average costs to expert advice, get all the answers you need to get your job done.