Consider letting a pro with all the equipment handle this one
Need professional help with your project?
Get quotes from top-rated pros.
What you'll need:
TOOLS
Broom
Mop and scrub brush (concrete subfloor only)
Caulk gun (wood subfloor only)
Roller paintbrush and large buckets
Standard level (4 to 6 feet in length)
Trowels
Rubber gloves and safety glasses
Power drill with a paddle attachment
Tape measure
Utility knife
SUPPLIES
Water and degreaser (concrete subfloor only)
Cement patching compound (concrete subfloor only)
Painter’s tape
Self-leveling floor compound
Latex primer sealer (wood subfloor only)
Concrete sealer (concrete subfloor only)
Caulk (wood subfloor only)
Backer board (half-inch or quarter-inch, wood subfloor only)
Backer board screws (1⅝-inch screws for half-inch backer board or 1¼-inch screws for quarter-inch backer board)
Mortar
Uncoupling membrane
Tile floors can be a great investment for your bathroom or kitchen, providing a strong, waterproof surface that’s easy to care for. However, despite their inherent strength, tile can easily crack or shift around if the surface beneath it is not also strong and level.
To ensure your tile is installed properly and doesn’t give you a headache, you’ll need a subfloor that’s properly prepared and an appropriate underlayment for support. Here’s how to start your tile installation off right.
4 Steps for Prepping the Subfloor
Once you gather all your materials, it’s time to get started.
Ensure Your Subfloor is Viable
Ceramic tile floors are heavy and rigid. They need a solid subfloor that won’t flex or move around underneath; one that’s strong enough to hold their weight and the weight of the preparation materials involved in their installation. They also need an even surface so tiles don’t crack or come loose over time.
There are a variety of viable subfloor options for ceramic tile, and each requires different preparation. You’ll commonly find a layer of oriented strand board (OSB) or plywood laid over the joists or structural support.
If your home has a concrete foundation or basement, tile can be installed directly over the concrete slab. A newly poured concrete floor should cure for at least three months before any flooring is installed on top.
If your subfloor is made of any of the following materials, it is unsuitable for tile and will need to be removed before you take any other steps:
Interior-grade plywood or particleboard, which can swell with water
Vinyl in multiple layers or not fully bonded to the entire subfloor
Drywall or green board
Clean and Patch Your Subfloor
Regardless of what material your subfloor is made from, sweep the entire room to get rid of dust and debris.
If your subfloor is concrete, use your scrub brush to scrub the surface with a degreasing cleaner in warm water. This will remove any salts, adhesives, and other surface contaminants that may inhibit water penetration, which is key to proper bonding between your subfloor and underlayment. Rinse and dry thoroughly before moving on.
Another additional step for concrete is to fill any cracks or holes using a cement patching compound. After mixing, apply with the edge of your trowel and level each patch with the surrounding concrete. Large cracks or displaced chunks may be a sign of deeper problems that you should hire a tile professional to diagnose.
Seal and Level Your Subfloor
Photo: andranik123 / Adobe Stock
Depending on your subfloor material, sealing and leveling may occur in different orders. Regardless of your material, start by sliding your level all around the room in different directions. If you notice any dips or uneven spots, they’ll need to be addressed.
If your subfloor is wood, fill seams with caulk and roll on a layer of latex primer-sealer with your roller brush. This prepares the surface to bond with self-leveler. Tape any vents off with painter’s tape.
Then, for both wood and concrete subfloors, mix and pour a self-leveling floor compound into any dips according to the manufacturer’s instructions. This self-leveler will seek its own level and dry in a flat, even surface. Wear safety goggles and gloves when handling the self-leveler and allow it to dry completely before moving on. This can take several days.
Finally, for concrete subfloors only, apply a concrete sealer to the level surface. Because concrete is porous, it draws moisture up from the ground which can cause damage to your floors without proper protection. Sealer keeps moisture away and prevents mold growth.
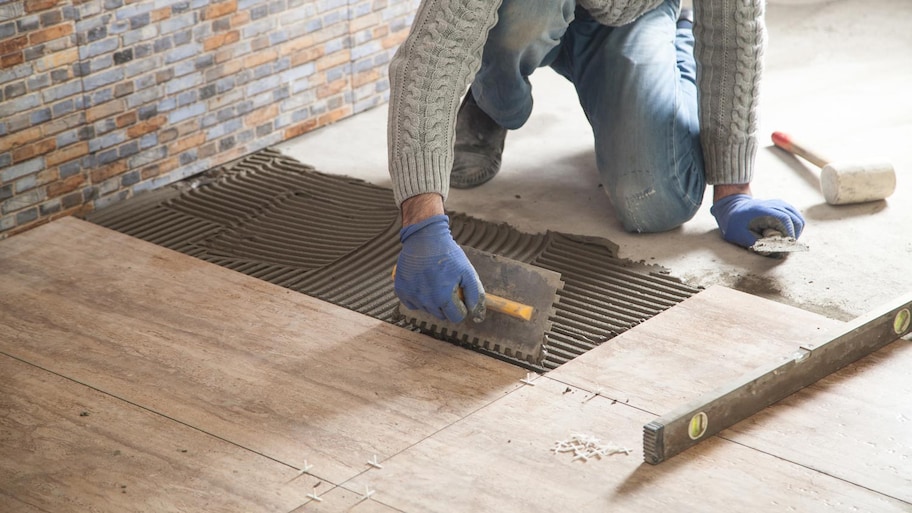
Attach Underlayment
Photo: Paul / Adobe Stock
The next step will vary depending on your subfloor and underlayment materials.
Attaching Cement Backer Board Underlayment to a Wood Subfloor
A cement-based backer board provides a solid surface that doesn’t flex, similar to solid concrete. Follow the manufacturer’s instructions and our tips below.
Attach the backer board to your subfloor with a polymer-modified thin-set (also called mortar) for additional strength and stability. It usually takes a day to dry.
Follow all directions on the packaging and wear safety glasses
Promptly clean your mixing paddle after mixing to prevent mortar from hardening on it
If your subfloor runs east to west, lay your backer boards running north to south
If you need to trim a panel, measure it and score along both sides with a utility knife. Press down on one side of the score line and lift the opposite side to snap the panel.
Working quickly while the mortar is wet, use your trowel to scoop and spread enough to cover an area slightly larger than your first panel of backer board. Comb the mortar with the trowel’s notched edge and place the panel on top.
Walk gently on the panel as you drill backer board screws every eight inches around the perimeter, half an inch from each edge and two inches from corners. Some manufacturers make this easier by identifying locations on the backer board to place screws. Every screw head should be flush with the panel.
Leaving a one-quarter-inch gap at the walls for expansion and a one-eighth-inch gap between panels, continue this process to cover your room. Arrange panels in a staggered pattern in which no four corners touch.
Attaching Uncoupling Membrane Underlayment to a Concrete Subfloor
Concrete, although solid, can still move and shift over time. To prevent this movement from cracking your grout or tile, install an underlayment of crack prevention membrane. It comes in large rolls of a waffle-patterned peel-and-stick mat that covers your entire subfloor.
Start by unrolling the membrane and using your utility knife to dry cut pieces to cover your subfloor. Leave a quarter-inch of space around the perimeter of the room and any poles or other obstructions. Pull back the membrane and wipe the areas with a slightly damp sponge, then apply thin-set mortar with the notch of your trowel directly to the subfloor.
Roll your membrane back down onto the thin-set as soon as possible so the surface doesn’t dry before contact. Using a wood float or hand roller, push the entire surface, including corners and edges, into the membrane.
Once your underlayment is laid and you’ve allowed at least a day for the mortar to dry, you’re ready to install your new tile floor!
Is It Worth It to Hire a Pro to Prepare Your Subfloor?
Depending on the type of flooring you have in your space already, DIY removal and subfloor preparation can be simple. However, DIY tile installation tends to be very difficult due to the complex nature of precisely cutting and placing new tiles.
If you hire a local professional tile contractor to install your tile, you should expect them to clean and inspect your subfloor as part of their routine before laying any tile. A DIY tile installation can cut your labor costs by $600 to $800 on average, but in exchange, you’ll need to purchase all of your own tools and preparation materials on top of the tile flooring itself.
Nick has been a copywriter in the home services industry since 2017, marketing for hundreds of flooring and home improvement providers throughout North America.
Nick has been a copywriter in the home services industry since 2017, marketing for hundreds of flooring and home improvement providers throughout North America.
The homeowners guide to Ceramic Tile
From average costs to expert advice, get all the answers you need to get your job done.