This project could take longer if you’re installing new sprinkler zones or an entirely new sprinkler system.
Cost
$50–$100
May be worth the DIY if your budget is tight.
Need professional help with your project?
Get quotes from top-rated pros.
What you'll need:
TOOLS
Wire stripper
Screwdriver
SUPPLIES
Sprinkler valves
Sprinkler wires
Waterproof connectors
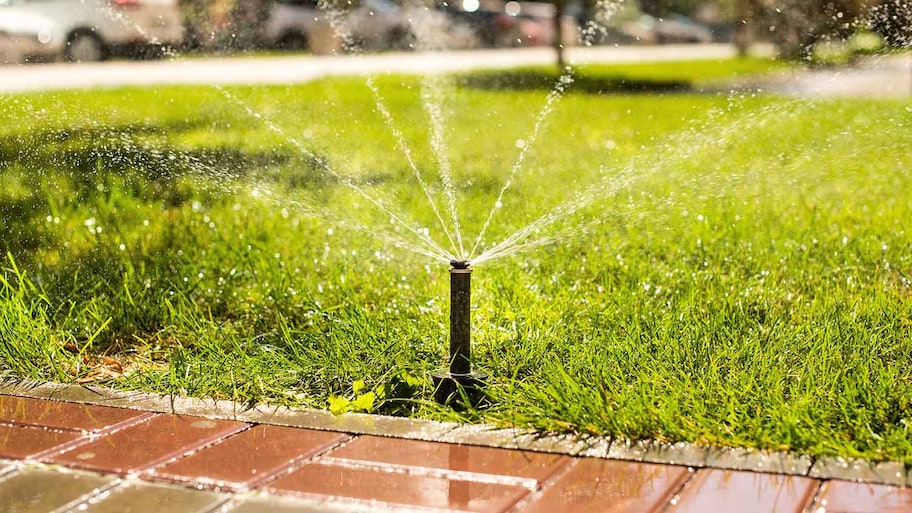
You might decide it’s time to learn how to wire sprinkler valves for many different reasons. Maybe certain sprinklers in your yard aren’t working as well as normal, and you suspect some wires have come loose. Or perhaps you’ve installed a new patio in one section of the lawn, and you’d like to shut off the sprinkler zone that was formerly watering that area. No matter the case, here’s how to wire sprinkler valves to optimize your sprinkler system.
Prepping to Wire Sprinkler Valves
If you’re installing a new sprinkler system, you’ll need to plan where your sprinkler zones will be before you can start connecting wires for each zone. You’ll also need to obtain permits and call 811 to check for utility lines before digging in the lawn.
But if you’re looking to repair a loose wire or shut off a zone in an existing sprinkler system, you’ll need to locate the valve box, the part of the sprinkler system that holds all of the valves. This box usually has a green lid that sits at ground level, but the box could be completely buried. You’ll also want to find the timer, which may be inside a garage, utility closet, or mud room if it doesn’t have a weatherproof cover or on the side of the house if it does.
Unplug the Timer
Photo: BOOCYS / Adobe Stock
Before you get started, unplug the timer to protect yourself from electrical shocks when working with wiring. For added protection and peace of mind, shut off the power to the sprinkler system from the electrical box and shut off the water supply to the sprinklers while you work.
If at any point you are worried about electrical shocks or water leaks while you learn how to wire sprinkler valves, don’t hesitate to pass this job along to a pro. Wiring the system incorrectly can damage the sprinkler system, warranting expensive repairs.
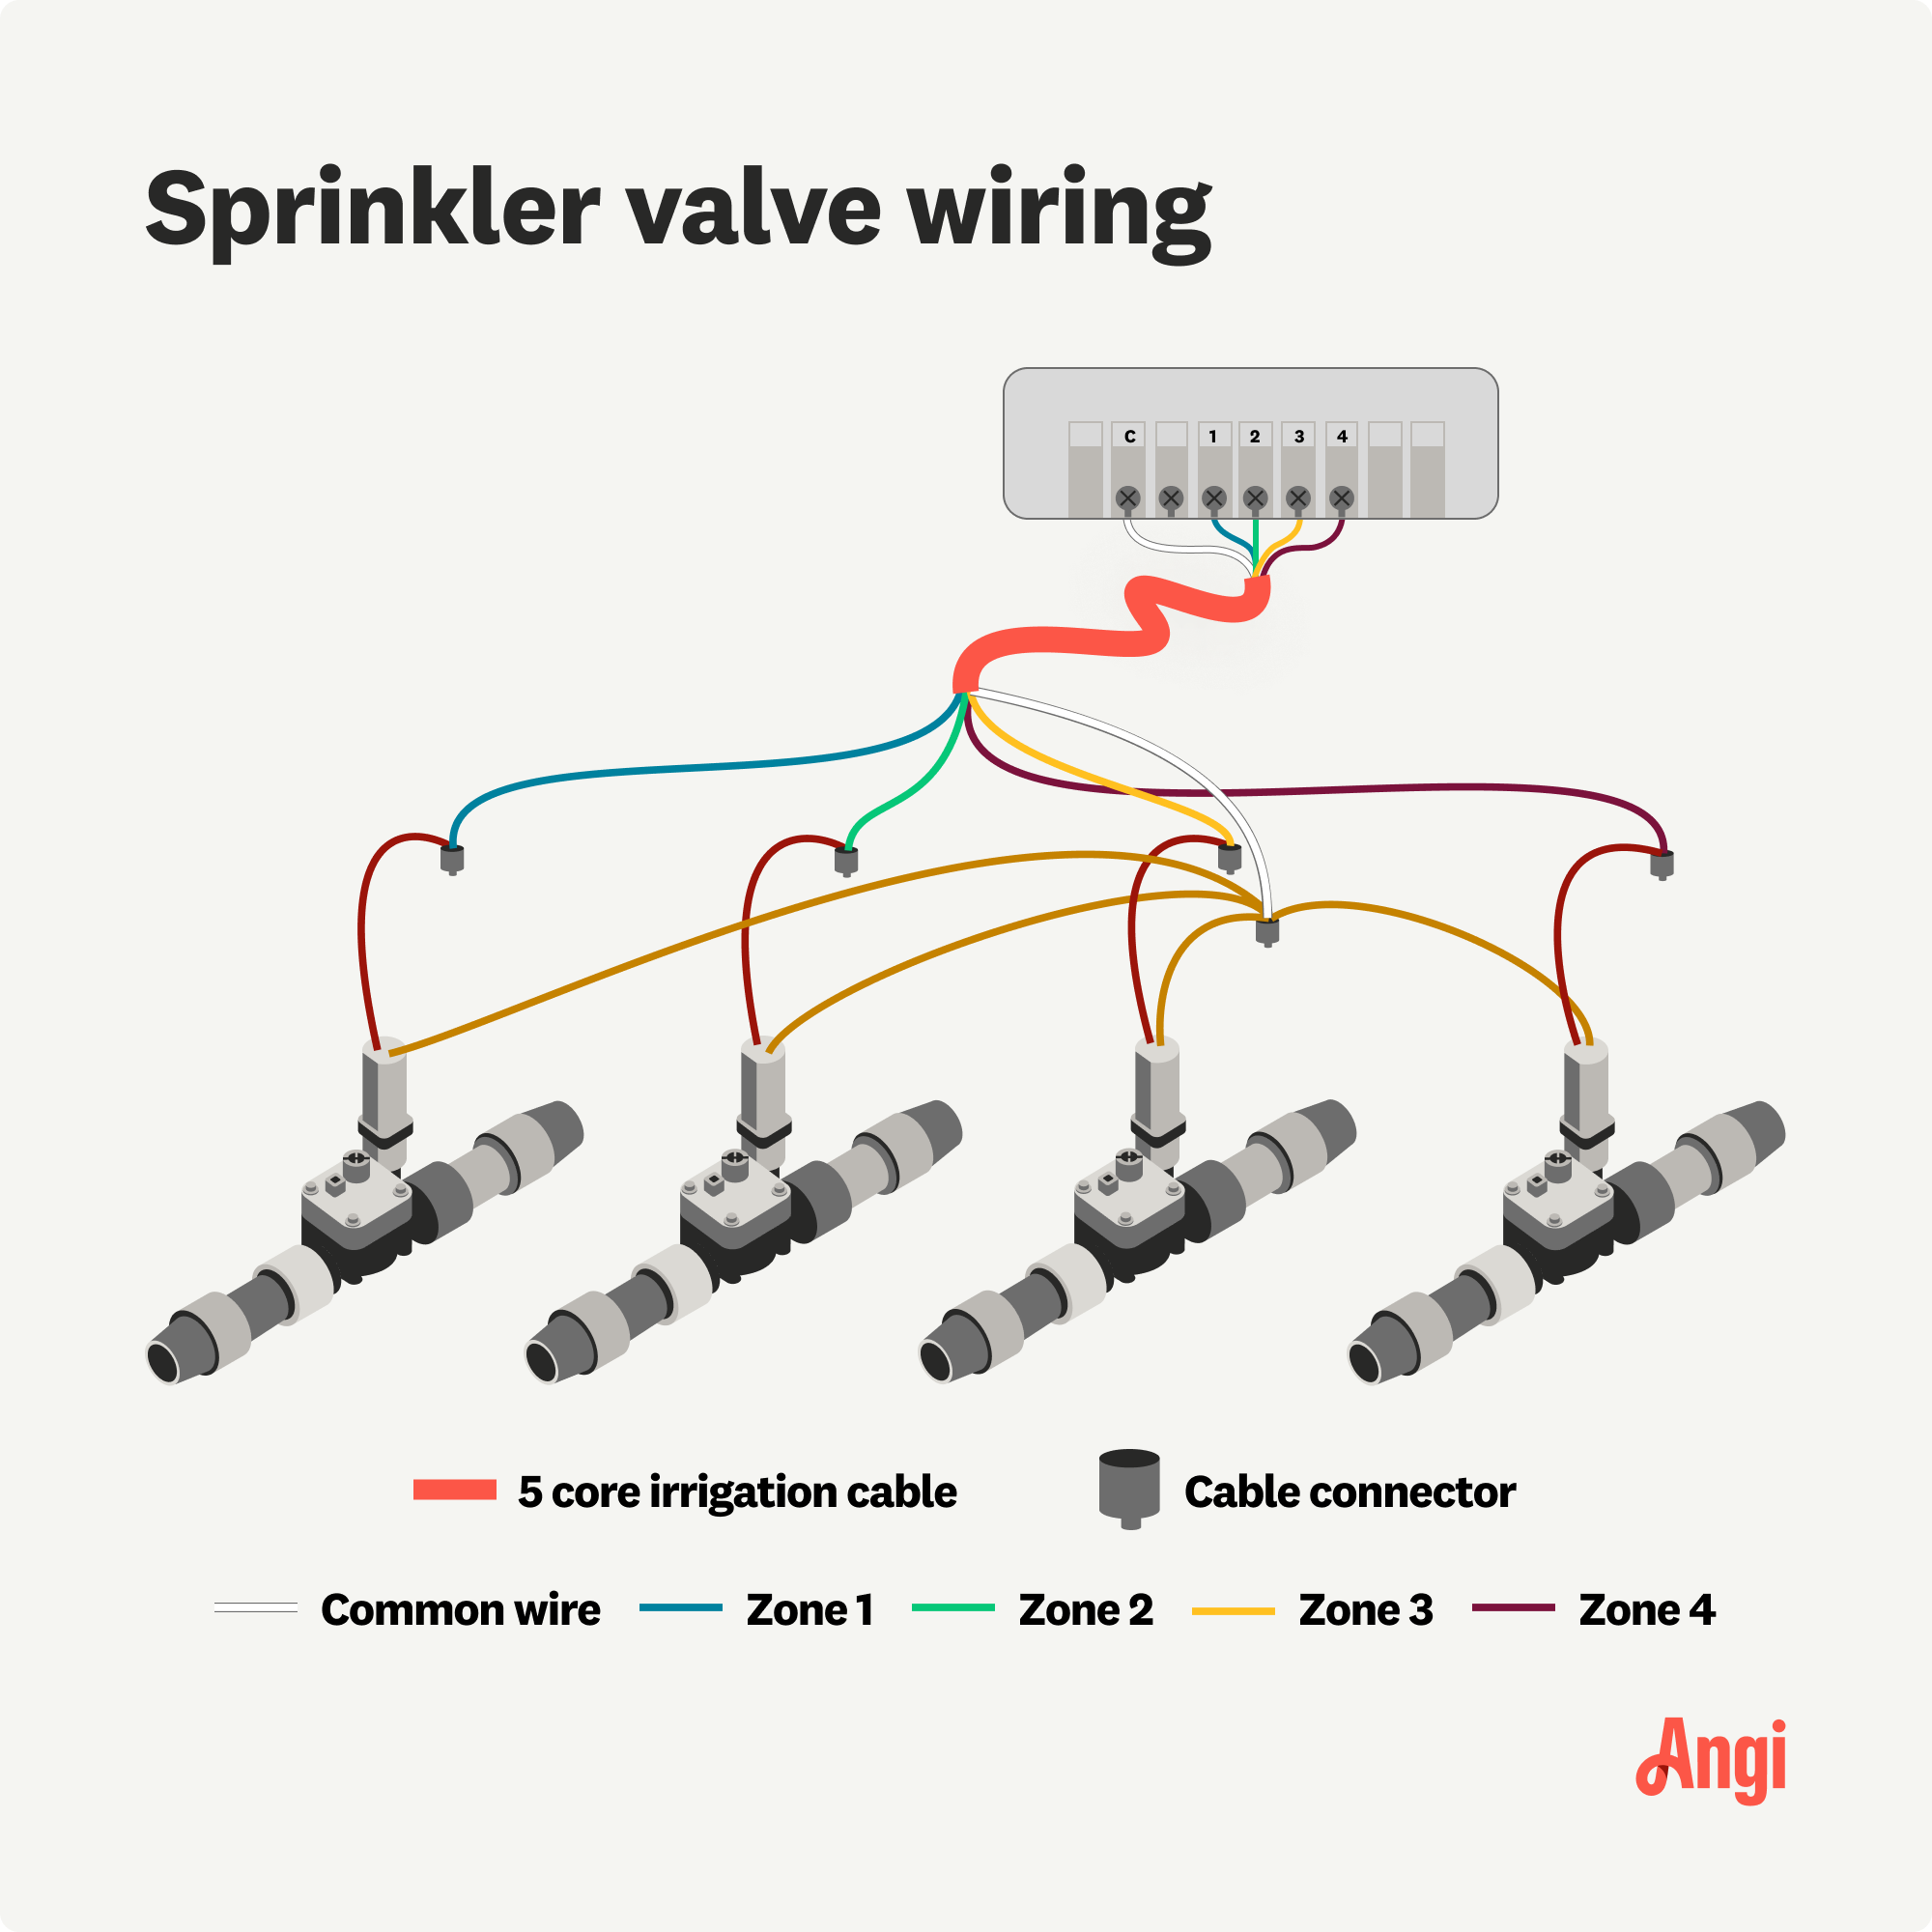
Connect Solenoids to Color-Coded Hot Wires
Each valve has its own solenoid, which uses electricity to determine the water pressure going through each valve. Each solenoid will have two black wires. You likely will see multiple solenoids, especially if you have or are setting up multiple sprinkler zones around your yard.
One of the two wires on each solenoid will connect to one of the color-coded wires that connect to your timer. The color-coded wires may be called hot wires, dedicated wires, or station wires. For example, for the solenoid on the valve controlling zone one, you may connect one of the solenoid wires to the blue wire. For the second, you may connect the red wire.
To connect the wires, use the wire stripper to remove part of the cover of the wire, then twist the metallic parts of the solenoid wire and the color-coded wire together. Write down which wire color is attributed to each zone. You’ll need this information when connecting the wires to the timer and later on, if you need to make repairs.
Connect Solenoids to White Common Wire
Now that you’ve connected one wire from each solenoid to one color-coded wire, you’ll be left with an additional, unused black wire on each solenoid. Strip each of these wire covers to reveal the metallic wire beneath, then do the same to the white wire on the cable that will be connecting to the timer. Twist the remaining black wires of all the solenoids together with the white common wire.
Cover Connections With Waterproof Caps
Twist a waterproof cap over each section of connected wires. So, you should have a waterproof cap over each pairing of a colorful wire with one of the two solenoid wires and a waterproof cap over where one of each of the two solenoid wires is twisted together with the white common wire.
Each waterproof cap should twist on tightly over the wires to ensure protection from moisture. If the cap spins continuously without tightening, it means the copper tip on the wire is too long. Clip it shorter until the cap twists on snugly.
Feed Wiring Through the Controller
On one end of the cable filled with colorful wires, you’ll now have wires connected to the solenoids and covered with waterproof caps. On the other end of the cable, you’ll have the other end of the common wire and the color-coded hot wires. Run the cable up through the hole in the timer or controller box.
Connect Wires to Zones
Connect each color-coded wire to its corresponding zone. Refer back to the notes you took in step two to ensure you connect the correct color wire to the right zone. Otherwise, you’ll likely program the timer incorrectly, and your watering schedule will be off.
To connect the wires, push them one by one into the labeled zones on the inside of the timer box and use a small screwdriver to tighten them in from the top. Then, do the same tightening procedure but with the white wire, pushing it into the common wire slot on the timer box.
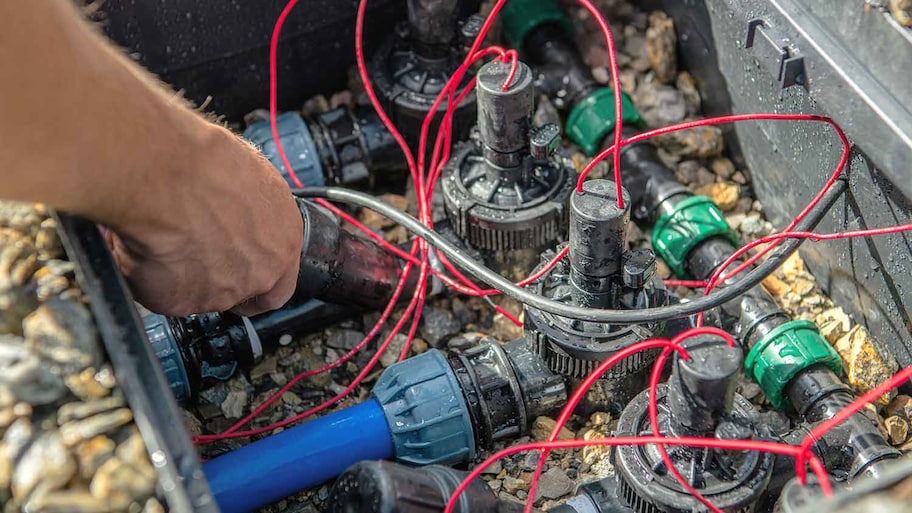
Reassemble the Controller and Valves
Photo: Tomasz Zajda / Adobe Stock
Place the valves back inside the valve box and replace the lid. Put the controller (or timer box) back on the wall. Double-check that all wiring is capped and secured safely before restoring the water and power and plugging the sprinkler controller back into a power outlet.
Test and Program the System
Turn the sprinklers on to test that they are working properly. If you notice any discrepancies in the zones, the color-coded wires may have gotten mixed up, and you’ll need to restart.
Otherwise, you can program the system to your ideal watering schedule, ensuring each zone follows the best time to water a lawn. Return your tools to the tool shed and enjoy your handy irrigation system as it waters your yard for you.
DIY vs. Hiring a Sprinkler Repair Pro
The total cost to wire sprinkler valves the DIY way depends on how much wiring and waterproof connectors you need. Wiring costs about $50 to $100, and the connectors cost about $5 to $30. But your sprinkler system likely already contains these items, so you may not need to buy anything.
Just note that handling wiring and plumbing by making sprinkler repairs can be expensive and dangerous if you make any mistakes. Working with electrical wires poses a shock risk, and improper connections could damage the electrical control board of your sprinkler system, causing it to malfunction.
Typically, the white wire is the common wire on a sprinkler valve. This makes it easier to identify, and many local electrical codes require the common wire to be white. However, in some places, any wire can be the common wire. If you ever need to call in a pro for repairs, the industry standard is for the white wire to be the common wire. So, if you decide to switch it up, relay that information to the sprinkler specialist before they start working.
Sprinkler valves typically have 16 AWG or 18 AWG wires. AWG, or American Wire Gauge, is the standard measurement for wire gauge sizing in the U.S. The gauge is the thickness of the wire, with higher AWG numbers indicating thinner wires. You can find the gauge measurement in your sprinkler system’s user manual or on the sprinkler manufacturer’s website.
Paige Bennett is a professional editor and writer with experience covering design, DIY projects, food, health, and travel, and holds a bachelor's degree in journalism from Ohio University.
Paige Bennett is a professional editor and writer with experience covering design, DIY projects, food, health, and travel, and holds a bachelor's degree in journalism from Ohio University.
The homeowners guide to Lawn Irrigation
From average costs to expert advice, get all the answers you need to get your job done.