Various sizes of plywood and boards (See below of measurements)
Whether your office doubles as a guest room or you simply prefer minimalist decor, a Murphy bed just might be the answer. This flexible piece of furniture allows you to maximize space as you can easily pull it down from the wall or hide it away, making it a practical yet stylish option for homeowners.
While this is a complicated DIY that requires advanced carpentry skills, it is possible to tackle this project yourself if you have the necessary background. Learn how to build a DIY Murphy bed that increases your usable space for less.
Prepping to Build a DIY Murphy Bed
Technically, you can build a Murphy bed without using a pre-assembled kit. However, we strongly recommend using a kit to increase safety. Murphy bed kits are more likely to include high-quality components that can handle the bed’s weight and hydraulic shocks that compress slowly to assist with lowering and raising the bed. The kits include specific installation instructions for the lifting and lowering of springs to ensure your bed is safe for use. Kits are also less expensive than buying individual hardware parts.
Always protect yourself during your DIY home projects by using safety glasses, work gloves, hearing protection, and other personal protection equipment when applicable.
How to Build a DIY Murphy Bed
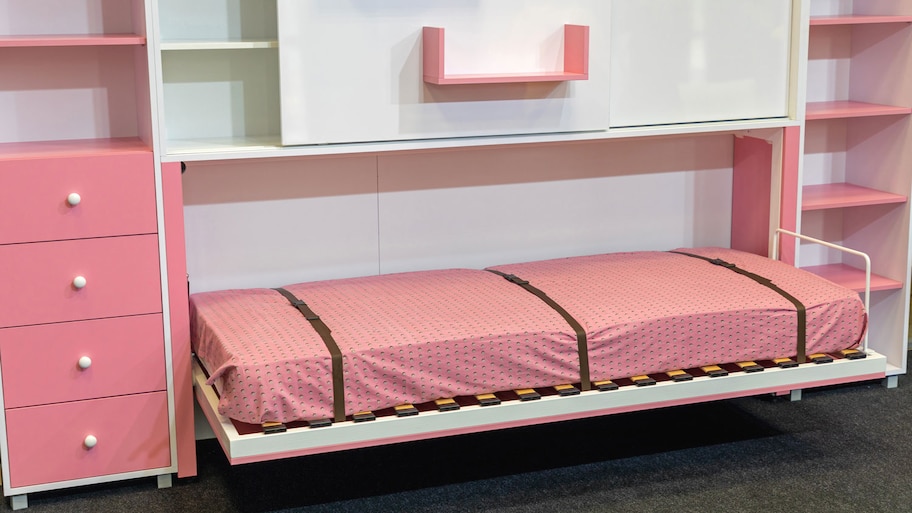
Photo: markobe / Adobe Stock
The following instructions contain steps to build a queen-size Murphy bed. You can alter the directions to your needs by carefully measuring any size mattress and adjusting the woodcuts accordingly.
Locate Wall Studs
Start the project by reviewing the Murphy bed plans in your kit. Locate the wall studs directly behind where your bed will go, and mark them for reference later. Also, clear enough space in the bedroom so you can work efficiently without interference.
Cut Lumber
Use a table saw or circular saw and a jigsaw to make the following list of cuts. If you desire, you can replace plywood pieces that are less than 12 inches wide with nominal lumber boards.
Use the replacement boards as they are and adjust your plan to match, or trim them on a table saw to replicate the plywood dimensions.
2 pieces 3/4 plywood at 31-1/2 x 81-1/2 in. for main panels
2 pieces 1/4 plywood at 30-1/2 x 80 in. mattress for support pieces
2 pieces 2x4 board at 60-1/2 in. for center struts
2 pieces 1x2 board at 60- 1/2 in. for end struts
2 pieces 1x2 board at 80 in. for frame sides
2 pieces 3/4-plywood at 31 in. x 81-1/2 in. for face panels
3/4 x 3/4 in. plywood or hardwood at 60-1/4 in. for leg rail
6 in. x 81-1/2 plywood for bedside rails
Use the jigsaw to cut a radius curve into the bedside rails to meet the foot rail height.
8 x 60-1/2 in. plywood for headrail
3 x 60-1/2 in. plywood for foot rail
6 in. x 81-1/2 plywood for bedside rails
3 in. x 64-1/2 plywood for cabinet header rails
14-1/2 in. x 64-1/2 plywood for cabinet header board
16 in. x 87-1/8 plywood for cabinet sides
Assemble the Bed Frame
Assemble the support structure for the mattress. Use clamps, glue, and screws to create two L-shaped end struts. Stand the 1-by-2 frame sides parallel and screw through them into the ends of the L-shaped end struts so the top of the L is perpendicular and facing outward at the ends of the frame sides.
Center one perpendicular two-by-four laying flat between the side rails and secure with 2-inch screws. Repeat with the other two-by-fours centered in the sections between the center two-by-four and the end struts.
Install the Bed Rails
Install the head and foot rail by standing them flush with the ends of the bed frame and securing them with glue and 1 1/4-inch screws through the end struts inside the frame. Secure the side rails standing up flush with the foot and head rails. Use glue and screws through the frame rail and two or three screws into the head and foot rails at the corner.
Attach the Face Panels
Lay the face panels so their long ends are parallel, with the bed frame and rails on top and all edges flush. Mark the location of the struts and rails. Remove the frame and glue between marks before laying the structure back down and securing it to the panels with 1 1/4 and 2-inch wood screws.
Build the Cabinet
Use glue and screws to fasten the header rails standing up flush to the front and back of the cabinet header board. Install the hinge pivot hardware as directed by your DIY Murphy bed kit instructions and attach the cabinet side panels to the bed rails.
Stand up the cabinet side panes and secure them to the header board with glue and screws so the top of the panels is flush with the top of the header rails.
Attach Cabinet to Wall
Remove the floorboard trim in the bed’s location or create cutouts in the cabinet sides to accommodate the trim on the wall. Push the bed and cabinet into position and secure them to the wall studs with 3-inch wood screws through the rear header rail. Install the legs and leg rail following the instructions in the kit.
Install Edge Banding
Use a hot clothing iron to install edge banding where necessary to hide plywood edges. Trim excess material after the glue is set.
Install Trim Work
Install crown molding or other trim material as you desire to complete the installation.
Finish the Wood
Apply a wood finish, including paint or wood stain and sealer of your choice.
Install Hydraulic Compression Springs
Carefully follow your bed kit's instructions and safety guidelines to install the stops and the hydraulic compression springs. For added safety, consider installing a separate locking device to prevent children from accidentally opening the bed.
Install Plywood Sheets
Open the bed and fasten the 1/4-inch thick plywood mattress support panels to the inside of the bed frame using trim nails or a pneumatic trim nailer.
Affix Mattress Support Straps
Install the mattress securing straps from your kit following their instructions and install your mattress.
Why Build a Murphy Bed?
A Murphy bed (aka wall bed, pull-down bed, fold-down bed, and hidden bed) is a bed that mounts to the wall, allowing you to fold it up or down as needed with a locking mechanism.
You might consider having a Murphy bed in an office, guest bedroom, studio, kid’s room, tiny home, or anywhere space is limited. One of the benefits of a Murphy bed is that they are a great way to reduce clutter in your home while allowing for full use of your space.
When folded up, Murphy beds can be made to look like cabinets, shelves, or decorative accents. Before deciding to build a DIY Murphy bed or buy a kit, you’ll want to ensure you have enough vertical and horizontal space to accommodate the bed, both when in use and tucked away.
Are Murphy Beds Safe to Use?
Properly installed Murphy beds are generally safe to use, provided the hydraulic springs and hinge point hardware are high quality and in good working order. If not properly installed, Murphy beds can cause minor or major injuries.
To increase safety, Murphy beds should be securely attached to the floor, wall studs, or both. The hardware in your Murphy bed kit needs to be capable of handling and holding most of the bed’s weight.
As an additional safety measure, you can purchase Murphy bed locks or retaining hardware that only allows the bed to move up or down when necessary. Also, use both hands when operating the bed to avoid pinching your fingers when closing.
How to Prevent Injuries When Using a Murphy Bed
While a properly installed Murphy bed is safe, there are some additional measures you can take to ensure you, your family, and furry friends can all use the bed without issue.
Ensure your Murphy bed uses a hydraulic lift mechanism, which will help keep the frame from falling when upright and make it easier to lift as well.
To ensure your bed closes properly, remove bulky bedding or pillows and store them elsewhere until needed.
Check your Murphy bed kit to ensure you can stow the bed with sheets on it (not all kits allow for this).
Install a lock to keep the bed safely stowed away when not in use.
Remove children and pets from the room when lowering/raising the bed to reduce risk of fingers or paws getting pinched.
Choose a mattress that is no more than 12 inches thick to avoid overloading the hydraulic lift mechanism.
Building a DIY Murphy Bed vs. Hiring a Pro
Building your own Murphy bed is a rewarding project that doesn’t take a lot of time and will cost well under $1,000, including the kit and lumber. However, this project requires precise woodcutting skills, the ability to safely use a saw, and acute attention to safety details that aren’t often a part of typical household projects. Although you don’t have to be a master carpenter, you must be comfortable and experienced with advanced DIY projects to safely handle this one.
Improper installation, or installation of hardware intended for other uses, can lead to injury due to the sheer weight of the unit and the springs’ inability to slow the movement of the bed. To ensure everything goes smoothly, have a helper on hand while installing your bed and its hardware.
Murphy beds are an ideal addition to multifunctional, minimalist spaces, such as guest rooms that double as your home office, studio apartments, or on-trend tiny homes. If your kids don’t have enough room to play in their bedroom, installing a Murphy bed means you’ll have space to set up an art table or ball pit during the day.
Building a DIY Murphy bed will save you the cost of labor over hiring a professional builder or installer.
For safety, don’t skimp on a proper Murphy bed hardware kit that includes design-specific components and hydraulic springs capable of handling the bed’s weight if you choose to build one. The temptation to save money by using less-expensive hardware carries high safety risks that could lead to injury.
A Murphy bed can handle standard-dimension mattresses up to 1 foot thick. The only restriction for mattresses less than 9 inches thick is to adjust the retention straps to secure the mattress.
Murphy beds must be securely attached to the studs in a wall unless the bed’s design states explicitly that a floor attachment is sufficient for safety.
Gemma has been a freelance writer and editor in the home and lifestyle space for the past five years and has a bachelor's degree in communication studies.
Gemma has been a freelance writer and editor in the home and lifestyle space for the past five years and has a bachelor's degree in communication studies.
The homeowners guide to Furniture Refinishing and Repair
From average costs to expert advice, get all the answers you need to get your job done.