How to Seal a Driveway: A Step-by-Step DIY Guide
Learning how to seal a driveway has a big payoff in both the short and long term


Want to boost your home’s curb appeal? Sealing your driveway isn’t just an aesthetic option—it’s totally practical. This DIY project makes your driveway look brand new and helps prevent the kind of wear and tear that leads to an expensive driveway replacement.
While many homeowners prefer to hire a local driveway seal-coating contractor, going the DIY route can save you more than $1 per square foot on driveway sealing costs. All it takes is a weekend of hard work. This step-by-step guide will show you how to seal a driveway. Now, roll up your sleeves and get going.
Why Is Driveway Sealing Important?
There are many benefits to learning how to seal concrete around your property. Sealant can make your old driveway look a bit newer, but more importantly, it can help prolong your driveway’s lifespan, kicking a costly replacement further down the road. This product essentially acts as a weatherproof barrier that blocks out UV rays, moisture, and corrosive chemicals—the stuff that can damage your concrete or asphalt over time.
Common Driveway Sealing Mistakes to Avoid
Sealing your driveway is tough work, and it’s easy to make a number of mistakes along the way. To help, we’ve pointed out some of the most common mistakes homeowners make when sealing their driveways, but if you’re not fully confident in your abilities, we recommend setting down the sealer and calling in a professional.
Applying Sealant Too Early
You must wait the appropriate amount of time before you seal your driveway. Most pros recommend waiting about six months after driveway installation before sealing it. That's because the driveway needs enough time to cure and harden properly.
Sealing Too Often
You should avoid sealing your driveway too often. That means low-trafficked areas should get a sealing every two to three years, and high-trafficked areas should get it every year or two. If you seal it too often, you risk getting a build-up of sealant on your driveway that can crack and peel.
Sealing Over Damage
It's crucial to repair any cracks or holes in your driveway before you seal it. Furthermore, if your driveway is uneven, you should have a pro level it out before applying sealant. Repairing a driveway is a heavier lift; we recommend calling a nearby driveway repair company to handle the job before you start sealing.
Not Checking the Weather
The timing of your sealing goes beyond the frequency (every few years). You also need to pay attention to the time of the year—and what the weather is like day to day.
For starters, the best time to seal a driveway is in the late spring, summer, or early fall, when temperatures are likely to stay above 50 degrees Fahrenheit. That said, avoid the hottest parts of summer, as you don’t want to apply sealer if temps are going to soar above 95.
Similarly, you’ll need to check the forecast to make sure it won’t rain for the next few days. You’ll also need to wait at least one day from the last rainstorm.
Hiring the Wrong Pro
If you're not up for DIYing your driving sealing, you should hire an expert to do it for you. But be sure you hire the right pro for the job. Low prices don't mean they're always the best person to do the work. When hiring someone to seal your driveway, collect a few quotes and get references to make sure they know what they're doing—and can do it well.
How to Prep for DIY Driveway Sealing
Before you seal your driveway, you’ll need to plan out your project. This includes buying the right sealant, getting all your tools and supplies in order, and finding the perfect weekend to do the job—which can be surprisingly difficult depending on the climate. Here’s what you should do in advance:
Purchase the Right Driveway Sealant
There are different types of driveway sealant, and which one you need varies based on the driveway you have and its condition. Asphalt driveways typically require coal tar or asphalt-based seal-coating, though some contractors may use a rubberized sealer. Concrete driveways typically require epoxy, acrylic, or silicate sealants. Here are the best driveway sealers for asphalt and concrete.
Either way, it’s important to choose a high-quality sealant. Read reviews and specifications to find which works best for you. Keep in mind that manufacturers formulate some sealants for newer driveways that are well-maintained, while other sealants are better for older driveways that may have more damage. Always buy a container more than you think you’ll need, just in case.
Collect Your Tools and Supplies
Once you have your sealer, you’ll need some extra supplies. If you don’t already have them, add these items to your shopping list:
Power washer or hose with spray nozzle
Gloves
Stiff-bristled push broom
Driveway cleaner
Old paintbrush or dashing brush
Oil-degreasing detergent
Oil-spot primer
Drill with paddle attachment
Poly sheeting
Duct tape
Squeegee or broom sealant applicator
Different sealants are applied in different ways so refer to the manufacturer’s instructions. Typically, you’ll apply asphalt sealant with a squeegee applicator and concrete sealant with a broom applicator.
Check the Weather Report
Applying sealant is a delicate process that requires just the right temperatures and humidity levels for the smoothest application. Fortunately, you only need to reseal the driveway every one to three years, so finding that perfect weekend won’t happen that often. Here are some considerations:
Make sure there’s no forecast for rain for at least three days. You want the driveway to remain dry for at least one day before and one day after applying each layer of sealant.
Opt for late spring, summer, or early fall to do this project. Temperatures should stay above 50 degrees Fahrenheit, even overnight, for the sealant to dry properly.
Avoid temperatures above 95 degrees Fahrenheit that can cause the sealant to dry too fast.
You may love the sleepy morning mist on your grass, but fresh sealant doesn’t. If you live somewhere with mist and dew early in the day, plan to stop applying sealant by 3 p.m. to prevent it from washing off the next morning.
How to Seal a Driveway
Follow these steps for a DIY driveway sealing job so good that your neighbors will have no idea you did it yourself.
1. Trim (or Remove) Overgrown Shrubs, Grass, and Weeds

Plants can interfere with the sealing process. Trim overhanging shrubs and grass along the edges of your driveway. Pull out weeds (especially if there are weeds in driveway cracks), and ensure there’s nothing that could potentially shed debris that would get stuck in your sealant before it dries.
2. Clean Your Driveway
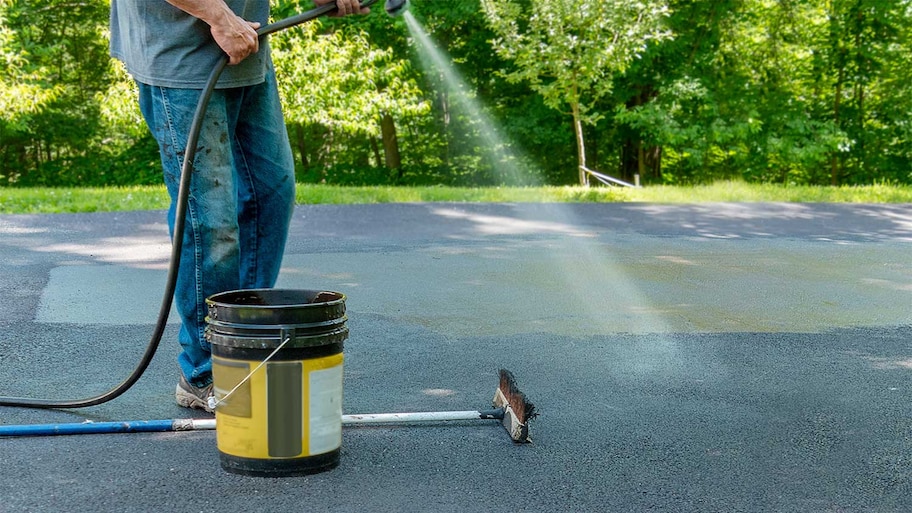
One of the biggest DIY driveway sealing mistakes is not properly cleaning your driveway beforehand. Sealant cannot stick to a dirty driveway. There are two ways you can apply driveway cleaner:
Using a power washer with a soap nozzle
Using a garden hose applicator
Either way, after you apply the cleaner, use a stiff-bristled push broom to scrub it into your driveway. Rinse with your hose or power washer (use a 40-degree nozzle), and get rid of all the dirt, debris, and soap suds. Allow your driveway to dry.
3. Scrub Out Extra-Tough Oil Stains
Sealant can’t properly adhere to oil, grime, and gas residue. That’s why it’s so important to properly clean the area before you seal it. Unfortunately, these types of stains are very difficult to remove. To remove these stains from your driveway, you’ll have to scrub them out using a stiff-bristled brush and degreasing detergent made specifically for your type of driveway.
4. Prime the Area
After you’ve cleaned the stained area of your driveway, paint over the trouble spots using an oil-spot primer—just make sure your driveway is completely dry before priming. You can apply the primer using a paintbrush or similar brush tool. Feel free to add a second coat if you notice any particularly stubborn stains. Let the primer dry before applying the sealant.
5. Repair Cracks and Potholes

Sealant will refresh your driveway, but it won’t effectively fill in holes or cracks. Before applying a sealer, you should patch any imperfections. Fixing small cracks in your driveway costs about $0.10 to $0.15 per linear foot for crack filler. Follow the manufacturer’s instructions on mixing, applying, and drying crack fillers or patching agents. Let the patchwork fully dry before applying sealant.
Keep in mind that large cracks could signal structural damage. You may need to call in a driveway paving contractor if you’re dealing with more than minor wear.
6. Prep the Area
Driveway sealer tends to splash when you pour it, so you’ll need to protect the surrounding area. Cover your garage door with poly sheeting. Use duct tape as painter’s tape along the edges of concrete walkways or driveway edging. You’re better safe than sorry.
7. Mix the Sealant
Once you’ve prepped your driveway, you can start mixing your sealant. Mixing sealant is hard to do with just a stir stick, so it’s best to use a drill instead. Try this method for headache-free results:
Turn the sealant container, unopened, upside down the night before you plan to mix it. This will make it easier to mix when you need it.
Cut a hole in the center of the lid to insert the drill and paddle. Keeping the lid on helps prevent splashing.
Use a drill with a paddle to stir the sealant.
Start mixing with the paddle toward the top of the sealant, then slowly lower it deeper into the sealant container and back up.
8. Apply Sealant Around the Edge of Your Driveway
Start by applying sealant along the perimeter of the driveway. Use an old, wide paintbrush or dashing brush to apply a generous layer of sealant along the edges. It should feel almost like you’re framing your driveway—and don’t spread it too thin. You want to make sure there’s enough to sink into the pores. This step helps you achieve neat, clean edges that make your asphalt driveway look new.
9. Apply a Thin Coat of Sealant to Your Whole Driveway
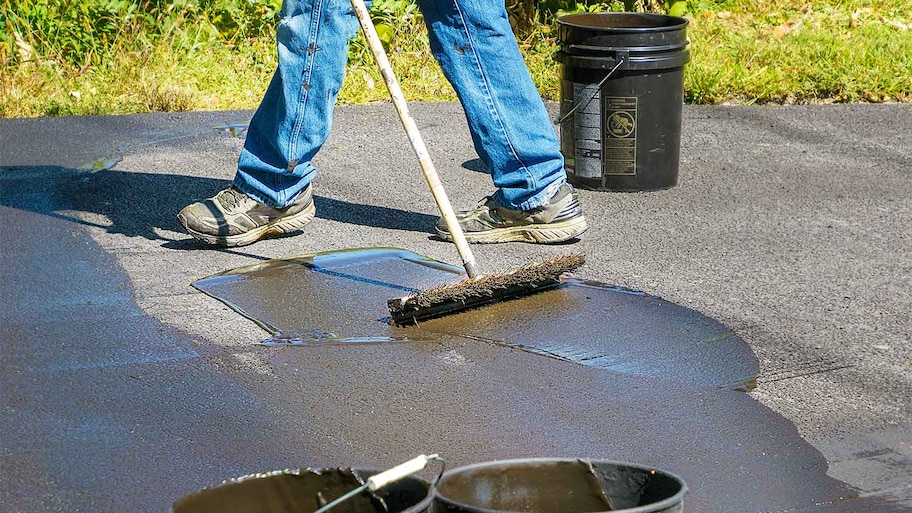
Prepare to spend a couple of hours applying the first coat of driveway sealant using the following steps:
Pour about 2 gallons of sealant slowly in a U-shape, starting in one of the top corners of the driveway.
Use the squeegee or broom to spread the sealant in a thin layer across the driveway, working from top to bottom or one side to the next.
Once you get about halfway through a bucket of sealant, start mixing the next bucket. This will prevent differences in color if you need multiple containers of sealant.
Once you’ve finished applying the sealant, let the first coat dry for eight hours.
10. Apply a Second Thin Coat of Sealant (Optional)
Your driveway may only need one coat of sealant. Refer to the manufacturer’s instructions. If you need a second coat, repeat the same process as above.
11. Let the Sealant Dry
It’s tempting to hop in the car and park it back in your driveway as soon as it seems like your sealant has dried, but resist that urge. You’ll need to wait 24 to 48 hours before driving on a newly-sealed driveway. Even if the sealant feels dry to the touch, rest assured, it probably isn’t. Sealant takes time to harden completely, so wait 24 to 48 hours before driving or walking on your driveway.
How to Take Care of a Newly Sealed Driveway
After you seal your driveway, the maintenance begins. Leaves, seedpods, and pine needles will collect on the surface, but you can sweep them away with a broom. Keep watch for any oil or gas puddles, and clean them as soon as you notice them.
The most important step, however, is to prepare your driveway for the winter. Certain deicing agents can break down new sealants, and those containing ammonium sulfate or ammonium nitrate tend to be some of the harshest. The good news is that most deicers won’t do much damage if you use them sparingly. Always apply deicers per the manufacturer’s instructions, and use a plastic shovel when shoveling snow; metal shovels can damage the surface of your driveway.
Beyond that, you’ll only need to reseal your driveway every one to three years. Take a look and see how your driveway is aging. If you can see the color of the individual stones that make up your driveway, it probably could benefit from another coat.
DIY vs Hiring a Pro
Sealing a driveway is not a DIY task suited to beginners. Only homeowners with an advanced understanding of driveway care should attempt this project. Instead, most homeowners would be better off hiring a professional driveway sealing company, which can advise on the best time to seal the driveway and the right sealer to use.
Frequently Asked Questions
Apply either one or two coats, depending on the manufacturer’s instructions.
Sealant comes in 5-gallon buckets that can cover up to 400 square feet. Measure your driveway to get the exact square footage, and remember to factor in enough sealant for two coats.
It depends on the type of sealer. Some sealers can dry in as little as 4 hours, but many can take up to 48 hours to fully cure. To play it safe, don’t drive on your driveway for two days after sealing.
Ideally, you should seal your driveway when there won’t be rain for several days, but at a minimum, there can’t be rain for at least 24 hours. If it rains shortly after you seal your driveway, the water can wash away the sealer and render your work useless. You’ll have to wait for your driveway to dry out and try applying again. Note that some sealers—like oil-based sealers or specialty fast-drying sealers—may cure faster. Ask your contractor for information on timing before the install, and if there’s rain in the forecast, postpone the job.