Showing posts with label home. Show all posts

Thursday, May 17, 2018

Sunday School Craft - I Am a Child of the King! Cuff Bracelet

The little kids are learning about Jesus' teaching the multitudes about His Kindgom. So today, we are going to make this bracelet.


You need: (colored) paper (preferably cardstock, but plain is fine), decorating items (stickers/crayons/glitter/etc.), scissors, and a stapler


First, print out the template at the end and cut the bands apart.


Next, decorate the band.


Then loop it around. . .


. . .and staple it.


You're done!


Template:


The End!


Wednesday, April 25, 2018

Sunday School Craft - Jesus Heals a Paralyzed Man

I totally ripped this one off a German Sunday School lesson site. Anyways, I refined it so that you can make the least amount of cuts (in case you, like me, are in charge of preparing crafts beforehand.)

This one teaches the story of Jesus healing the paralyzed man really well. As I said, I did rip it off a German site, but I added the verse in English at the top. 


You need: cardstock, scissors (or cutter), Exacto-Knife, and crayons (optional)


First off, you want to cut the "ribbon" part away from the main part. You can do this with scissors...or you can do it with my new favorite office tool: The paper cutter!


Cut one:


Cut two:
(Throw the right-hand portion away.)


Next, stack all your "main portions" on top of each other so they are perfectly even. Then, very carefully, and with your non-dominate hand pushing down on the top of the stack (and your thumb out of the way!!!), pull the Exacto-Knife through all four cutting places. If your stack shifts during the cut, restack and press the stack harder with your non-dominate hand.


Cutting through the stack like this kills several birds with one stone. First off, you can cut through 2-4 pieces of cardstock at a time--saving time. Secondly, you don't have to worry about cutting through to your table when you do it this way.


Okay, here is how you thread the "ribbon" portion through. Remember to thread it through all four slits.


The first scene you should see is the man being let down by his friends in the top window, and Jesus looking up in the bottom window.


Keep pulling and you will see the man and Jesus interacting.


Finally (and don't pull too hard here or you will have to re-thread!), you will see where Jesus healed the man who is now holding his bed.


Template: 


The End!


Thursday, April 5, 2018

Sunday School Craft - Daniel's Lion 2

Another Daniel's lion craft!


First, print out the template at the end of this post. (I compiled it from two lion pictures in a Google search.)


Next, fold the paper just under the top lip of the lion.


Then, fold that top lip down to meet the bottom lip.
Done!


From here, the kids can color the lion however they want. 
You can even cut the eyes out if you want to make a mask.


Template:
 

The End!


Wednesday, February 21, 2018

Sunday School Craft - David's Five Stones (with verse tag)

This is like. . .my third David vs. Goliath craft (actually. . .maybe my fourth). Anyways, it's because the same little kids are still in the class when I started making these and I don't want them to make the same craft twice! (We keep teaching kids from 2-4 the same select stories from the whole Bible in order, over and over, until they get to the next level. In case you were wondering!)

Today's craft: David's Five Stones


You will need: brown fabric (I used a roll of wreath burlap), jute (or regular string or yarn), stones (make sure your kids are at least three years old and won't put them in their mouths), scissors, cardstock, and single hole punch.


First, cut out your fabric (or wreath burlap) into squares. (You can do circles, but they take longer).


Print out the template at the end and cut the tags apart.


Punch the top corner of each tag.


Cut the string into however many pieces.


Let the kids select five stones and put them in the middle of each square.


Pull up the corners around the rocks.


Put a tag on a piece of string.


Tie the string around the little square of fabric! (Those stones are for photo aesthetics. . .There are five others inside the fabric! . . .Obviously!)


Template:


The End!


Thursday, January 25, 2018

Sunday School Craft - Baby Moses in the Bulrushes


Today, we are going to make a cute little tiny craft: Baby Moses in the Bulrushes!

You need: paper, cupcake cups, green tissue paper, scissors, and glue (crayons optional)


First, print out my template at the end. Then, cut out as many Baby Moseses as you need.


Color the baby.


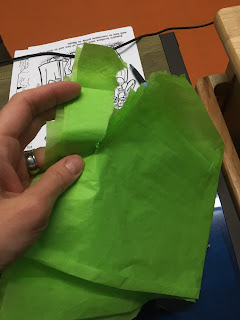
Get some green tissue paper.


Hopefully, you will be able to find your scissors. I looked all over the craft cabinet at church and couldn't find any. So. . .if you can't find scissors, carefully tear your paper into strips.


Here's a trick for a fast and clean tear: put down a hard plastic straight-edge on top of your paper and rip along the edge.


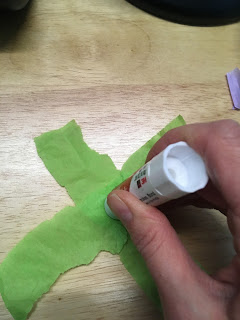
Take one strip of paper and put glue in the center.


Then, add another paper strip on top of it and perpendicular.


Add more glue to the top of this.


Stick a cupcake cup on top.


Add some glue on top of this.


Stick your baby on top. Done!


Template:


The End!