My pastor's wife asked me to make a box to collect candy for our church's Trunk or Treat. Immediately, I knew I wanted to make a box that looked like a pumpkin. I searched Pinterest, but I couldn't find any. . .
And, anyways, I already knew what I wanted to make in my head:
This box doesn't have to be just for candy collection. You may be a teacher and want to make one for your classroom. If so. . .
This is how to make one yourself!
Total cost: $3.00!
The large box was one that we had at church from some shipment or other. I went to Dollar Tree and found two rolls of orange wrapping paper, and one leafy garland.
The first step was to turn all the flaps of the box so they were out.
The next step was to make knife pleats folded like this: (You can see other pictures of these pleats in other pictures, don't worry. You can also Google "knife pleats - casual.")
Then, I rolled tape like this. . .
And folded them up.
The rolling of the tape was taking too long, so I just started taping the rest of the pleats like this:
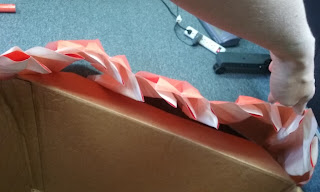
This is one side completely finished. (Be patient! It takes a while. Also, don't press down the pleats any farther than about two inches from the top. You want the rest of the paper to be folded but not creased:
Here is a back-side view of the pleats. See how they are folded from this angle?
Okay, once that side was done, I started pleating the other side of the paper.
This is what one whole roll of wrapping paper looked like. See how the middle of the paper is only slightly folded, but only the outer sides are pressed into pleats and taped?
Then, I turned the whole box upside-down and started taping the folded paper onto the bottom left side of the box. (I didn't put any paper on the back, because this box was going to be against a wall. Feel free to put paper on the back of yours if you need it. In that case, buy three rolls of wrapping paper!)
[Not pictured]
Then, I turned the box on the side that will be against the wall, and taped the paper to the box around the bottom of what would be the front.
This next step is VERY important if you want your pumpkin to have "body" and stick out like a real pumpkin: Turn the flaps of the box down. This is a little awkward as the wrapping paper will naturally be creeping up the sides. You kind of have to finagle it so you don't crush the paper as you do this.
Then, I taped the top of the wrapping paper into the top edge of the box. The paper covered exactly half of the pumpkin! I got lucky!
At this point, you can stick your hand inside the paper and sort of push it out from the inside to get it to round out like an actual pumpkin. If you want to fill it with packing peanuts or something light and puffy, feel free. I didn't.
Then, I got smart and instead of pleating one side of the paper at at time, I pleated both sides at the same time. Much faster and easier!
Then, I taped this other piece of paper to the box, starting with the box completely upside-down. . .
And then turning it on its side to finish taping the bottom part around to the front.
It's starting to look like a real pumpkin!
Then, I Googled pictures of pumpkins to make the stem, and free-hand cut one out of a piece of green paper. (If you don't have green paper, you could also paint the stem green.)
Then, I traced the stem on the back flap of the box. . .
And cut it out.
Then, I glued my green paper to it.
To keep the stem upright, I grabbed one of the empty wrapping paper tubes and taped it to the back.
Then, I added the leaf garland. (First I taped two of the leaves to the stem, but the tape kept coming off, so I stapled them.)
The tape on the wrapping paper was starting to pull away from the box, so I reinforced all the tape with clear packing tape.
Okay, now the box is done, but I wanted to make a little sign for people to know what the box was for, so I spent another $3.00 at Dollar Tree and bought this cute little owl and two fall leaves.
I also printed out a speech bubble for the owl to say, "Whoooo wants to help with Trunk or Treat? Deposit candy in the box below!"
The End!


.jpg)


