Transferring a Domain Purchased Elsewhere to Wix
5 min read
When you transfer your domain to Wix, Wix becomes your domain host. This means your domain's contact information, DNS settings, and registration payments are all managed from within your Wix account.
Before you begin:
- To transfer your domain to Wix, you must get an authorization code (also known as the EPP code) from your current registrar. The code is usually sent to your domain's registered email upon request. If needed, contact your current domain registrar for assistance.
- Your domain must be unlocked before you begin the transfer. In most cases, you can contact your current registrar to unlock the domain. In some cases, your domain might be locked due to ICANN's 60 day lock policy.
Transferring your domain to Wix
Transfer your domain so that Wix becomes your domain host. Once the transfer is complete, all your domain's settings and billing will be managed at Wix.
Tip:
The transfer process can take up to 7 days to complete. If you need your domain linked to your site in a shorter timeframe, connect your domain to Wix first. Learn more about the difference between transferring and connecting a domain.
To transfer your domain to Wix:
- Go to Domains in your Wix account.
- Click Add an Existing Domain and select Transfer your domain to Wix.
- Read the information on your screen and click Start Transfer.
- Enter the domain you want to transfer (e.g. mystunningwebsite.com).
- Click the drop-down and select the domain host you purchased your domain from.
- Click Continue.
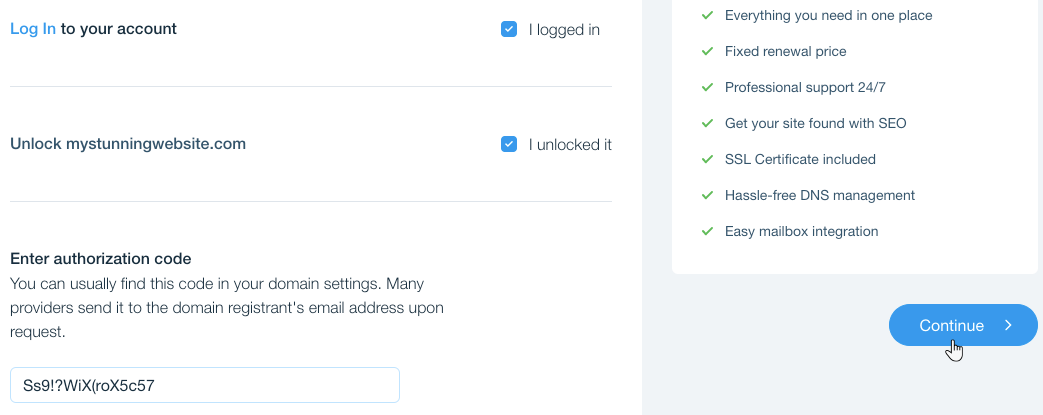
- Log in to your account with the current domain host:
- (In a different browser tab) Log in to the account where your domain was purchased.
- (In your Wix account) Select the I logged in checkbox.
- Make sure your domain is ready to transfer:
- (In a different browser tab) Unlock your domain from your current domain host.
- (In your Wix account) Select the I unlocked it checkbox.
- Get an authorization code from your account with your current domain host.
- Paste the code under Enter authorization code.
- Click Continue.

- Select an extension period of at least one year.
Tip: If you have a free domain voucher, it's automatically applied. - Click Continue.
- Check and/or edit your contact information. Then, click Continue.
- Select a privacy option:
- Private Registration: Your contact details won't appear in the WHOIS domain information records. You can turn the privacy protection option on and off whenever you want.
- Public Registration: Your name and address always remain public in the WHOIS domain information records. You can only change it to private when manually extending the domain subscription.
- Click Continue.
- Select your payment method and click Submit Purchase.
What's next?
Once you've submitted the purchase, an email is sent from [email protected] to your domain's registrant email, confirming the transfer has been initiated. It may take up to 7 days for your domain transfer to complete.
FAQs
We are here to help with all your questions. Click a question below to learn more.
My domain can't be transferred to Wix. Can I connect the domain to Wix instead?
What domain extensions can be transferred to Wix?
How long will the transfer take to complete?
I've recently changed my registrant information. Can I still transfer my domain?
Can I transfer a 'premium' domain name to Wix?
If I transfer my domain to Wix, what happens to the domain registration period?
If I transfer my domain to Wix, what happens to the domain privacy setting?
I've successfully transferred my domain to Wix, but my old site still appears. What's happening?
Can I cancel the transfer of my domain from another registrar to Wix?
Did this help?
|