Gimme That is a file transfer tool written in Python. It turns your computer into a server and your friends simply upload their files to your computer! It has a simple web interface. So anyone can use it. It uses Python 3.4+, so...
Just use pip install gimmethat to install.
It has following Python package dependencies, at its minimum
flaskflask_bootstrapnetifacesgunicorn
And if you want to use additional features like antivirus integration and notifications, you would need
Python side
clamd(for antivirus integration)notify2(for notifications)
OS side
python3-gi(for notifications)libnotify-bin(for notifications)clamav(for antivirus integration)
Gimme That has a simple concept: You turn yourself into a server, add some username and password if you wish to have an authorization, give that credentials to your friend with your adress and your friend uploads files to your computer.
So, there are several things you can do with this program.
You can restrict Gimme That's file uploading to a number of users with credentials. Just add the --secure optional argument to restrict file uploads to only authorized users with credentials. All information about user system is below. By default, Gimme That does not use authorization.
Use the line below to create a user named USER with the password PASSWORD
gimme add USER PASSWORD
Use the line below to remove a user named USER
gimme remove USER
Use the line below to change USER's password to PASSWORD
gimme change USER PASSWORD
You can see all users you created by typing
gimme show
Use the command below to run your server on port PORT
gimme run
This will produce the output which contains the address of the interfaces you can use to connect the upload page.
Once you've start the server, your friends can upload files to your computer. Please use Python 3.x.
You can specify port, title and upload directory by using optional parameters.
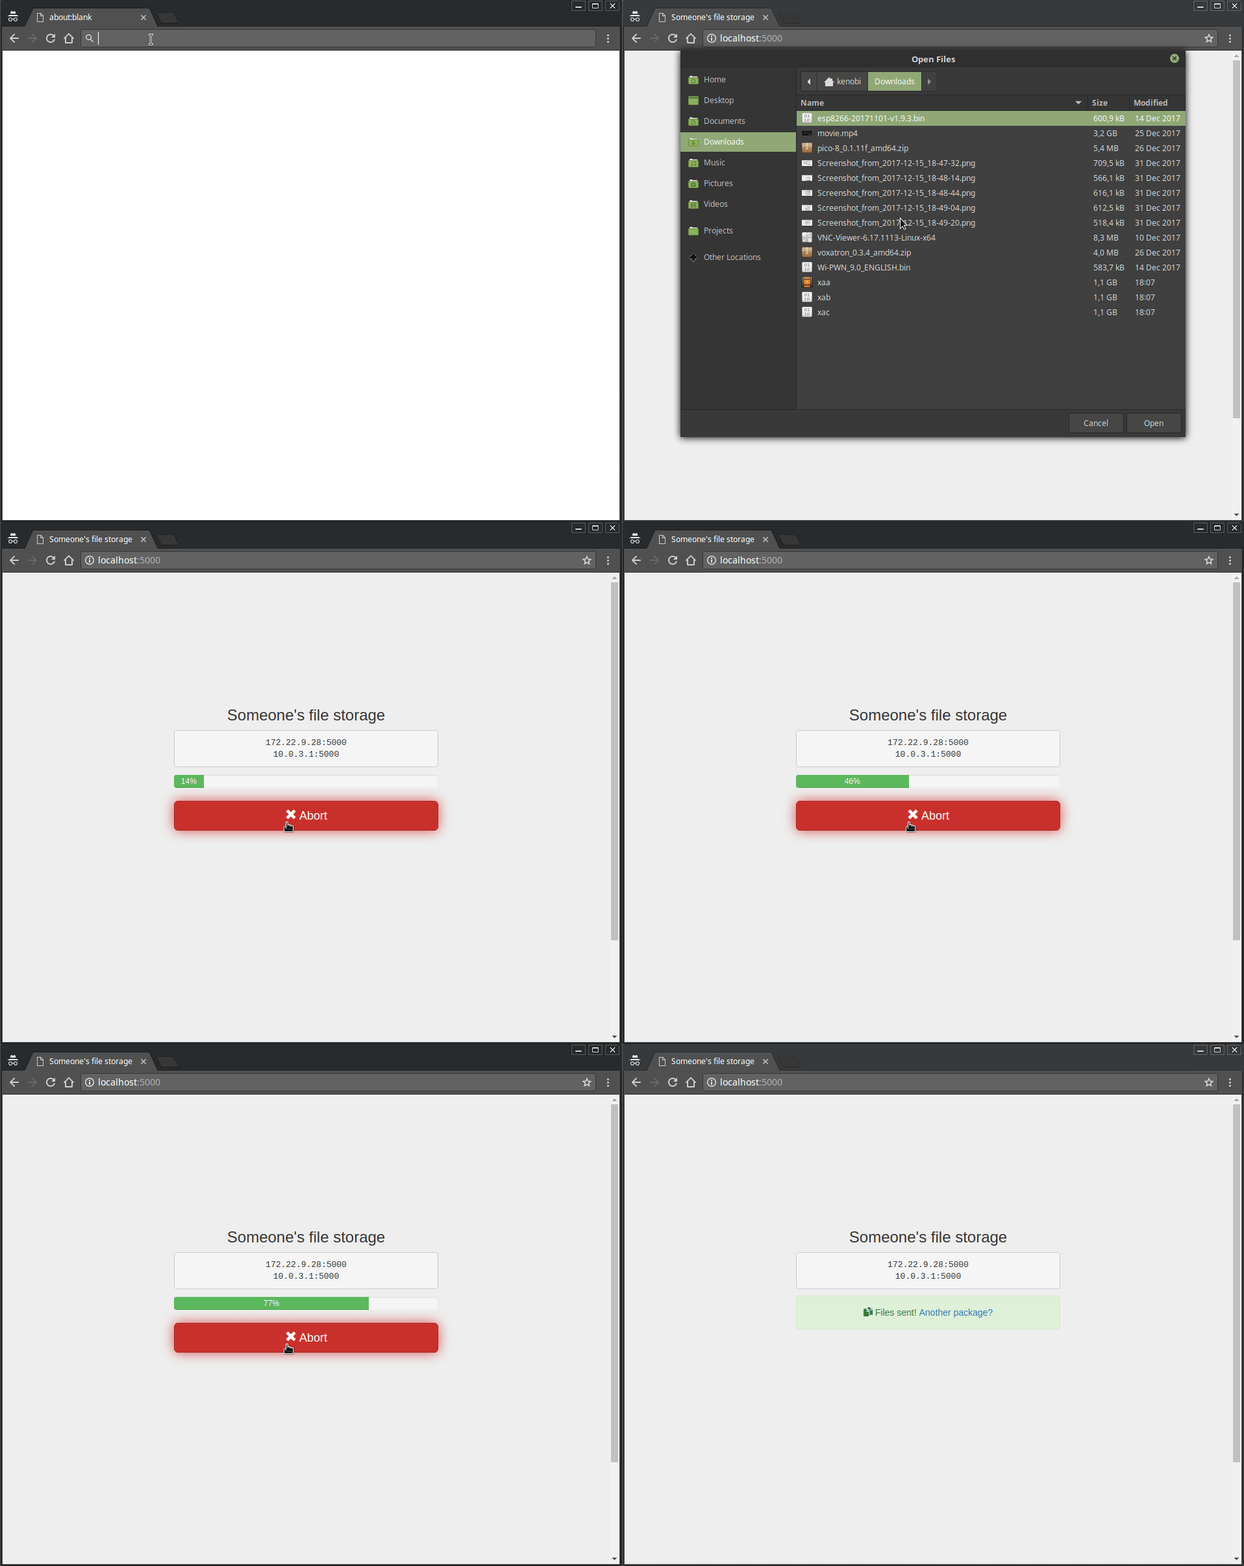
For example, to provide the screen above and to set upload directory to SOMEPATH, you should use the command below
gimme run --port 5000 --directory "SOMEPATH" --title "Someone's file storage"
| Name | Value |
|---|---|
--directory |
"~/Uploads" (~ is current user's home directory in both Windows and *nix) |
--port |
5000 if not specified. |
--title |
"" (Nothing will be shown as title) |
--max-size |
No limit if not set. Can be 256 for 256 bytes, 13.6K for 13.6 kilobytes, 1M for 1 megabyte, 2.2G for 2.2 gigabytes, etc. |
--scan |
False if not specified. Else, uploaded files will be scanned if you have ClamAV and will be removed if infected. |
--notify |
False if not specified. Else, you'll have notifications via libnotify-bin package |
--auth |
False if not specified. Else, uploading a file requires HTTP basic auth |
-
GimmeThat uses Twitter's Bootstrap.
-
GimmeThat does not overwrite uploaded files. When your friend
userused your server to uploadwiggle.jpgat2018-01-17 16:14:24.620737, program will put the files into~/Uploads/user/2018-01-17 16-14-24.620737/wiggle.jpg. So, even if he/she uploads the same file again and again, it'll be put into different directories. -
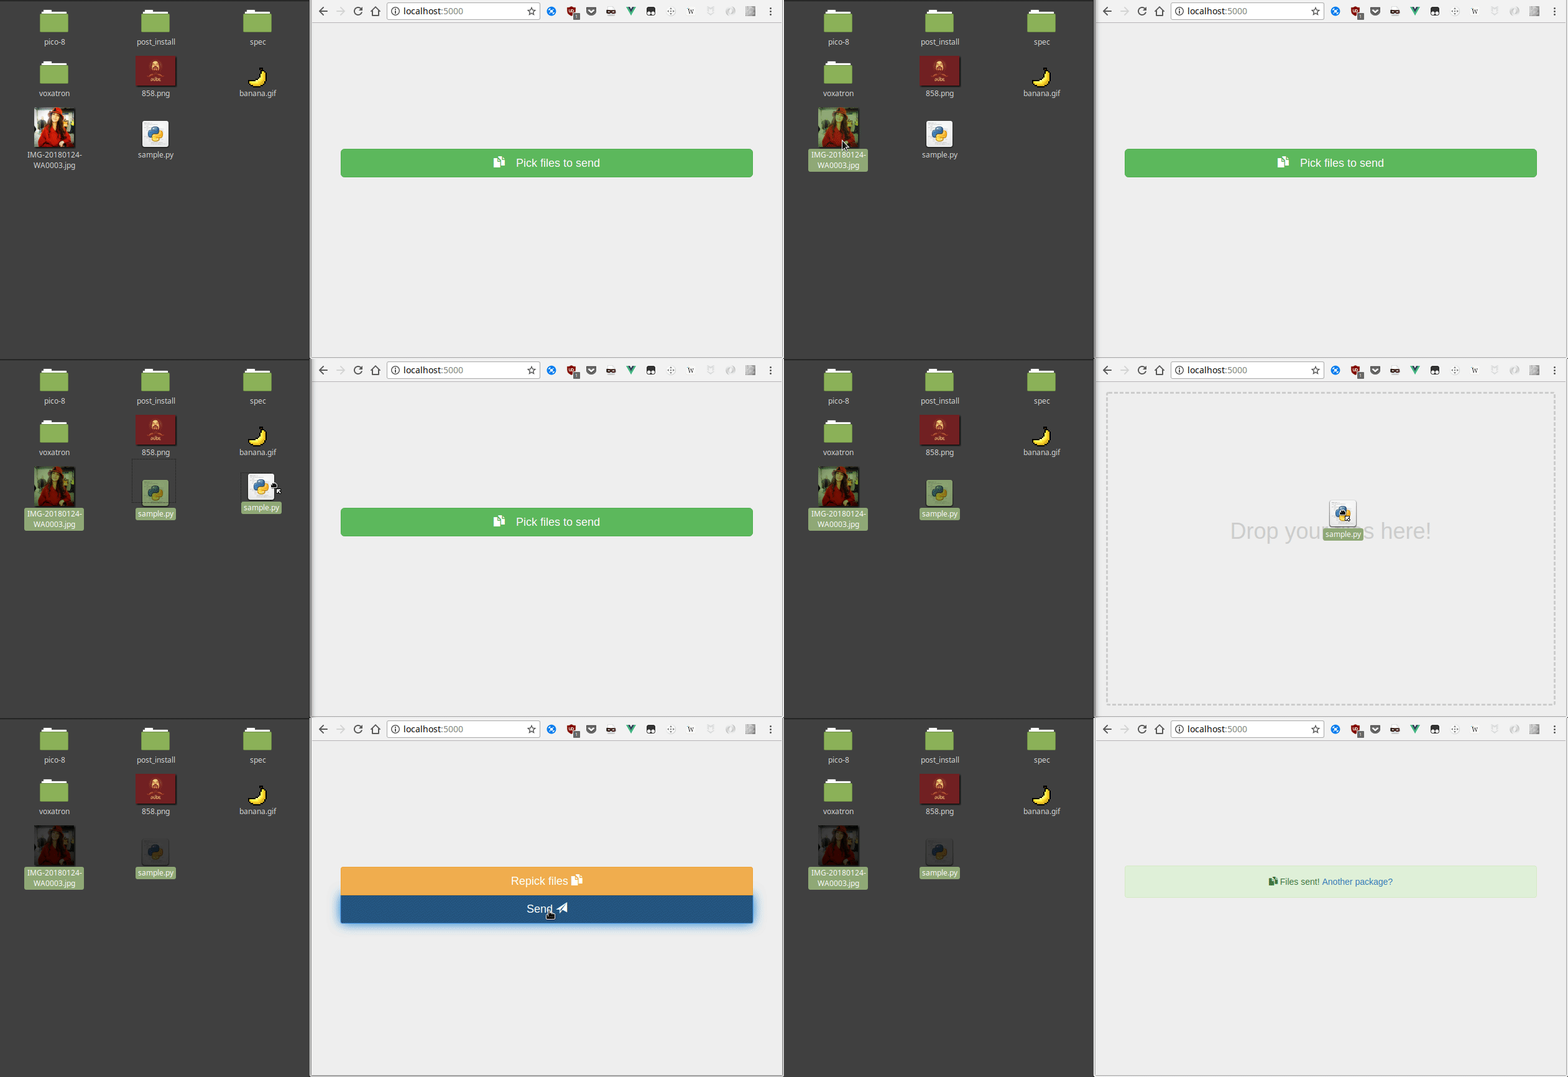
You can drop files. It has drag and drop support.
-
If you specify
--scanoption and getting interesting logs for every single file (or an error maybe), you may have the issues below: Both issues are solved for linux. Please check Antivirus Issues section.- Clamav is not installed.
- Permission errors. (Possible cause of
lstat() failed)
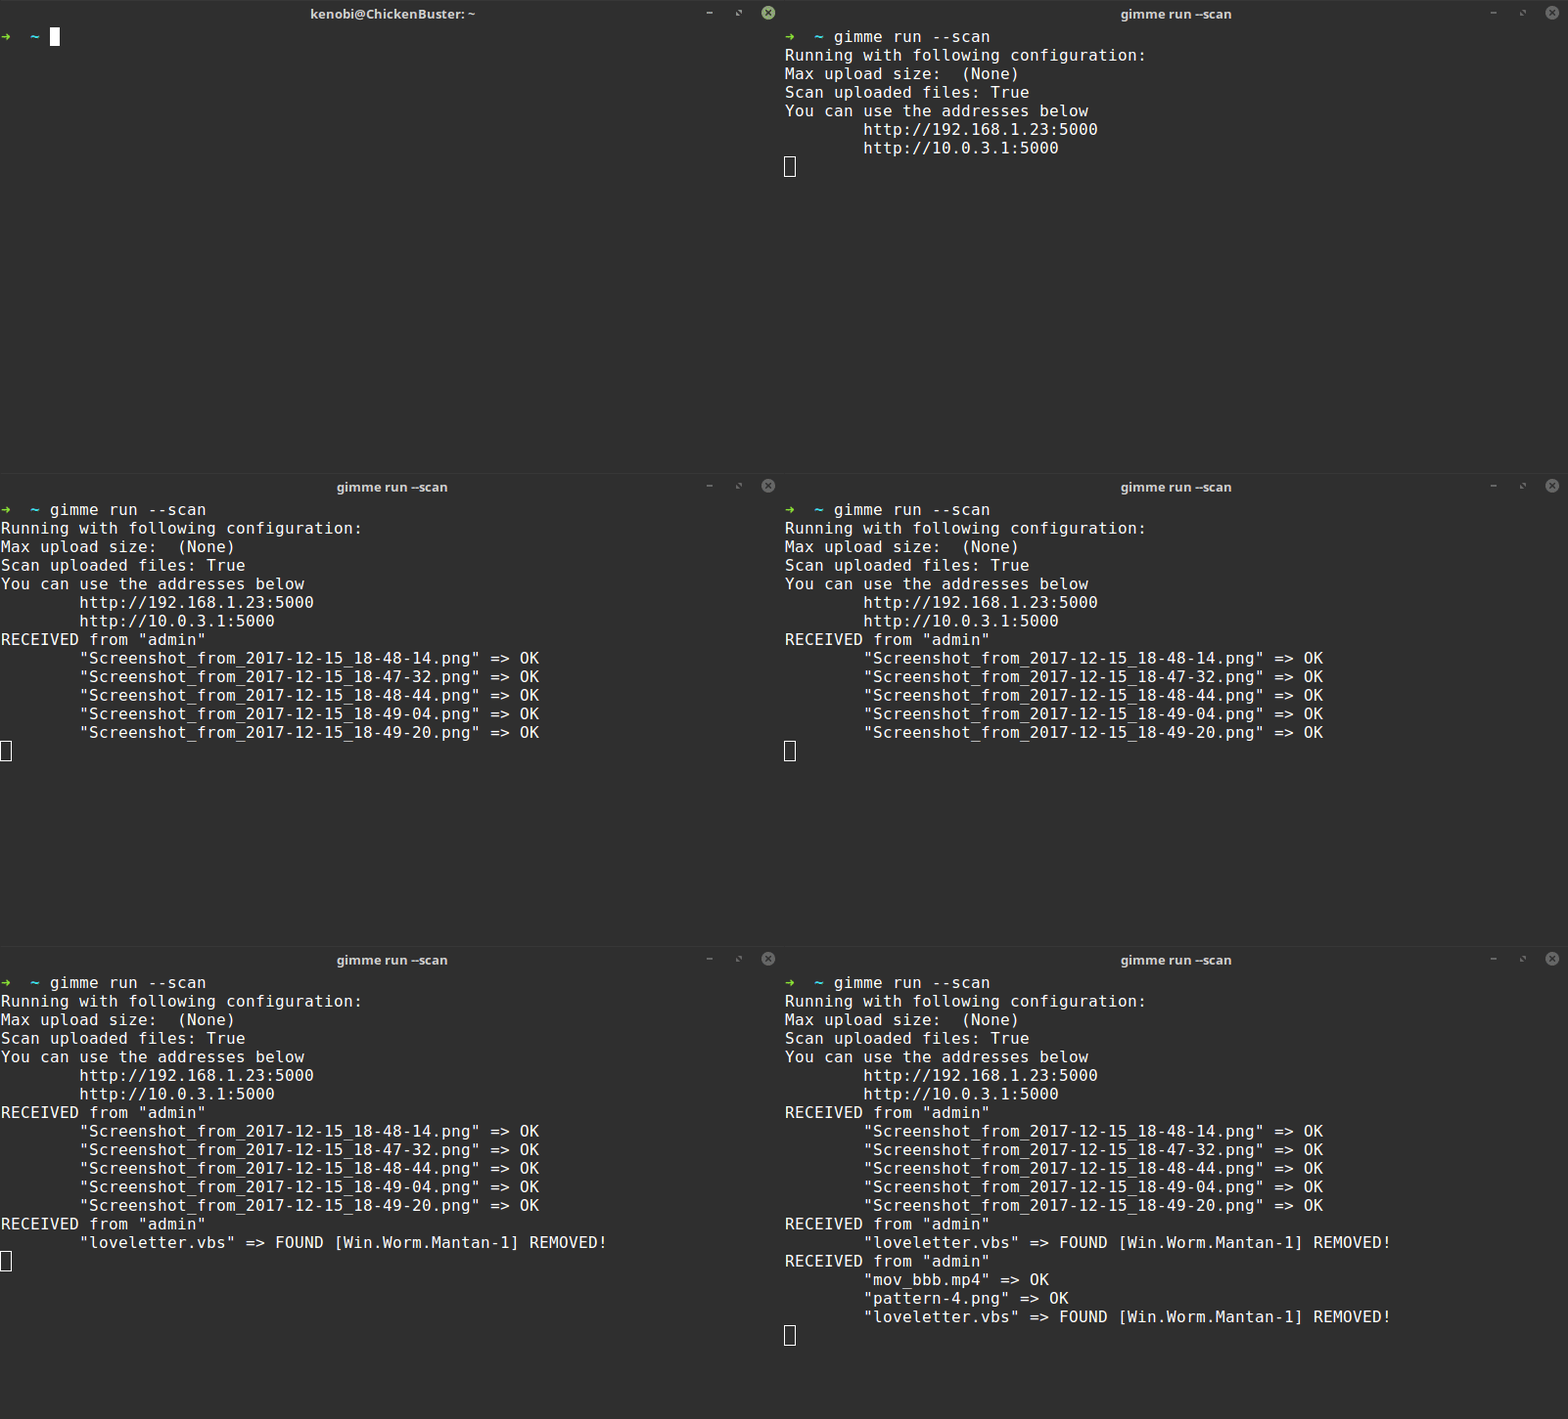
Command line while a client uploads some files, ClamAV's action when an infected file found, multi file uploading and removing infected ones while clean ones stay.
You can see the drag&drop support on Chrome
You will be notified if you prefer by using libnotify-bin
Note: For CentOS, please follow this tutorial then take the hard way. The commands below will not work for you obviously till the hard way.
Please use the command below to install ClamAV:
sudo apt-get install clamav-daemon clamav-freshclam clamav-unofficial-sigsThen update the virus DB by running the commands below. This will take some time.
sudo systemctl stop clamav-daemon
sudo systemctl stop clamav-freshclam
sudo freshclam  # It'll update the virus DB.
And then start ClamAV daemon:
sudo systemctl start clamav-daemon
sudo systemctl start clamav-freshclam
Optionally, you enable clamav-daemon so it will be automatically run on startup:
sudo systemctl enable clamav-daemon
sudo systemctl enable clamav-freshclamLinux users uses Debian/Ubuntu based distros, after the installation, run gimmeconf and you should be OK.
For all else - or if you're not OK with that - you should try the hard way.
I am assuming that you reinstalled the following packages: (If you didn't, please try reinstalling the packages.)
- clamav-daemon
- clamav-freshclam
- clamav-unofficial-sigs
Note: USERNAME is your account's username. Not the name which you created with gimme add.
Stop the ClamAV first:
sudo systemctl stop clamav-daemon
sudo systemctl stop clamav-freshclam
Just because I use ClamAV for on-demand scans, I set the user for ClamAV as ourselves.
To do this, open /etc/clamav/clamd.conf with your text editor and find the User line.
(Caution: It will require superuser privileges.)
...
User clamav
...
Replace the value clamav with your username. (My username is USERNAME here.)
User USERNAME
Save and close the file when you're done.
Add your user to clamav group.
sudo adduser USERNAME clamavThen change the ownership of the log file so it can use the file again
sudo chown USERNAME:clamav /var/log/clamav/clamav.logAnd lastly, start ClamAV again:
sudo systemctl start clamav-daemonThanks to the following reddit users for their ideas:


