I’m a student with no experience in woodworking or computers. But since I prefer desktops over laptops I decided to start a project last summer.
If I were to spend this much money (for a student at least) on the computer components, I might as well spent a lot of time on building a case. This could have been done way faster but given my little experience I only had basic tools like a chisel and files at my disposal.
Nonetheless I’m happy the final result and I recommend anyone who is in doubt about starting a similar project to just commit to it. It is easier than it looks.
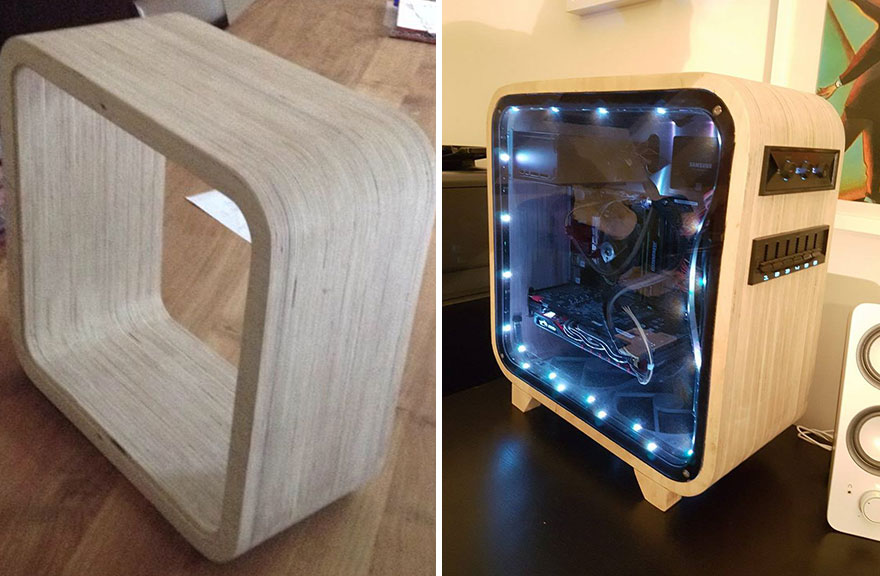
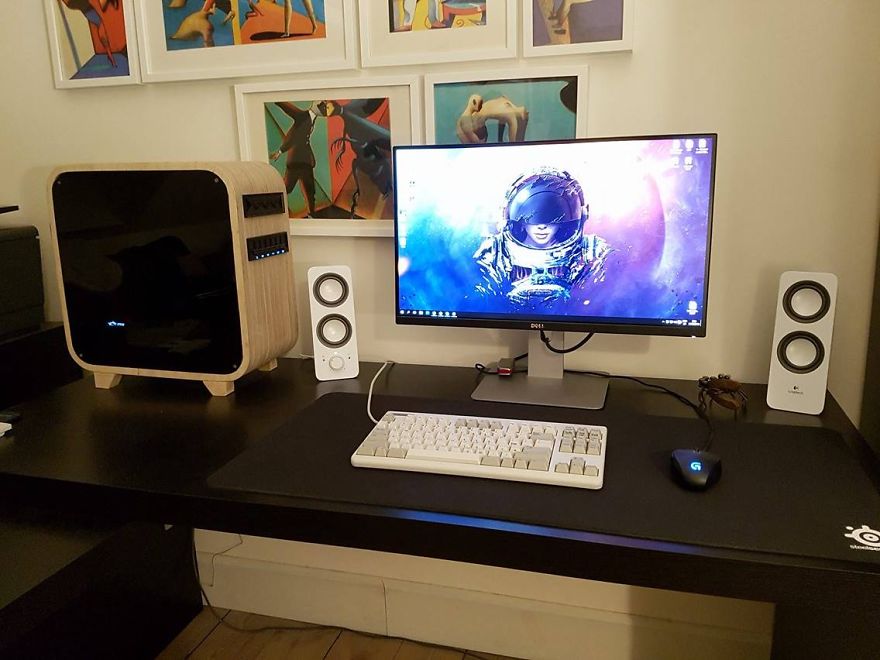
This is how it looks and you can make one yourself
I’m a student with no experience in woodworking or computers. But since I prefer desktops over laptops I decided to start a project and build a wooden computer
The beginning of the project. I worked for a few weeks in a local carpentry. I asked if they could make me a custom frame (420mmx420mm). A few weeks later this got dropped off at my home
I removed the edge for the side panels. I used a chisel and hammer to remove 5mm deep and 15mm high pieces of unneeded wood and smoothed the edges with a dremel
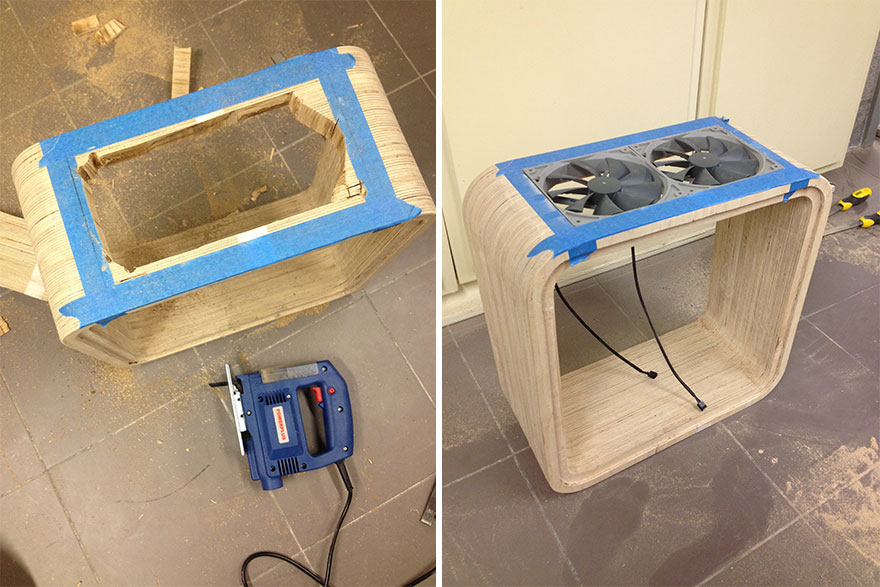
I installed the fans. These fans are held in place by friction only. I used a metalfile to file off a fraction of wood everytime until the fans fitted snugly. Same method was used for fans on the bottom
I went with 2x140mm fans on the top and 2x140mm fans on the bottom this way the hot air can follow it’s natural pathway: straight up. I used a cheap jigsaw to roughly cut out the holes for the fans and shaped some more with a wood file.
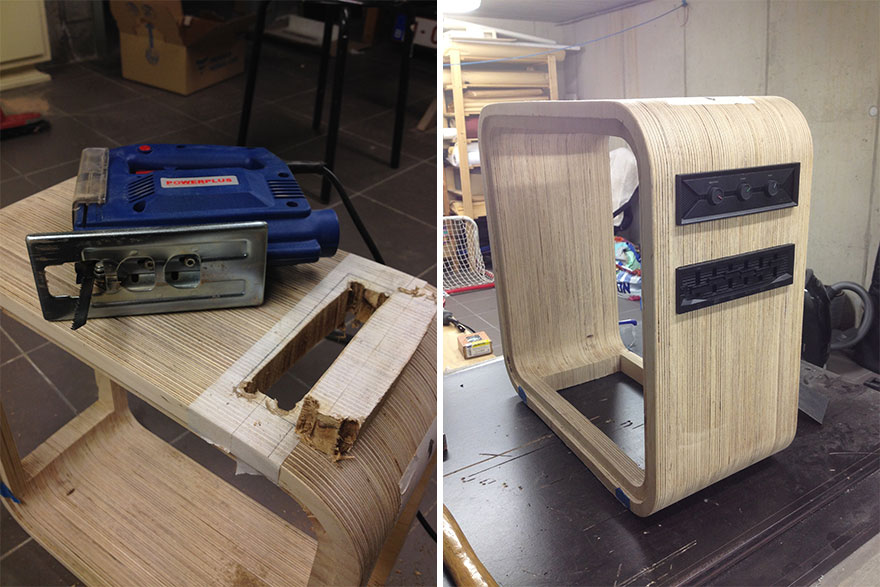
Installing the controllers wasn’t easy. The bays were too big so I cut them off with my dremel and sanded the cuts with 200 grit sandpaper. RGB LED controller and fancontroller were fitted into the body
I bought the aluminium sheets at a local metalshop. I used a metal file to file the edges until they fitted perfectly into the frame. The outer wall was also filed to shape
Next step was to install the power-supply. The PSU I used was a small form factor power-supply
So it came with a metal adapter to make it fit into cases with a normal PSU hole. I trimmed it down and drilled some extra holes so I could use this to attach the PSU to the back of the case
I ordered this 390x390x5mm black plexiglas online and again, as I did with the aluminium outerwall, I filed the edges to fit the case
Then I attached the fake wall to the case. The L irons I used were a bit too large so I used a simple metalsaw to shorten them. Then I attached the fake wall to the case using small bolts, screws and washers
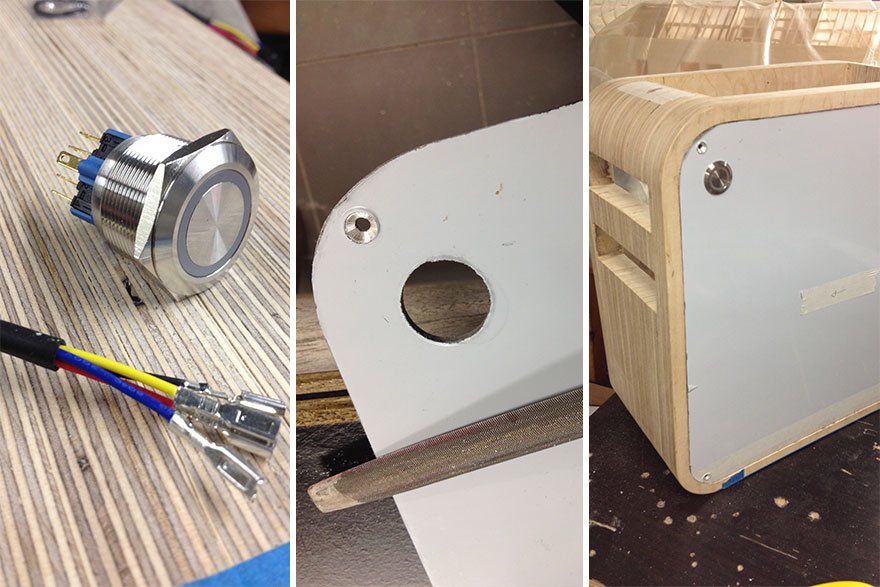
I had to installing the ON/OFF switch. I bought this online from a german shop, called a “Vandal switch”. I drilled a hole in the wall and used the metalfile to make it the right size
I installed the i/o panel. The i/o panel is held in place just by fitting snugly
I initially intended to make the stands out of aluminium but decided to go with wood scarps anyways because it gives the case a better coherence
The final assembly
Illustration of the fake wall that hides all the cables from view and makes sure the pc is tidy on the inside
I have also installed LEDs but I never turn these on because I don’t like the look of it. Only use of them is to show the inside of the case
First time turning the wooden pc on
41Kviews
Share on FacebookYou didn't make a wooden computer, you made a wooden computer tower. ;) Nice job, though.
I wouldn't have put the fans on the top myself, dust will fall in through them so will build up a lot more inside than usual.
Load More Replies...You didn't make a wooden computer, you made a wooden computer tower. ;) Nice job, though.
I wouldn't have put the fans on the top myself, dust will fall in through them so will build up a lot more inside than usual.
Load More Replies...
 Dark Mode

 No fees, cancel anytime








429
64