Showing posts with label origami. Show all posts

Saturday, March 5, 2011

Celebrating the bride ♥

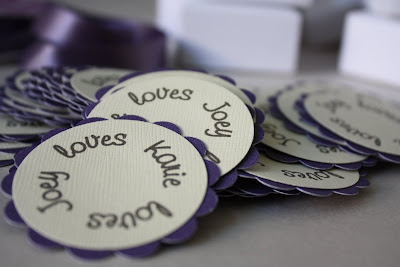
Sweet treats for our niece, Karie, for her bridal shower...

When I volunteered to make party favors for our niece's bridal shower I knew I'd need some help with the basics. {I'm still nursing a sore shoulder and knew that 50 boxes and tags probably wasn't a good idea to do on my own.} I had the girls over a few weeks ago to help fold the boxes, and then I took it from there... {well...kind of...}

My SIL, Laurie (Karie's mom) punched all these butterflies because I thought I'd be using them on the top of the boxes. As it turned out, I wasn't happy with the looks of them on top...

so I tucked them inside, along with 3 Hershey's Hugs and 3 Kisses.

A big thanks to Doug and my girl C for punching circles for the tags!
.
This afternoon we will gather at the home of Karie's maid-of-honor to celebrate her upcoming nuptials.

And each of her guests will take one of these home with them.
.
Made by me, with the help of my friends.
{Thanks, you guys, for all your help!!!}
xo xo xo xo xo xo xo

Sunday, December 20, 2009

Card box tutorial

Welcome to my first blog tutorial.
:o)

Hello all! I have been making these origami treat boxes for years - mostly using recycled Christmas cards. They are great for gifting little trinkets and candies. Once you make these you'll never look at a Christmas card the same way again! Everytime I see a pretty design on the front of one I think, "Hey, that would make a nice box!" :o) I have also made these boxes using a 12x12 piece of scrapbook paper for a larger box -- so unique and a fun way to package a small gift!

Here's how it's done.

You'll need these simple tools:

1 - You'll need paper for the top and bottom box pieces. I like to use cardstock, but for this tutorial I'm using an old Christmas card.

2 - Cut your paper into a perfect square - you'll need one for the top and one for the bottom. The top piece should be about 1/4" larger than the bottom piece. (For example, if the top piece is 5-1/4" x 5-1/4", the bottom should be 5"x5".)

3 - Use a ruler to mark an X in the center.
4 - Using the X as a guide, fold each corner to meet in the middle.

5 - Now fold the top and bottom sides in and crease well.


6 - Open up and then fold the sides in and crease well.

7 - Now you're going to open up two of the flaps of your box...
7 (continued) - Open the box to look like this:
8 - Find your crease lines for cutting. Cut along these lines on both sides. (I know, I know, origami isn't supposed to be CUT, and there's another way to make these boxes where you fold these corner edges in instead of cutting them, but I've found that these boxes have a better shape if these pieces are cut and tucked in.)

9 - Fold these cut edges into the center, and then fold the large flaps over them to complete the box top (as shown in the next few photos).

10 - You can add a little bit of glue or tape to hold the ends in place, but I find that if you play with it a little you can get the pieces to hold on their own.
10 - Repeat this process for the box bottom, fill with candy, and put the two together.

11 - If anything in this tutorial doesn't make sense...ask me! :o)
*****
If you make some of these cuties on your own, I'd love to see what you come up with!
Fold.
Create.
Enjoy.


Tuesday, November 10, 2009

The party prep continues...

Last night I sat down and filled the favor boxes with mint M&M's Premiums. I think they made great fillers for these party giveaways. What do you think?
I ran out of ribbon with 7 boxes left to tie. ARGH!!! That means I need to make another trip to the ribbon store. Ribbons & Lace in Chandler is a FUN store that I love, but I'm not happy about having to add another stop to my list of errands to run for the upcoming party.


Have you tried these? They're a bit pricey - but yummy! I've only tried the mint ones -- no crunchy coating, just smooth yummy chocolate and mint.

Sunday, November 8, 2009

Planning two parties at a time? What was I thinking?

I will not be a crazy woman.

That is my MAIN goal for the remainder of November!!!


We are hosting Thanksgiving dinner at our house this year (26 guests) AND having a 50th birthday party for my hubby that same weekend (35 guests). I've been fairly well organized with my planning, keeping my main goal in mind so that I don't end up stressed out and overwhelmed in the end. eh-hm. yeah.


IT'S ONLY THREE WEEKS AWAY AND NEXT WEEKEND WE'RE GOING CAMPING SO OMG I AM SERIOUSLY RUNNING OUT OF TIME.


So. I spent a lot of time this weekend finishing up some projects for hubby's casino themed party. I strung some garland using sewing thread, hot glue, poker chips and cards. (Do you call it garland if it hangs straight down?) These will hang from the arch in our entry way the night of the party. For now it's hanging on a foam board that I'll store in the garage to keep from getting mangled between now and the party.

(always a cat in the action...)

And, I folded 36 origami box party favors to fill with candy and place on tables (my finger tips are sore!).


Bonus: I ended up with a bunch of white and red cardstock strips (scraps left over from invitations and favor boxes) that I'm saving to make paper chains to use on the fireplace mantel the night of the party. I think this will be a fun project for my nieces and me on Thanksgiving afternoon, and the red and white will work for the birthday party and carry over through Christmas. I'll definitely have some pictures to post of that. :o)

Friday, September 4, 2009

I ♥ origami!

Kusudama flower and Fancy Jane

I've always been fascinated by origami. I can fold a few simple things -- a fish from a dollar bill (pull its tail and the mouth opens and closes), a boat, cootie catchers... And I've also folded a few things by following step-by-steps from books. You have to wonder, whoever came up with this stuff!?!? It's amazing that someone would have the forethought/sight to visualize what a piece of paper could become if folded this way and that.

I folded this Kusudama flower by following a tutorial I came across here. It was actually very easy to do -- the toughest part was gluing the petals together!

Side note: I always smile to myself when I see fellow artists selling their wares with the disclosure "made in a pet free environment." I think there's a little more love in a piece of art when there's a cat hair or two included. [wink] Fancy had to be on my work table this morning, leaving little room for folding.
>^..^<
Related Posts Plugin for WordPress, Blogger...