Showing posts with label Tutorial. Show all posts

Tuesday, 29 January 2019

Making your own clear bases


I’ve been using clear bases the last couple of years, as you have seen, and I’m really satisfied with that.
A female pulp adventurer on a home-made clear base
I found a YouTube video on how to make your own clear bases from Pulp Alley the other day. I seem to have missed it when it first aired, about half a year ago, but checked it out now.
It’s all about a very simple and cheap way to make your own clear bases, and I decided to try it out.
First you have to buy a punch stamp, and the video recommended EK Tools. I found a Medium Punch (1”) locally in a e-shop selling scrapbook-stuff and had it delivered just two days after purchase.
Then you collect all those blister-packs that you kept, as they could, someday, be useful for windows/water/whatnot. Now they will actually be used!
Use a scissor to cut out all biggish flat surfaces.
Start punching! I found some of the thicker blisters to crack when I punched out my bases, but it all works well enough, and I’m pumping out cheap (as in free) bases. What’s not to like?
Finally - ask your friends to keep their blister packs! One of mine had to do some trash-diving to collect what he had just thrown away (well, he actually rummaged around in a bag of plastic bound for recycling).
When I scrapped a lot of material from courses I took ages ago I found a sheet of clear plastic used as a cover for an old spiral bound collection of papers. The paper and metal tread is in their respective recycling bins, while the plastic is refined into clear bases.

Friday, 15 June 2012

Tutorial – undercoating – black or white or both?

Black or white? That is the question.
A white undercoat will give brighter colours, but you might get these annoying white specks in crevices – places your ordinary paint didn’t cover, and where the undercoat shows in a most irritating way.
A black undercoat will give a more dull finish, and you’ll find it hard to cover it with yellows and reds for example.
You can off course undercoat with other colours. If you would like to paint a figure in mostly reds, then a red undercoat could serve you very well.
My take on undercoats is a mix of white and black.
I paint the figures with white paint, usually Citadel or Vallejo (simply because I have them). You could use spray paints, but I prefer using a brush, mainly because the climate makes spraying outside impossible during at least half the year, also because I’m not very skilled with airbrushing and painting by hand will give me a chance to study the details of the fig.
I then give them a black wash, and there you have the best of both worlds. A light base with dark crevices. Easy to cover, no white spots, and instant shading for lighter colours with weak coverage. It also makes it easier for you to appreciate all the details of the figure, so it helps you in painting.
An extra plus is that you will see mould lines easily, as on the head on  this zombie from Mantic. This saves you the irritation of finding those lines the hard way, when your figure is nearly finished.

Thursday, 14 June 2012

Tutorial – undercoating soft plastics – a sticky problem


Getting paint to stick on soft plastic soldiers (that is, the soft-plastic ones, like the classic 1/72 or 1/76 scale plastics by Airfix, Revell, Caesar, Hät, etc.) is a problem.
A couple of years ago I got the tip to undercoat with white glue (wood glue). I was sceptical, but tried it out.
At first it looks really messy, as the glue formed globules, or fills recesses, as in these photos.
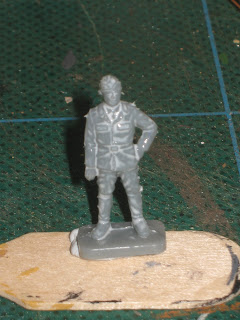
(Figures from Airfix Luftwaffe Personell. They will be used as Italian airfield personell in our upcoming LRDG scenario)
 
After some experimenting I found out that if you wait a little while after applying the glue, it dries a bit, and you brush it out again. If you’ve done it right you will have the figure covered with a thin and even coating of wood glue. As it dries it contracts and gives a very strong coat.
Let it dry thoroughly, and you will have a god surface for your ordinary undercoat. More on that in my next short tutorial.
(Sorry about the photos, but I just couldn’t get the camera to focus on the wet surface)