EBS VolumeIn this topic, we will learn how to upgrade the EBS Volume in various ways. - Sign in to the AWS Management Console.
- Move to the EC2 service.
- Create an EC2 instance.
- Choose an Amazon Machine Image (AMI).
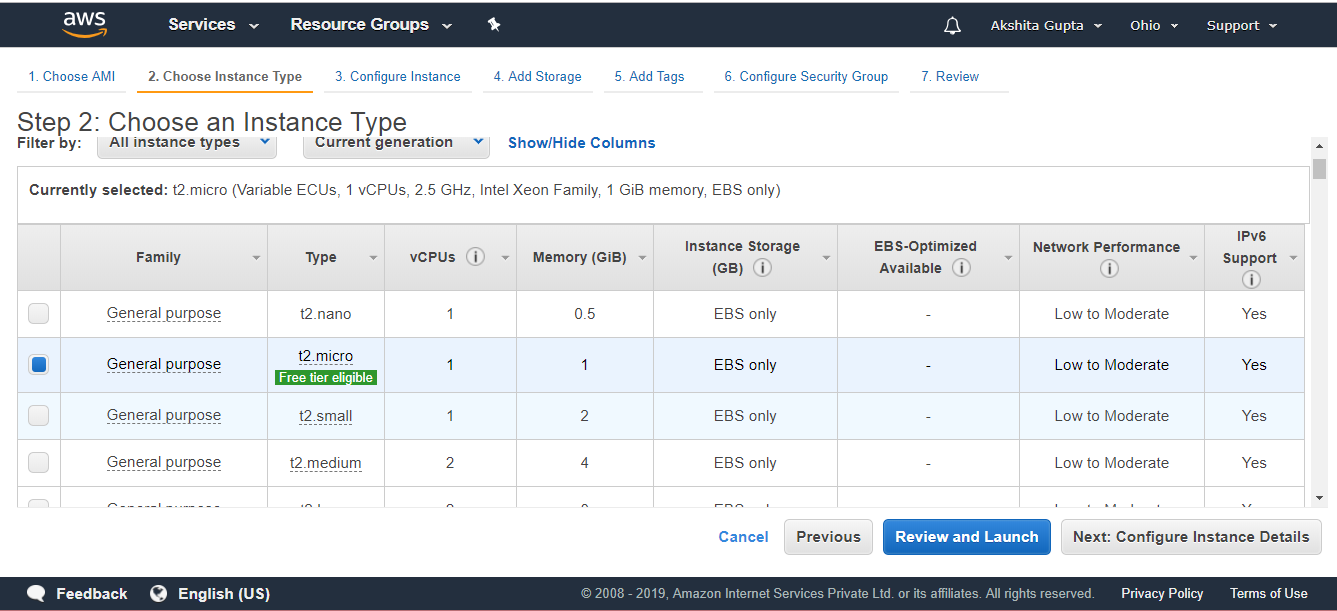
- Choose an Instance type. Suppose I choose a t2.micro type for our EC2 instance. Click on the Next.
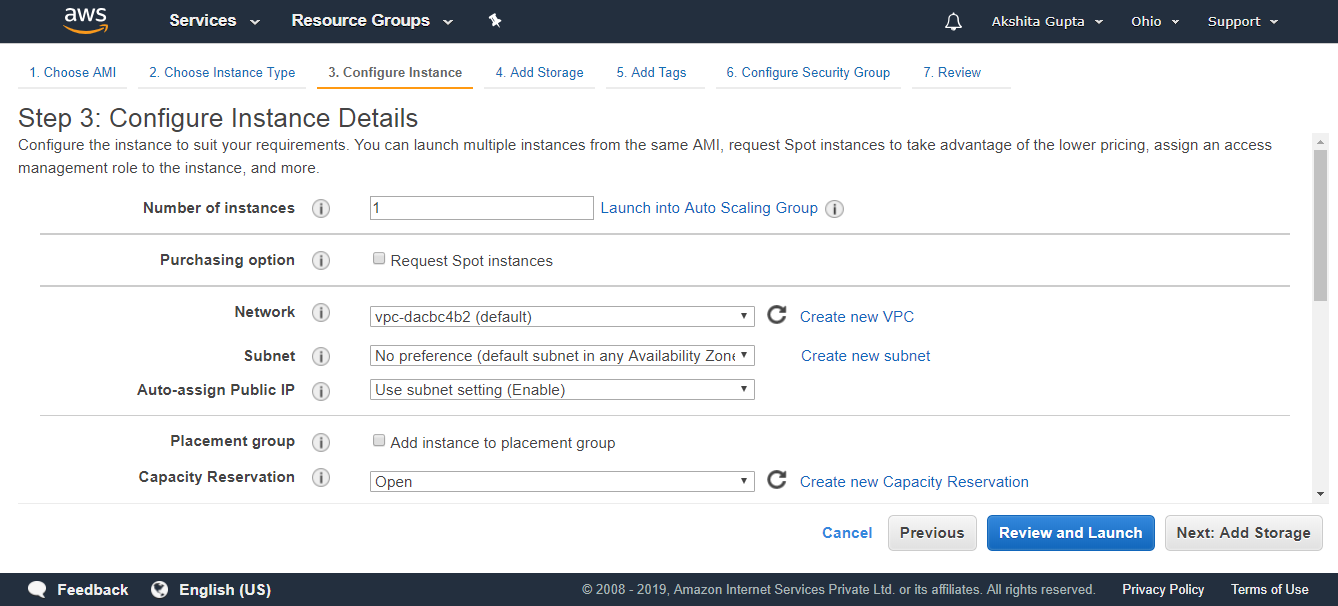
 - Configure Instance details. Keep all the details as default, and then click on the Next.
 - Add the EBS Volume. Root is the default EBS volume used to store the operating system.
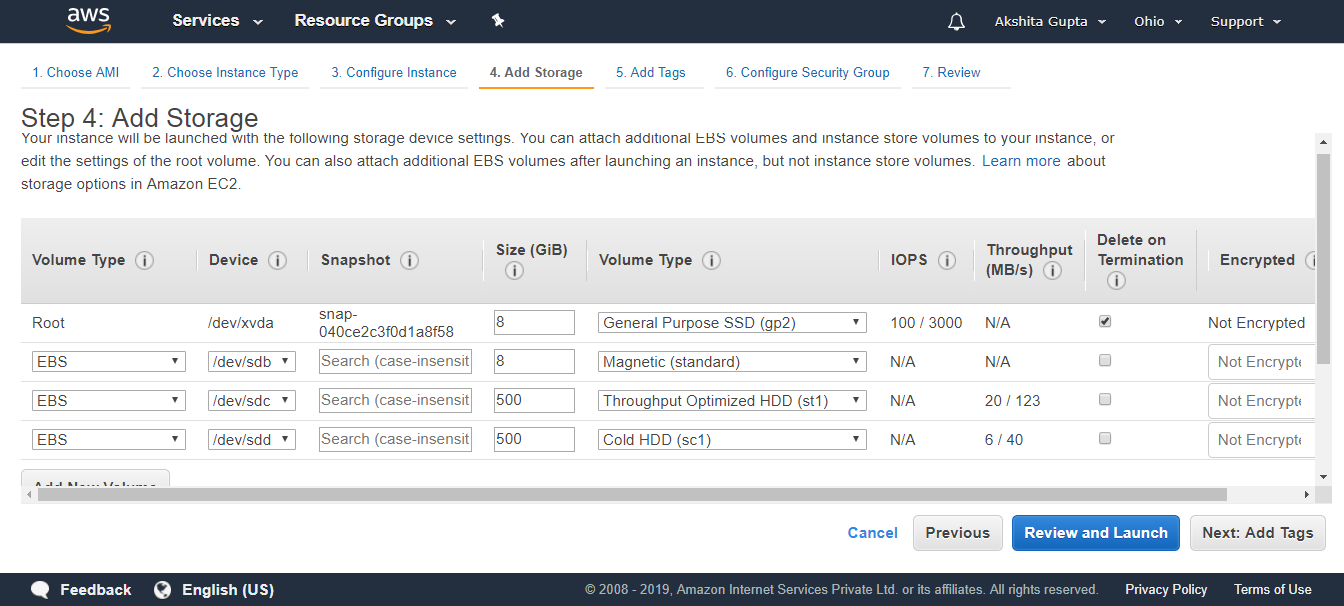 I create three EBS Volumes of type Magnetic, Throughput Optimized HDD and Cold HDD. 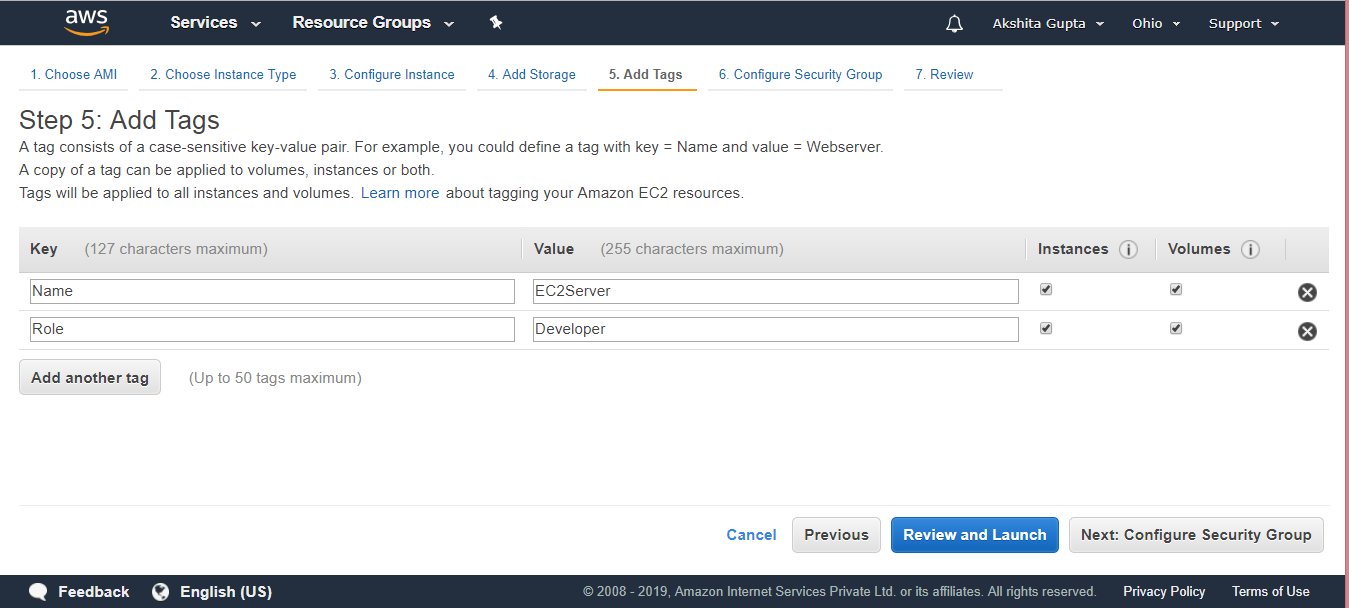 - Configure Security Group. Click on the Review and Launch.
- Click on the Launch button.
- Move to the Volumes appearing on the left side of the console.
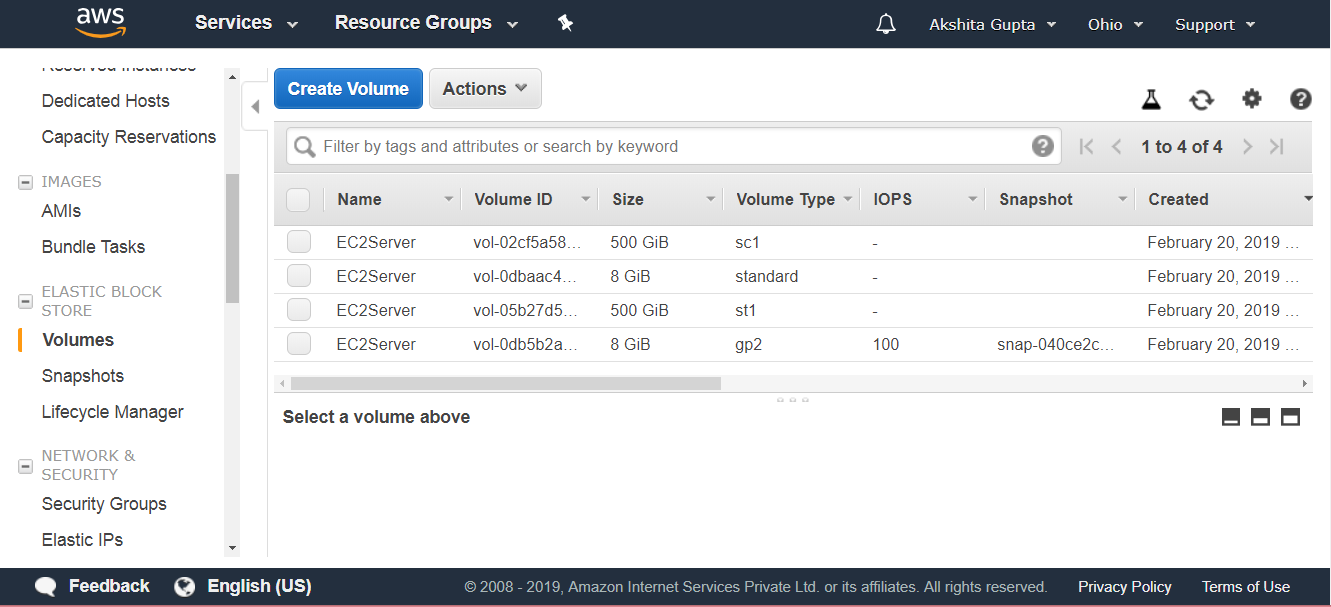 From the above screen, we observe that a single EC2 instance is associated with four EBS Volumes type. - We can also modify the volume. Suppose I want to modify the volume type of gp2, check the EBS Volume that you want to modify.
 - Click on the Actions dropdown menu, click on the Modify Volume.
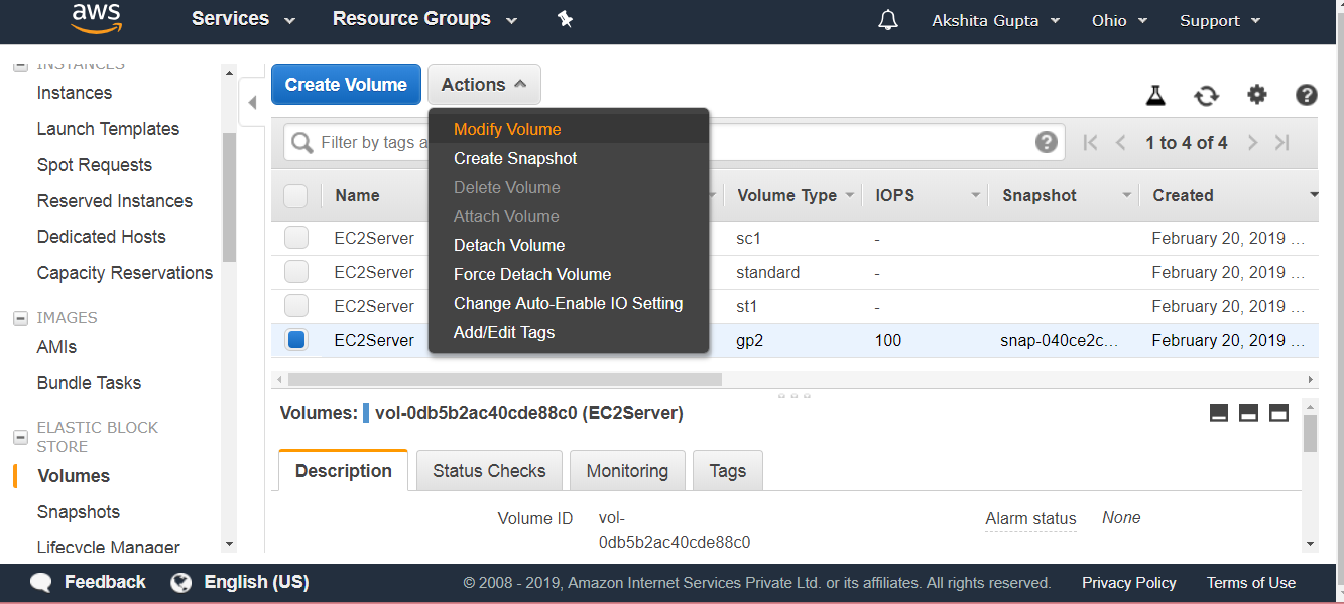
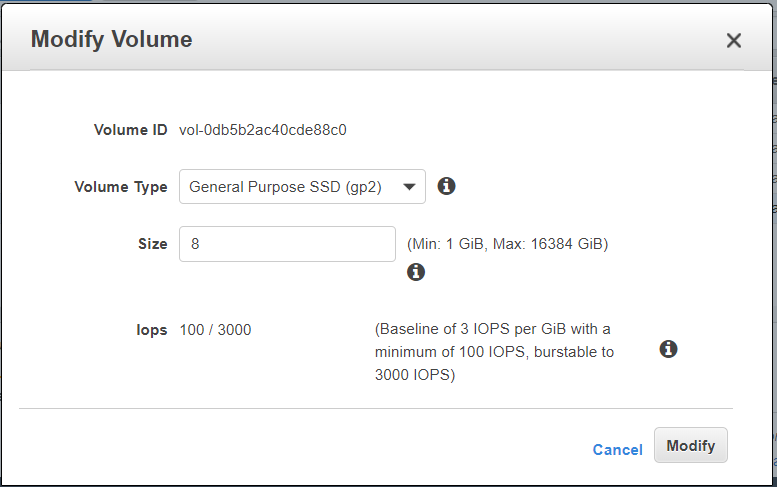 From the above screen, we observe that we can also modify the volume type. Standard cannot be modified as it is the oldest storage available. Therefore, we can say that all the volumes are modifiable apart from the magnetic storage volume. - Suppose I want to create another EBS Volume or EC2 instance in another Availability Zone. In order to achieve this, we first need to create a snapshot. Move to the Actions dropdown menu, then click on the Create Snapshot.
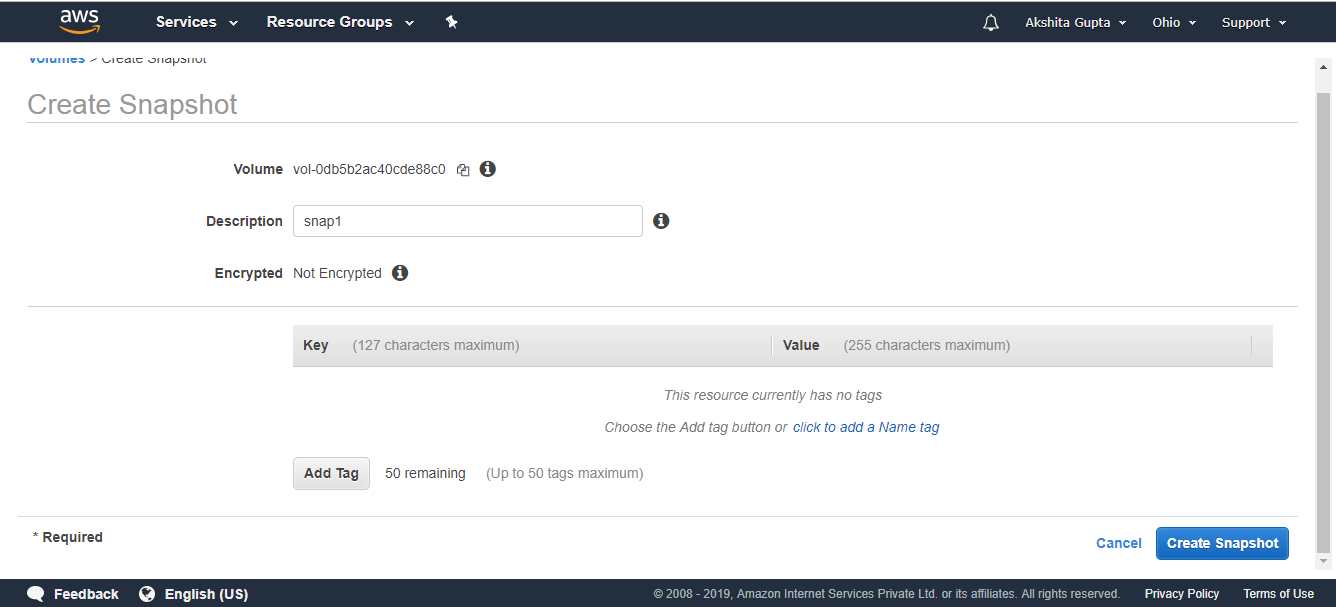 Move to the snapshot appearing on the left side of the console. 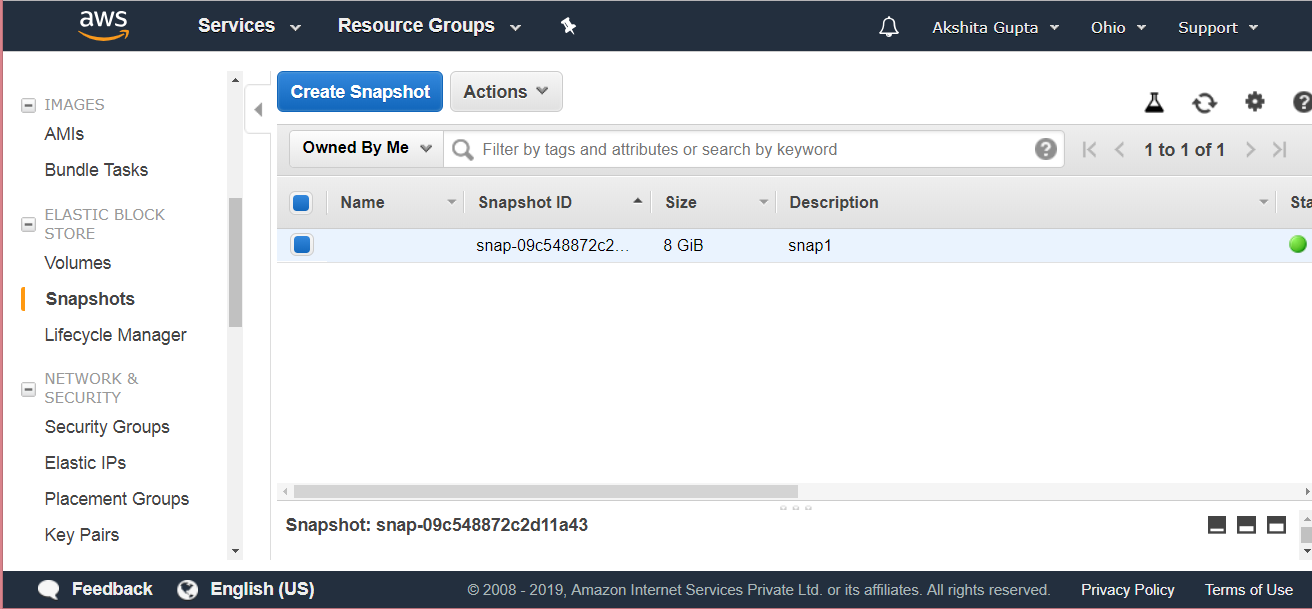 The above screen shows the snapshot that you have created just now. Move to the Actions dropdown menu, click on the Create Volume. 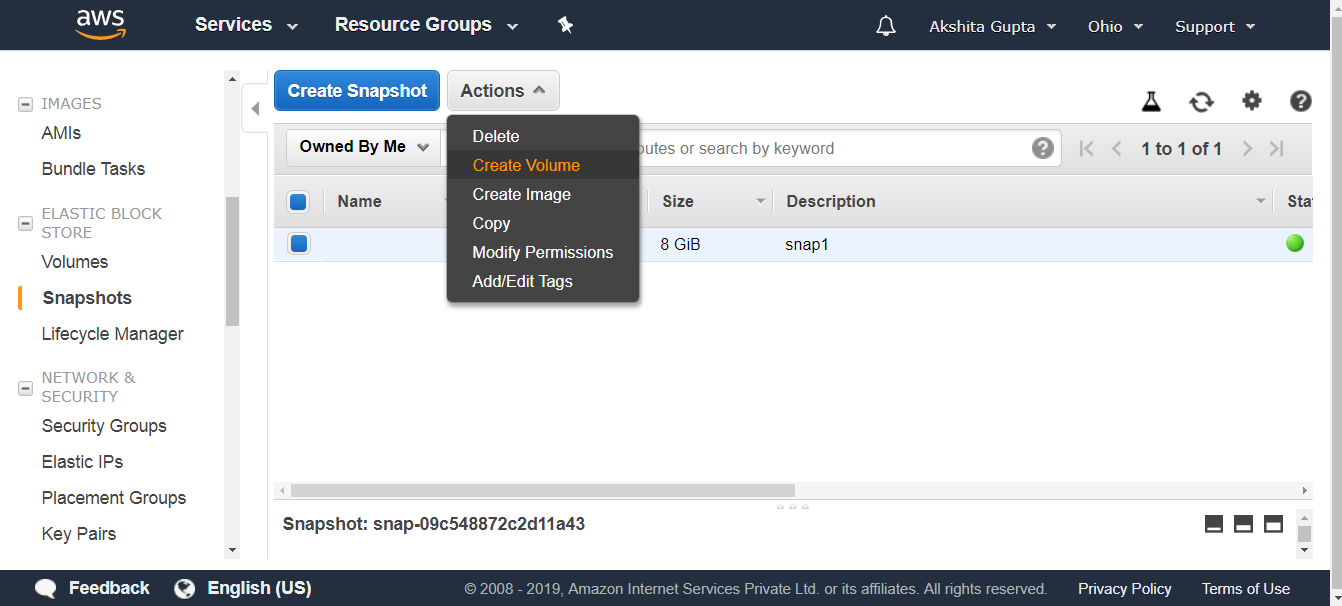
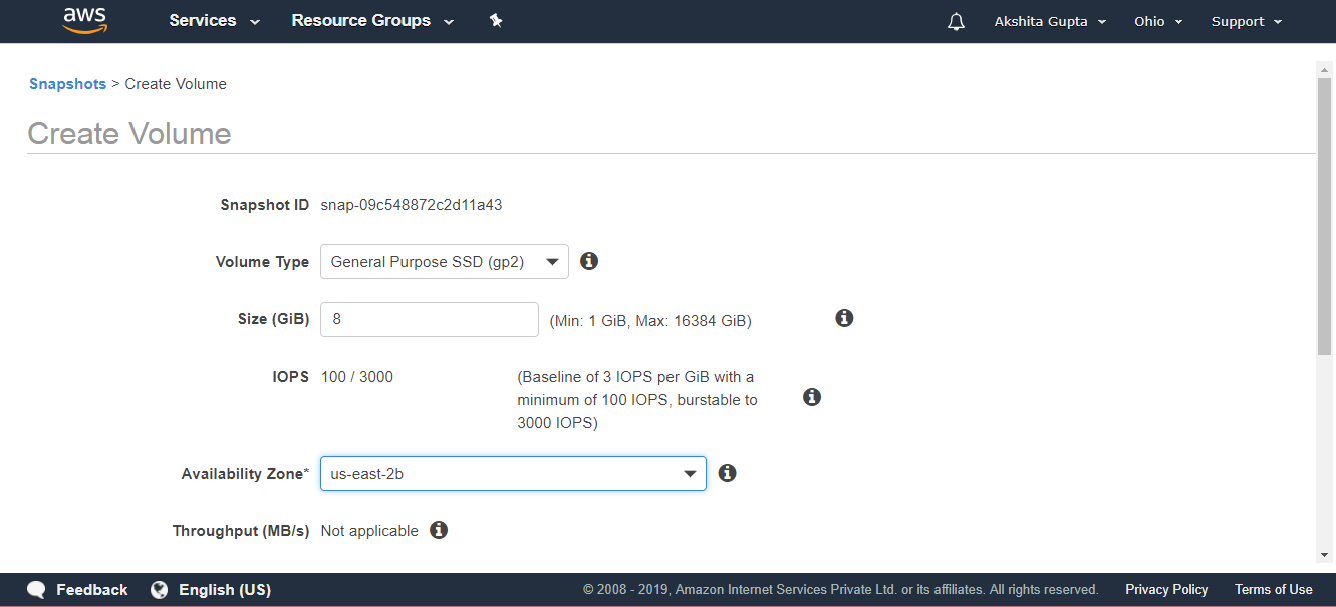 From the above screen, we observe that we can change the Availability zone of a Volume for a snapshot that we have just created. Therefore, we have created a new EBS Volume with different Availability zone, i.e., us-east-2b. - You can also move an EC2 instance from one region to another region. In order to achieve this, the following steps are to be taken:
- Create a Snapshot.
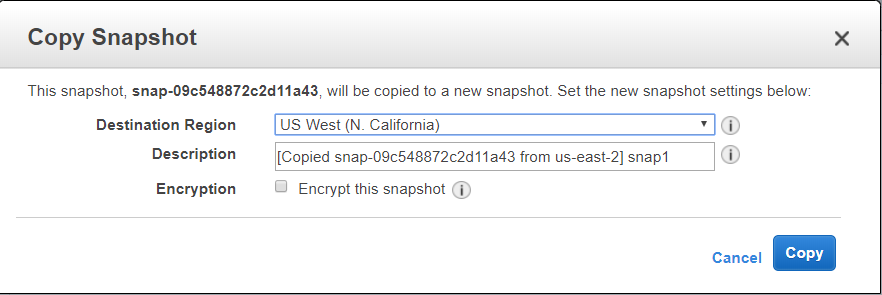
- Move to the Actions dropdown menu, click on the copy.
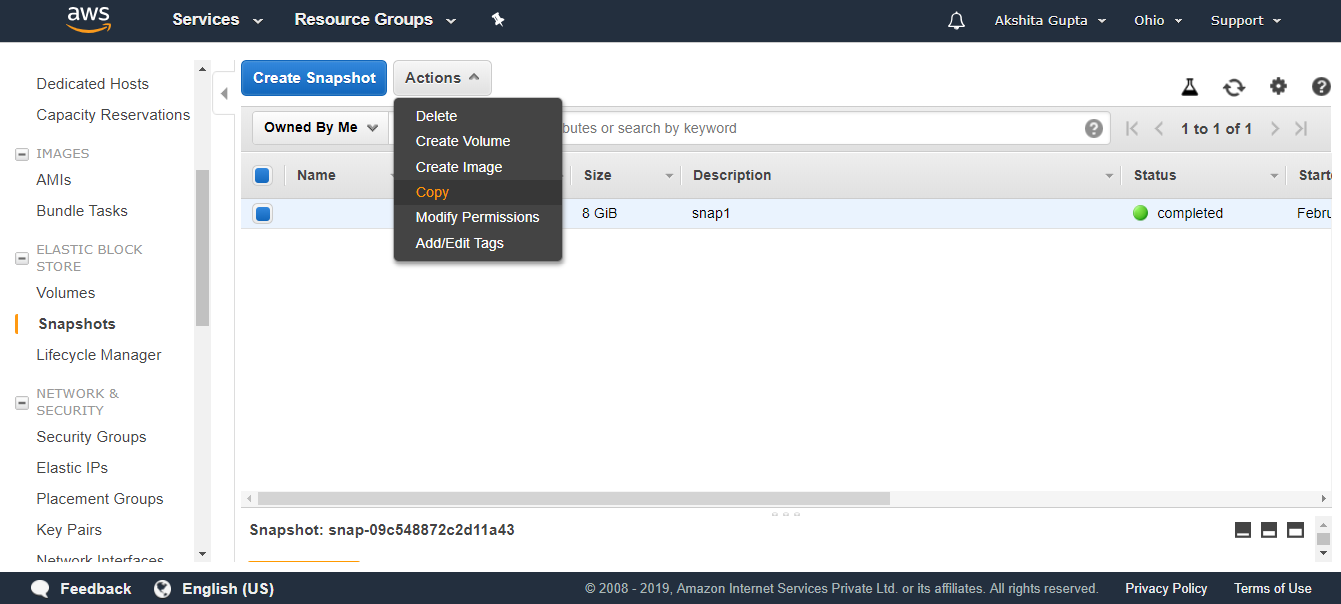 - The screen shown below shows that the snapshot has been copied to a new region, i.e., US West.
 - Once the snapshot is in a different region, create the image of the snapshot by clicking on the Actions dropdown menu, and then click on the Create Image.
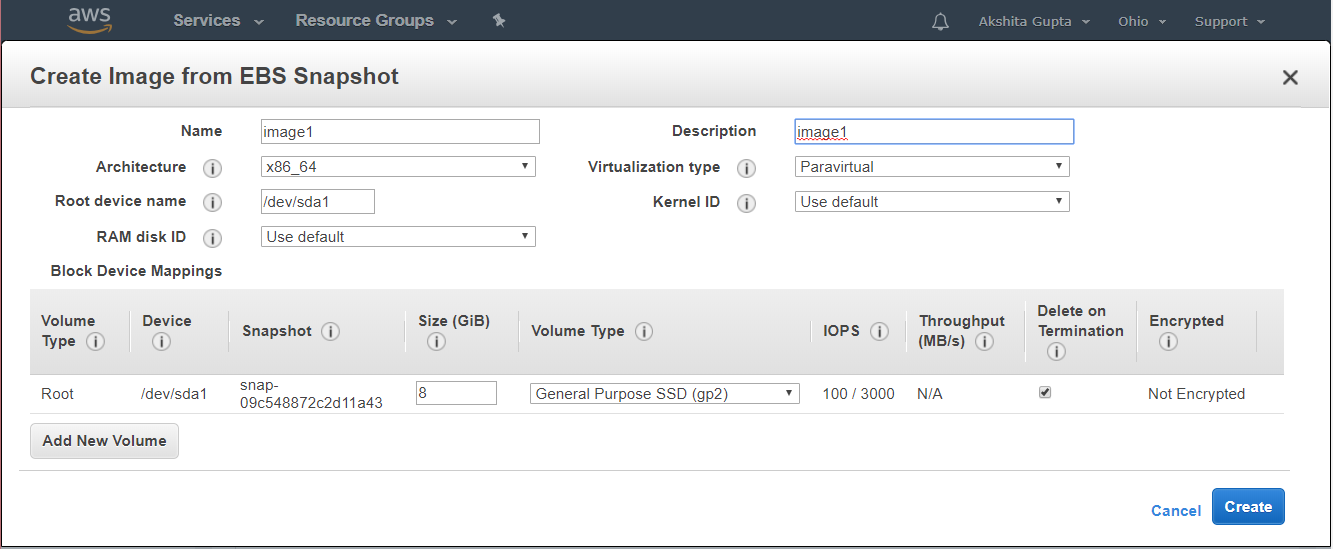 - Click on the Create button.
- Move to the AMI appearing on the left side of the console. An AMI displays the image that you have just created.
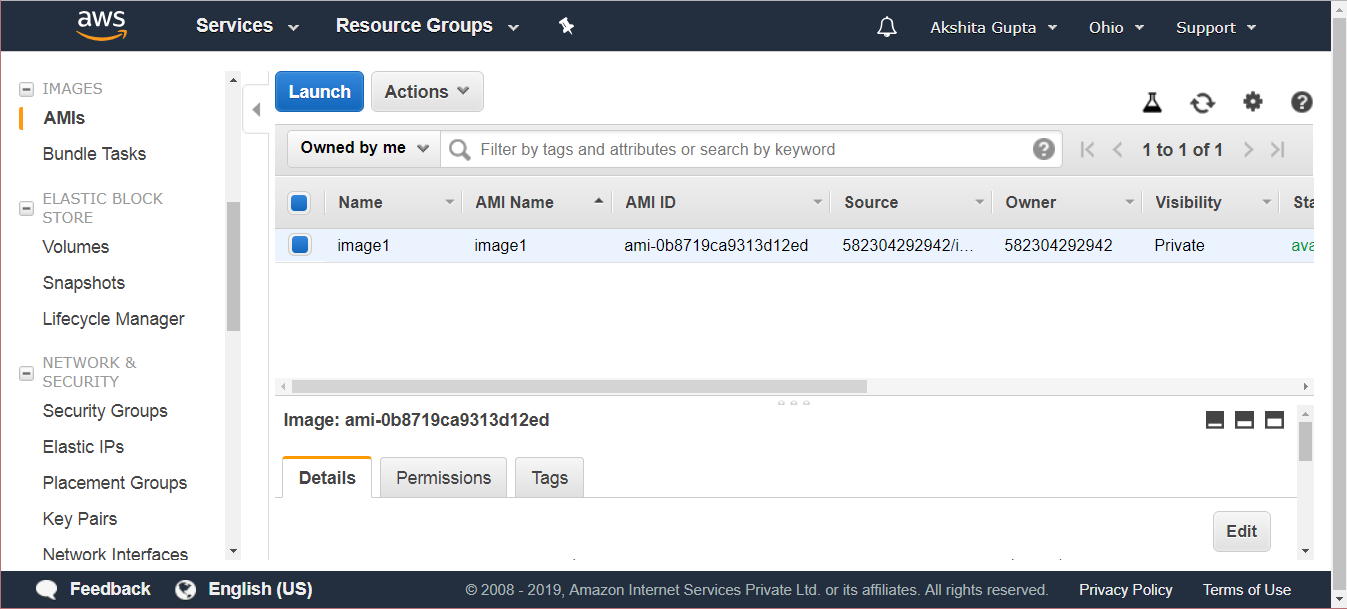 - Click on the Launchbutton.
Note: If you delete an EC2 instance, then root device is deleted, and other EBS Volumes are not deleted.Important points to be noted:- Volumes exist on EBS. Volume is a Virtual Hard Disk which stores the operating system.
- Snapshots exist on S3. However if you look at a bucket and searches for the snapshots in a bucket, you will not be able to see the snapshots. Therefore, we can say that the snapshot has no visibility.
- Snapshots are a point in time copies of volumes. It's just like taking a photograph of the hard disk at a point of time.
- Snapshots are incremental means the blocks that have been changed since your last snapshot are moved to S3.
- The first snapshot always takes some time to create.
- To create a snapshot for Amazon EBS Volumes that serve as root devices, you should stop the instance before taking the snapshot.
- However, you can take a snapshot while the instance is running.
- You can create AMI from snapshots.
- You can change the EBS Volume size and storage type.
- The Volume will always be in the same availability zone as the EC2 instance.
- To move an EBS Volume from one region to another, take a snapshot of it, and then copy it to the new region.
|


