How to Insulate a Dryer Vent: Everything You Need to Know
Keep the heat with these insulation tips

Highlights
Insulation costs between $6 to $25 on average.
Excess condensation and damp clothes can be a sign you need insulation.
While you don’t have to insulate your dryer vents, it can help improve efficiency.
Your clothes dryer plays an important role in your everyday life, but did you know that parts of your dryer also play a big impact on your home’s efficiency as well? When installed properly, dryers and their vents keep moisture out of your home to help lower utility bills and keep your home at a comfortable temperature. And to help them do their job better, you can insulate your dryer vents.
Learn more about this topic, including when and how to do it, in this guide.
Importance of Dryer Venting
Dryer vents carry air through your ducts to the outside, removing the warm, wet air created by your dryer. Most models require that the venting can’t run more than 25 feet from the dryer to the exhaust port, so usually, it’s run directly outside the home. In some cases, it could also be run through a basement or attic or roof insulation.
These dryer vents (also called dryer pipes or dryer ducts) play a crucial role in maintaining the temperature and humidity of your laundry area to help prevent any mold or wood rot caused by lingering wetness.
It also helps your other systems, like your heating system, work at tip-top efficiency.
Do Dryer Vent Pipes Need Insulation?
According to most building codes, dryer vents don’t need insulation. But, it can be a good idea—especially if your laundry is located in or runs through an unheated area of your home, like a basement or crawl space. This is especially true if you live in a colder climate, taking steps to insulate your dryer vent can help prevent condensation build-up and freezing that can lead to other types of damage.
Not to mention the fact that dryer vents also often carry lint and other debris from your laundry. In unheated or air-conditioned areas where temperatures can easily fluctuate, that laundry fuzz could actually ignite a fire pretty easily.
So the short answer is: No, you don’t need to insulate your dryer vents. But more often than not, it’s a good idea for efficiency and safety (and is a pretty cheap and easy DIY project to boot).
Where Should My Dryer Vent Be?
Ideally, your dryer vent should run directly from your laundry area horizontally through an exterior wall to the outdoors. This will help minimize the distance the moisture, air, and lint have to travel, minimizing heat and debris build-up.
But that’s not always possible, or in some cases, your home may be old enough that it has some wonky ducting and piping in place. In that case, it may run through your basement, crawlspace, or attic. None of these are ideal options, as they’re often unheated and untreated. And even in areas with insulation already, like your attic, running a vent through these areas could be a fire hazard.
In some cases, it may be worth changing the layout of your vent. But in others, adding the right insulation in the right places is enough to do the job.
Signs Your Dryer Vent Needs Insulation
Besides a poor location, there are a few things to look out for in your laundry room that may indicate that the humidity isn’t able to leave your area properly.
You notice condensation starting to build up in or around your dryer.
Your dryer exhaust is extremely hot to the touch.
Your clothes aren’t drying properly.
These can also all be signs that you need to clean your dryer vent. But if your dryer vent is clear of debris and up to par, insulation could do the trick.
Types of Insulation
While you can use nearly any type of insulation for this project, some are better suited for the job. For example, the cost of spray foam insulation doesn’t make it the best choice for this project unless you are looking to burn money.
Instead, opt for these more affordable and easier-to-use alternatives:
Foam: Dryer vent pipes don’t need a lot of insulation, and something as cheap and easy to work with as foam will easily do the job. Rigid foam board costs as low as $7 for a 2 ft by 2 ft piece, which is more than enough for this project.
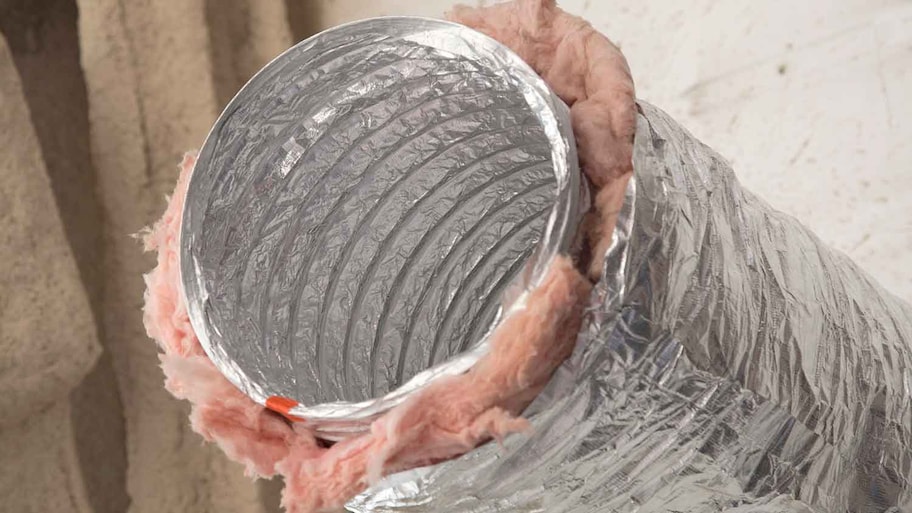
Metal foil wrap: Metal foil tubes are a common solution for a dryer vent because they’re flexible, movable, and require very little DIY effort. They’re about double the cost of foam board, usually around $15.
Fiberglass: If you have extra rolls or batts of fiberglass insulation lying around from a past project, you can simply wrap it around the vent and duct for added protection. Blown-in insulation isn’t suitable for this DIY. If you don’t have any extra, expect to spend about $30.
What R-Value Should I Use?
R-value is a means of measuring the effectiveness of insulation. In general, the higher the R-value, the more effective (and thicker) the insulation is.
For this project, most insulation R-values will be fine. Just make sure the thickness of the insulation will fit the opening.
How to Insulate Dryer Vent Pipe
While the specific steps for insulating a dryer vent depend on the type of insulation you choose, the general steps are the same.
1. Measure the Opening
Measure the length and width of the vent pipe to see how much insulation you need. Use that number to gather or cut the appropriate amount of insulation.
If your vent is located in a crawl space or attic, wear gloves and eye masks to protect yourself from debris, bacteria, and insulation. These are also a good idea if you’re using fiberglass insulation too, as it can irritate your eyes and face.
2. Put the Insulation in Place
Fit the insulation in place.
If you’re using foam, you may need to hammer it into the spot. For fiberglass batting, you can use twine or aluminum tape to keep it from moving around.
3. Check for Gaps
Look around to see if there are any places where air can still leak out. If so, add more insulation. If you notice any additional air flow, check for leaks.