This project can take anywhere from one day to a week depending on how much repair and prep work is needed.
Cost
$100–$200
Doing the labor yourself goes a long way.
Need professional help with your project?
Get quotes from top-rated pros.
What you'll need:
TOOLS
Latex paint
Primer
Polyurethane sealant
Mild soap or commercial cleaner
100 grit sandpaper
Two-part epoxy
Toothpicks or wooden craft sticks
Grout (optional)
Painter’s tape
Drop cloth
Paintbrushs or rollers (at least two separate for paint and primer)
Paint tray
SUPPLIES
Rubber gloves
Sponge
Sandpaper block or orbital sander
First things first: can you paint tile? Yes, you can. Painting tile is a budget-friendly DIY home improvement project that can drastically change how a room looks. And learning how to paint a tile backsplash or tile floor is simple enough if you follow this guide.
Prepping to Paint Tile
You can paint over most types of tile including ceramic tile, porcelain tile, and even natural stone. But before you jump in on this project, weigh the pros and cons first to determine if painting tile is the right move for your space. The pros: You can save big on tile installation costs by painting your existing tiles instead. And if you have any damaged tile, you can often make simple repairs and cover them with paint rather than replace the entire tile.
The cons: Not every type of tile or surface area can be painted over (such as kitchen tile or shower tiles exposed to high moisture levels) and may require tile removal and new tile installation. And because you paint the tile and grout all at once, you will lose dimension as the color of the tile will be the same color as the grout. In addition, painted tile can peel over time, especially in spaces with significant moisture or foot traffic. Lastly, this project requires patience, because you’ll be waiting for the area to dry completely between repairing, priming, and applying multiple coats of paint.
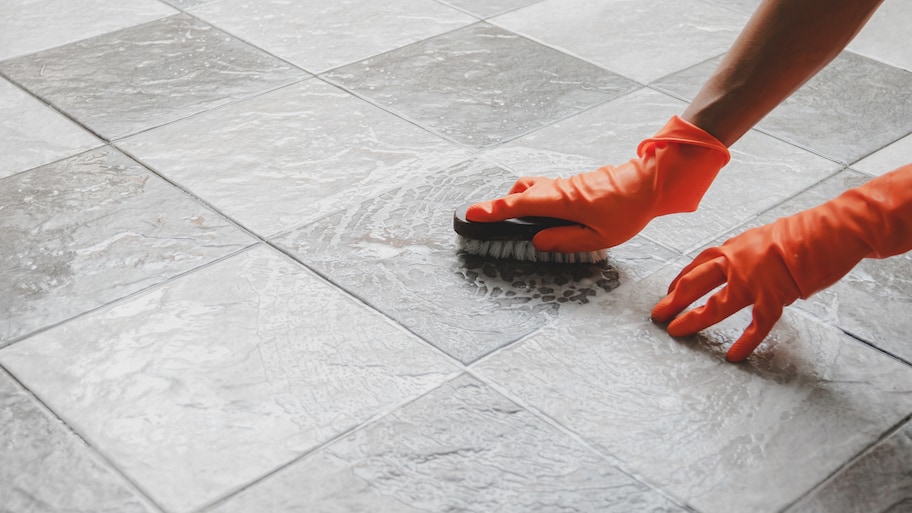
Clean the Old Tile
Photo: ETAP / Adobe Stock
Clean off your old tile with a mixture of warm water and mild soap. This creates a base for fresh paint to adhere to by removing dirt or dust from your old tiles. Tiles that are in high-traffic areas, such as kitchen tiles and bathroom tiles, might need a more thorough cleaning. In this instance, use a stronger cleaning solution specifically designed for tiles and a brush to scrub off dirt and grime. Make sure to clean the tile grout, too.
Sand the Tile
Sand the surface of your tile with sandpaper and a sandpaper block or an orbital sander. Tile is a smooth and slippery surface, which is why it’s difficult for paint to adhere to it. You can create a surface for the paint to bind to by sanding the tile before applying paint.
Use 100 grit sandpaper to buff through the surface of the tile. While an orbital sander isn’t required, it can make the job more efficient, especially if you have a larger surface area to cover, such as floor tile or kitchen tile.
Pro tip: Be sure not to apply too much pressure when sanding as you only want to break through the glaze, not penetrate it completely.
Clean the Tiles Again
Wipe away the residue from sanding with warm water and a sponge. This is also a good time to clean back over the grout as it is subject to build-up over time.
Use a scrubbing brush or old toothbrush and a commercial cleaner or a homemade solution of vinegar, baking soda, and warm water. Grout tends to hold dirt and residue, and this can give you a clean slate to work with.
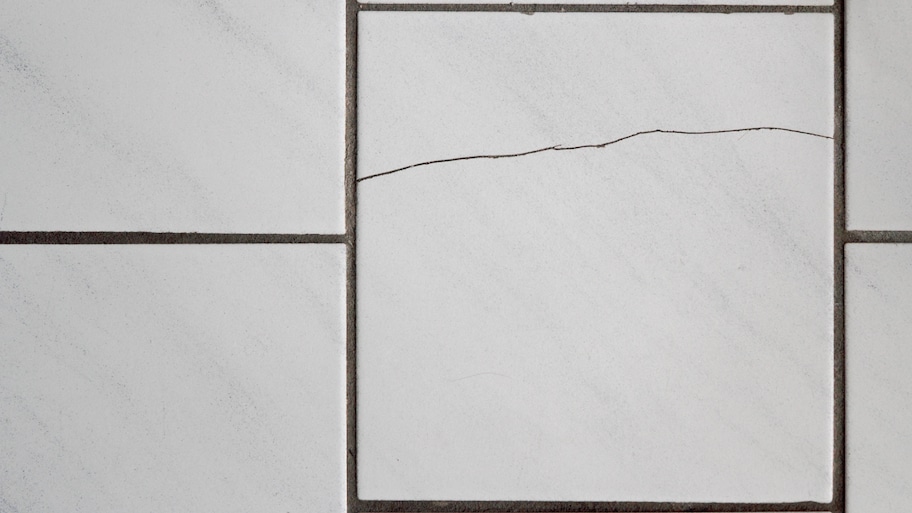
Repair Cracked or Broken Tile with a Two-Part Epoxy
Photo: ArTo / Adobe Stock
Extend the life of the fresh paint by mixing a two-part epoxy and using it to fix cracked tile. Two-part epoxy is a binding system that, when mixed, provides strength and durability, allowing the repaired surface to be sanded, painted, and even drilled into once fully cured. Refer to the manufacturer's directions to determine the mixing ratio of the two compounds and the time it takes to set. Mix the epoxy on a separate surface, such as cardboard or in a tray, and then apply the mixture directly to the crack.
When applying epoxy, use a toothpick for thin cracks or a wooden craft stick for larger cracks and nicks. You can then go over the area with a putty knife or the dry edge of the craft stick to remove any excess epoxy. Remember to work quickly, as most epoxies will set within minutes. You may need to wait a day or two after completing this step for the epoxy to fully cure.
Repair Grout
Repair damaged grout, especially in high-traffic areas, before applying fresh paint. Painted or not, the tiles will still need to be secured, and grout helps keep them in place. Grout also helps stop debris, water, and spills from seeping underneath tiles. If there are areas with damaged grout, it’s important to regrout the floor tile. Let the new grout cure fully before moving on to the next step.
Tape Off Other Surfaces, Put Down a Drop Cloth
Once all repairs have been made and the tile is fully dry, tape off areas you want to keep free from paint. For example, if you are painting the backsplash in a kitchen, apply painter’s tape to the countertops and cabinetry. Or to paint fireplace tiles, apply painter’s tape to the surrounding walls and the fireplace insert to avoid paint transfer. Even though you might only be working in a small area, it’s also important to put down a drop cloth to catch any paint drips or splatter.
Prime with Epoxy Bonding Primer
Add a coat of primer before applying the paint coat. Primer extends the length of the paint coat and creates a good surface for the paint to adhere to. When painting over ceramic tile in particular, using a specific epoxy-bonding primer by Rust-Oleum can give you a professional finish and more longevity. Because it is made with epoxy, this type of primer is thicker and more adhesive. If you are applying the primer to a larger area like wall tiles, use a paint roller, and for smaller areas, use a paintbrush. Read the manufacturer’s specific directions and recommended dry time for the primer you choose.
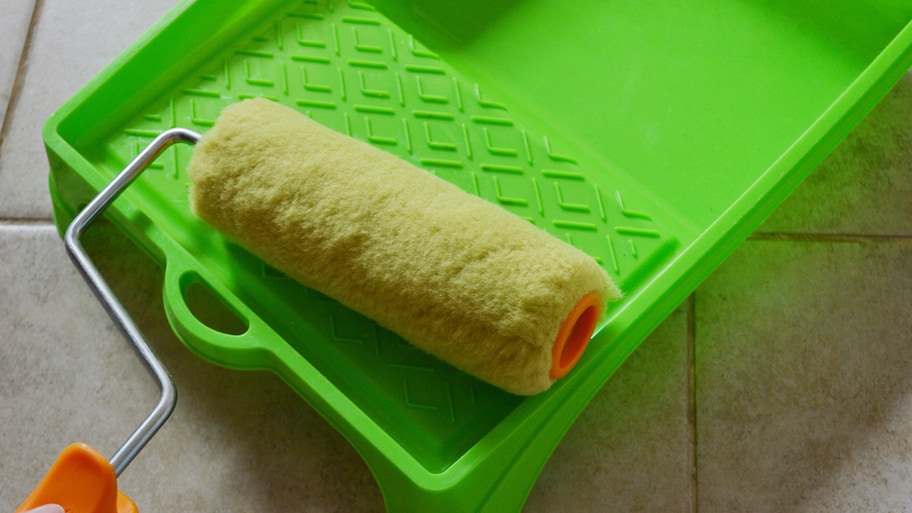
Paint with Latex Paint, Apply a Second and Third Coat
Photo: MarioGuti / E+ / Getty Images
Once the primer has fully dried, paint the tile with latex paint.
If you are using a roller:
Dip the roller into the tray’s reservoir
Roll a few times over the ramp of the tray to remove excess paint
Apply the paint onto the tile, being sure not to press too firmly to avoid drips and splatter
If you are using a paintbrush:
Dip about an inch of the bristles into the can and tap off excess paint
Apply the paint starting at the grout and working inward to the center of the tile
Apply thinner coats with your paintbrush to minimize the visibility of brush strokes
Once fully dried, add a second and third coat of latex paint. Because you will apply the paint in thinner coats, adding a second and third coat will help complete the look and prevent peeling.
Seal Using a Polyurethane Sealant
Apply a water-based polyurethane sealant using a roller or paintbrush after all topcoats have been applied. You’ll need the paint to be completely dry and hardened before applying the sealant. This is crucial because polyurethane can actually combine with the topcoat and create a sticky coating if applied when still wet. This last step will complete the look and give your updated tiles an added layer of protection.
DIY vs. Hiring a Pro to Paint Tile
If you can set aside a few days to work on it, tile painting is a relatively easy DIY project. A thorough cleaning, a few repairs, and some paint, and you’ll have a brand new floor or backsplash that you can be proud of. As with most DIY projects, you can hire a contractor or painter near you who specializes in tile painting, but you’ll have to add the cost of labor to the project.
You can paint tile with interior latex paint after priming with an epoxy bonding primer and allowing the primer to dry completely. The primer will help the latex paint stick to the tiles. It’s best to apply three thin coats of latex paint to help prevent the paint from peeling.
Painting tile can last up to five years if properly cleaned and maintained. In high traffic areas or if the original tile wasn’t prepared properly, paint can peel off of tiles much sooner, but it’s easy to grab the paint you used and do some touch ups when and where they’re necessary to keep the paint looking its best.
Tile paint should be sealed with a polyurethane sealant to best protect the paint from traffic, impacts, and spills. The sealant adds a finishing layer that makes the project look complete, though it should only be sealed after all of the paint coats have thoroughly dried. If you’re painting floor tile, try to avoid walking on them until they are properly sealed.
Stephanie Mickelson is a freelance writer covering home improvement, real estate, design, and personal finance. Before beginning her freelance career, she worked in residential construction, specifically remodeling kitchens, installing cabinets, flooring, countertops, trim, and more.
Stephanie Mickelson is a freelance writer covering home improvement, real estate, design, and personal finance. Before beginning her freelance career, she worked in residential construction, specifically remodeling kitchens, installing cabinets, flooring, countertops, trim, and more.
The homeowners guide to Flooring Sales and Installation
From average costs to expert advice, get all the answers you need to get your job done.