You’ll spend a lot on supplies (and the insert itself), but you may still save money by DIYing.
Need professional help with your project?
Get quotes from top-rated pros.
What you'll need:
TOOLS
Tape measure
Safety goggles
Fire extinguisher
Gloves
Pipe wrenches
Grinder
Ladder
Screwdriver
Tin snips
SUPPLIES
Fireplace insert
Plastic drop cloth
Gas cap
Pipe dope
Cut-off wheels
Screws
High-temperature silicone
Top plate
Termination fitting cap
Screws
Weatherproof cap
Cover plate
Fireplace sealer
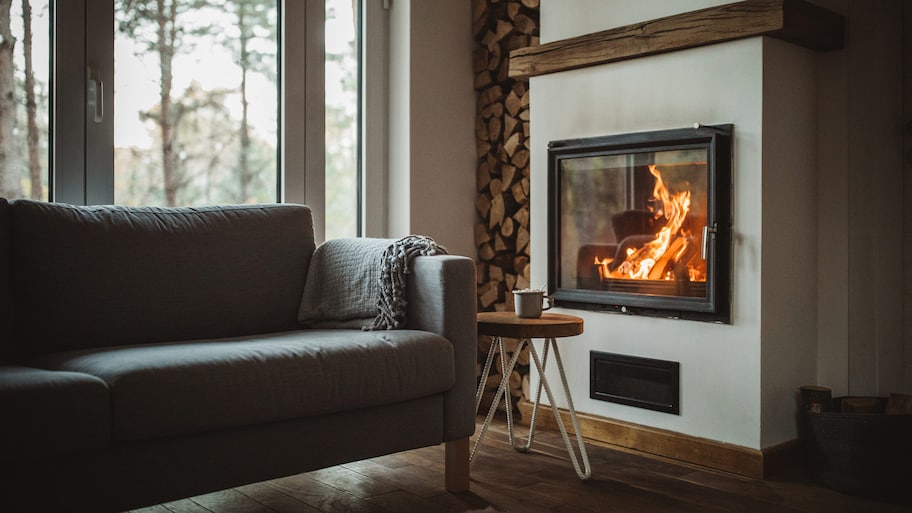
Did you know a traditional fireplace actually makes your home's heating system work harder, meaning your energy bills go up? A wood-burning fireplace insert is a more energy efficient way to create a cozy space in your home. Fireplace inserts are fireproof boxes that sit inside an existing fireplace. Here's how to install a wood-burning fireplace insert to keep your home toasty and your heating bills low this winter.
Preparing to Install a Fireplace Insert
You need to have an existing fireplace to install the insert into, and the existing fireplace should be in good shape. Before you get started, take a close look inside the fireplace, inspecting for damage. If anything looks off, such as broken stones or dented pipes, reach out to a local fireplace contractor to have them check it out and make any needed repairs.
If everything looks okay, clean out the fireplace. Remove any debris, such as ashes and leftover pieces of wood. Also get rid of any accessories, such as andirons or grates.
Since you aren't removing the existing fireplace or installing a new structure, you may not need a permit before starting your insert installation project. Still, permitting requirements vary by jurisdiction, so it's a good idea to check with your local authorities and confirm permit requirements before your project begins.
If you don't have one already, you'll need to install a chimney liner to protect the chimney and the rest of your home from burning debris whenever you use the fireplace. You can DIY but may feel more comfortable hiring a pro to do this.
Installing a wood-burning fireplace insert is a two- or three-person job. You'll need someone to go on the roof and work with the chimney, someone to act as a spotter, and someone to remain in the room with the fireplace to help position the insert.
Once the fireplace is clean and clear and you have any required permits, you can get started. Here’s what to do if you’re adding an insert to a wood-burning fireplace.
How to Install a Wood-Burning Fireplace Insert in 7 Steps
If you think your DIY skills are up to snuff, check out the step-by-step process for installing a wood-burning fireplace.
Measure the Space
Pay attention to two measurements when choosing and installing a fireplace insert. The first measurement is the insert's dimensions. It needs to fit inside of your existing fireplace.
Measure the fireplace opening's height, width, and depth using a tape measure. If you have one, use a laser measuring tool. The tool takes accurate measurements with the help of a laser beam and is much easier to manipulate than old-school, flexible metal measuring tape.
The second measurement concerns the heat output of the fireplace insert. An insert's heating capability is measured using British Thermal Units (BTUs). The more BTUs, the more heat the insert can produce. Bigger rooms require an insert with a higher BTU.
Measure the room's dimensions to determine how many BTUs you need. You'll need to find the room's area, in square feet. For a rectangular room, the math is pretty straightforward. Measure the room's width and length, then multiply the two.
You'll need to flash back to high school geometry to find the area of irregularly shaped rooms, such as a circular or triangular space. The formula to find an area of a circle is 3.14 times the square of the room's radius (half the diameter). To find the area of a triangle, multiply the length by the width, then divide by two.
Once you have the room's area, multiply by 20 to get the BTU measurement.
Protect the Area
Spread a plastic drop cloth over the area in front of the fireplace to prevent scratches or other damage during the installation. Also, don your safety goggles and gloves to protect yourself.
Cap Off Gas Line
If you’re converting your fireplace from gas to wood-burning, you’ll need to cap off the gas line. Find the gas pipe that supplies gas to your home from the utility company. Look for the valve connected to the pipe. When open, the valve's handle is parallel with the pipe.
Turn the valve's handle 90 degrees, so that it is perpendicular to the pipe, to shut off the gas. After you've turned off the gas, unscrew the gas lines in your fireplace with pipe wrenches.
To cap the gas line into the fireplace, coat the threads with the pipe dope, then screw a fitting size cap on top.
Once you've done that, you can turn the gas back on.
Remove the Damper
You need to remove the damper to pass the flue liner between the chimney and insert. You may be able to remove the damper by lifting it out through the guides by the flapper. If that doesn't work, you'll have to cut the damper free.
Use the grinder to cut through the flapper and lift the damper free. Keep your safety goggles and gloves on while using the grinder.
Install the Flue Liner
Scared of heights? It may be time to call in a chimney repair professional. Otherwise, recruit a friend to spot you and follow all ladder safety precautions so you can climb up to the top of the chimney to install the flue liner.
Once you're on the roof, remove the chimney cap and thread the liner into the chimney.
Have a person on the ground slide the insert into your fireplace opening. Connect the flue line to the adapter on top of the insert. Use screws and a screwdriver to secure it in place.
From the roof, trim away the excess liner from the top of the chimney with tin snips and discard it. Use high-temperature silicone on top of the flue tile, then attach the chimney cap, pressing down for a secure seal.
Add the Finishing Touch
Attach the surround panels to the sides of the insert with screws. Clean up your drop cloth and any debris or dust, then step back and admire your handiwork.
What Does Fireplace Insert Installation Cost?
The cost to install a fireplace insert ranges from $700 to $6,500. Several factors affect the total cost, including the insert type, size, and whether you go with a pro installer or DIY.
Wood-burning fireplace inserts typically cost $1,000 to $1,500. The larger the insert and the more BTUs it produces, the higher the price.
Should you decide to hire a professional to install a wood-burning fireplace insert, you can expect to add about $2,000 to the total project price. Wood-burning inserts are often trickier to install than other types, since they must be connected to the chimney.
DIY Installing a Fireplace Insert vs. Hiring a Pro
Installing a wood-burning fireplace insert requires you to climb on the roof and may require you to handle your home's gas line. If you're not comfortable with doing either, we strongly suggest you contact a fireplace installation pro near you to do this project. They have the equipment, experience, and safety skills to complete this job successfully and safely.
Amy is a content writer specializing in home improvement and personal finance topics. She loves helping people tackle DIY projects that beautify their spaces. Her work can also be found on Money Crashers and Coldwell Banker where she combines home improvement and money saving tips.
Amy is a content writer specializing in home improvement and personal finance topics. She loves helping people tackle DIY projects that beautify their spaces. Her work can also be found on Money Crashers and Coldwell Banker where she combines home improvement and money saving tips.
The homeowners guide to Fireplaces
From average costs to expert advice, get all the answers you need to get your job done.